
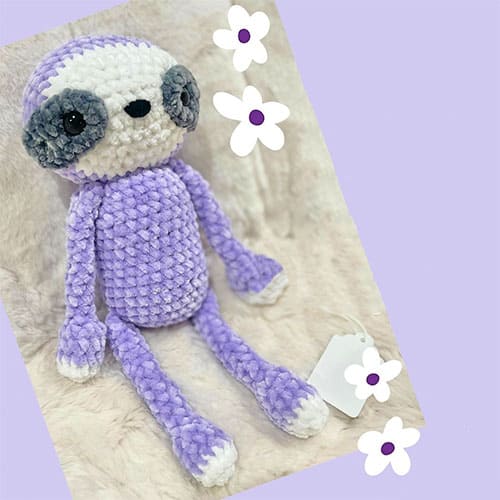
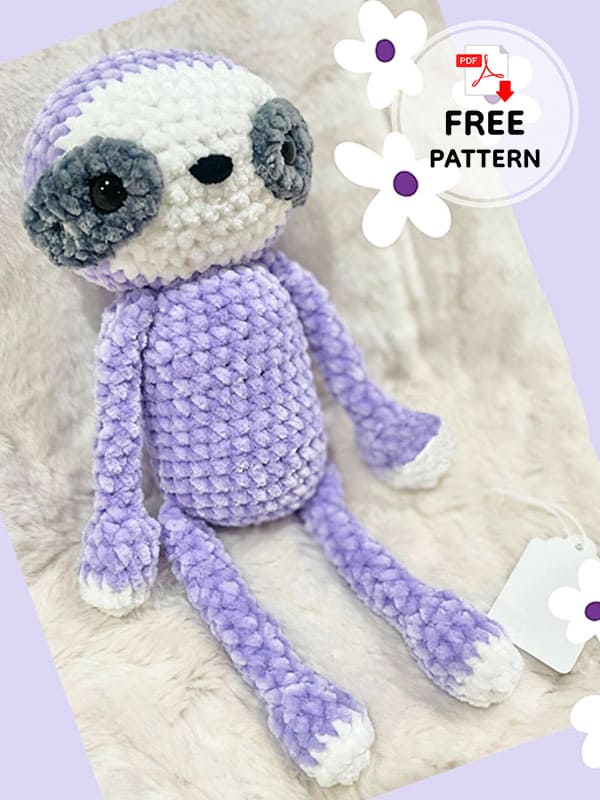
Good morning my virtual friends. How are you today? I brought you a very cute amigurumi pattern again today. Also completely free of course. Sloth crochet pattern. Your kids will fall in love with this cute crochet sloth amigurumi toy thanks to its purple color and plush soft texture. At the same time, they can recognize animals more easily by playing games with such animal amigurumi toys. It’s both educational and entertaining. If you are wondering how to do it, don’t worry. Since the amigurumi pattern is at the beginner level, it is very easy to make. Thanks to the detailed step by step amigurumi pattern instructions, you can complete the cute crochet sloth without difficulty. Now, without further ado, I would like to invite you to the pattern instruction. Wishing you a pleasant Sunday.
Sloth Crochet Pattern
Designer: crochet._.girl
Abbreviations
R.- Row
MR- Magic ring
Sc- Single crochet
Inc- Increase
Dec- Decrease
Slst- Slip stitch
Ch- Chain
Materials
• Main color yarn (purple)
• Face and hand / feet yarn (white)
• Eye patch yarn (grey)
• Nose yarn (black)
• Stud eye (18mm)
• Poly-fill
Head
R1- R5.
Oval- chain.
X- single crochet
X+V- increase
Dot- slip stitch
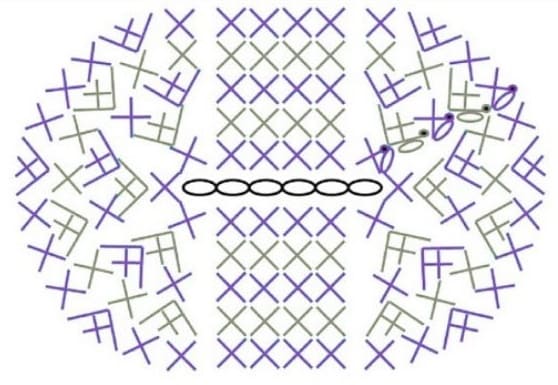
Start from chain 6, ch 1 then purple ring right outside the ch 6 is your R1. slst, then R2. will be the gray row.
R6-R10. 38 sc
R11. same as R5 of the diagram (pg3)
but change inc to dec (32)
R12. 32 sc
R13. same as R4 of the diagram but change inc to dec (26)
R14. 26 sc
R15. same as R3 of the diagram but change inc to dec (20)
R16. same as R2 of the diagram but change inc to dec (14)
Leave a long yarn and cut it.
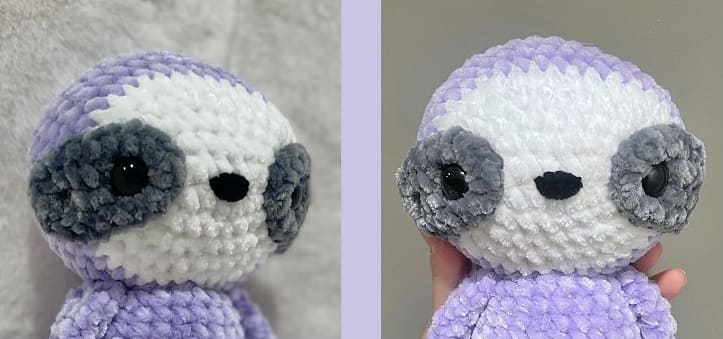
Eye patch
R1. and R2. of the diagram (pg 3)
Stitch it to the head like the picture below.
Pull a yarn twice through middle of the face.
Add stud eyes at the top corner of the eye patches.
Stuff the head, then stitch it up with the yarn that’s left.
Body
R1-R3. of the oval pattern (pg 3)
R4-R14. 26 sc
R15. 1 dec, 9 sc, 2 dec, 9 sc, 1 dec (22)
R16. 22 sc
R17. 1 dec, 7 sc, 2 dec, 7 sc, 1 dec (18)
Leave a long yarn and cut it.
Arms and legs
R1. 6 sc in MR
R2. 6 inc (12)
Switch color
R3-R4. 12 sc
R5. 6 dec (6)
R6-R17. 6 sc
R18. 3 sc
Assembly
1. The head should be nicely stuffed and have eyepatches and stud eyes attached.
2. Stuff just the end of the arms and legs.
3. Stuff the body.
4. Placing the arms on the side of the final row of the body (R17), stitch the body, arms, and head together.
5. Stitch the legs on around R5 of the body.

Leave a Comment