
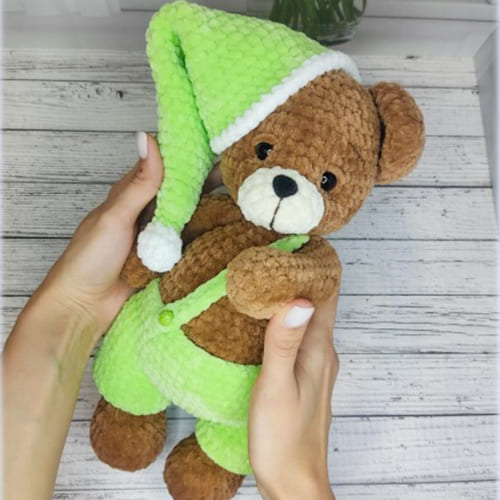
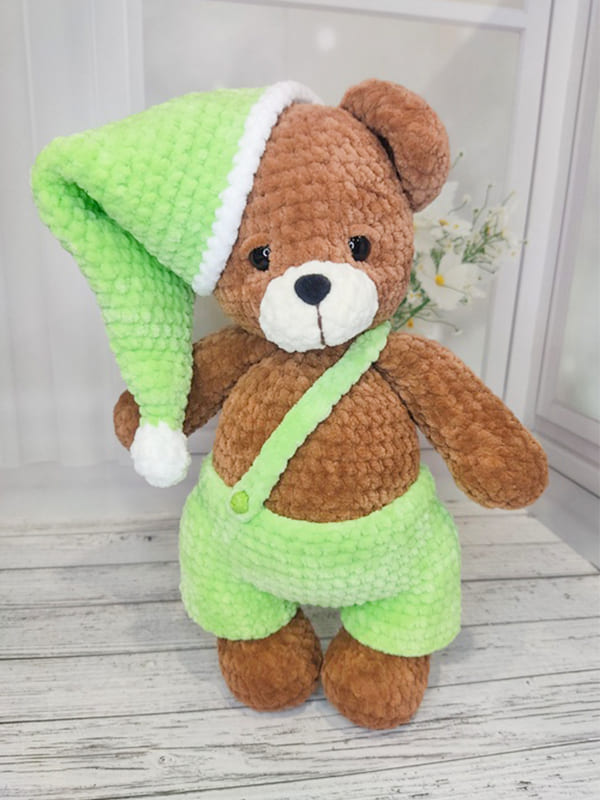
You’re in the right place to crochet a sleepy crochet bear named Barney. The height of the crochet amigurumi toy is about 29 cm. The designer used Himalayan Dolphin Baby yarn and a 4mm hook to make such a large crochet bear. The body and head of the toy are knitted as one piece, the remaining parts are fixed separately later. Thanks to the splint connection, the legs of the teddy bear can move. You will also learn how to make crochet hats and pants to decorate your cute teddy bear from the detailed step by step amigurumi pattern instructions.
Sleeping Bear Barney Amigurumi Free Crochet PDF Pattern
Designer: Vika_toys_sochi
You’ll need:
• yarn Himalaya Dolphin Baby 337-1 skein
• some white for the cap and muzzle
• Yarn Himalaya Dolphin Baby 350 – a little more than 0.5 skein
• filler (holofiber, sintepukh or any other)
• black eyes on a 14mm safety mount
• velvet spout 15*11
• thread for tightening the muzzle in the color of the main yarn (yarnart jeans)
• hook 4 mm
• scissors
• joints for legs 25mm
• Needle with large eye
• button for panties
Abbreviations
MR: Magic ring
Sc: Single crochet
Slst: Slip stitch
Inc: Increase
Dec: Decrease
Legs (X2)
1. In MR 6 sc= 6 sc
2. 6 inc= 12 sc
3. 1sc+inc (*6 times)=18 sc
4. 1sc, inc, 2sc+inc (*5times), 1sc=24 sc
5. 24 sc
6. 5sc+inc (*4 times)=28 sc
7. 8sc,dec (*6 times), 8sc=22 sc
8. 7sc,dec (*4 times), 7 sc=18 sc
9. 7sc,dec (*2 times), 7sc=16sc
10-17. 8 rows without changes in 16 sc
We insert the joint

Be careful here, put the joints on different sides, so that they look at each other as a result of knitting, you will get left and right legs.
18. 4sc,dec,4sc,dec,2,dec=12 sc
19. 6 dec= 6 sc
Tightly stuff the place where the joint is and close the leg with a needle with a large eye, hide the thread.
Ears (X2)
1. In MR 6 sc=6 sc
2. 6 inc=12 sc
3. 1sc+inc*6times=18 sc
4. 2sc+inc*6times=24 sc
5-6. 24 sc= 24
7. 1sc+dec*8times=16 sc
Fold the ears in half and close behind both walls 8sc, leave the thread for further sewing the ears to the head.
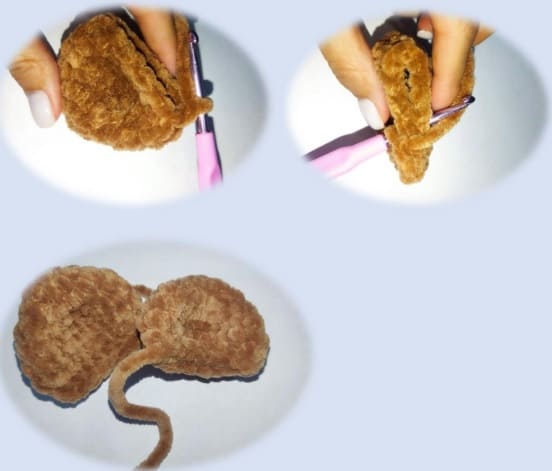
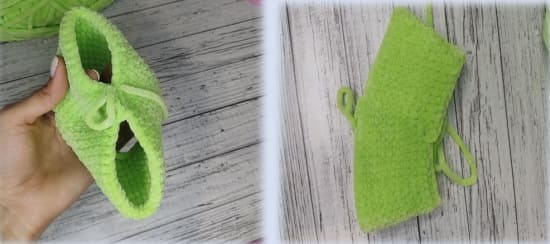
Paws (X2)
1. In MR 6 sc=6 sc
2.3 sc in 1 loop, 3 sc in 1 loop, 1 sc, 3 sc in 1 loop, 3 sc in 1 loop, 1 sc = 14 sc
3. 2sc,inc,6sc,inc,4sc=16 sc
4-5. Two rows without changes in 16 sc
6. 3sc,inc,6sc,dec*2times,2sc=15 sc
7. 4sc,inc,6sc,dec,2sc=15 sc
8. 11sc,dec,2sc=14 sc
9. 14 sc
10. 11sc,dec,1sc=13 sc
11-13. 3 rows without changes in 13 sc
14. 11sc,dec=12 sc
15-17. 15-17. 3 rows unchanged in 12 sc
Fill the paws tightly, but not completely, up to about 14-15 rows.
Close the paws for both walls = 6sc, leave the thread not long, as the paws are tied into the body.

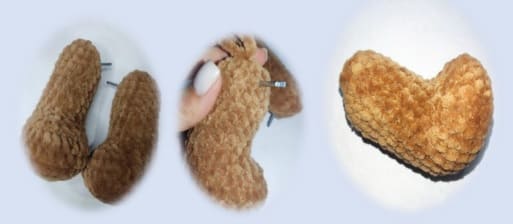
Body and head
1. In MR 6 sc=6 sc
2. 6 inc=12 sc
3. 1sc+inc*6times=18 sc
4. 1sc,inc,2sc+inc*5times,1sc=24 sc
5. 2sc,inc,3sc+inc*5times,1sc=30 sc
6. 3sc,inc,4sc+inc*5times,1sc=36 sc
7. 4sc,inc,5sc+inc*5times,1sc=42 sc
8. 5sc,inc,6sc+inc*5times,1sc=48 sc
9-15. 7 rows without changes in 48 sc
16. 6sc+dec* 6times=42 sc
17-18. 2 rows without changes, 42 sc
19. 5sc+dec*6times=36 sc
20. 36 sc
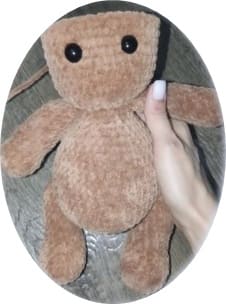
At this stage, we will attach the lower legs, fill the body with filler and try on how you like the location of the legs. I have it between 10-11 rows at a distance of 23 sc from one joint to the other. The paws should be facing you. For convenience, remove the filler and secure the joints.

21. 4sc+dec*6times=30 sc
22. 3sc+dec*6times=24 sc
23. 24 sc
24. 2sc+dec*6times=18 sc
25. We knit the upper paws. We knit 6 sc together with the foot, 5 sc, again 6 sc with the foot, 1 sc = 18 sc
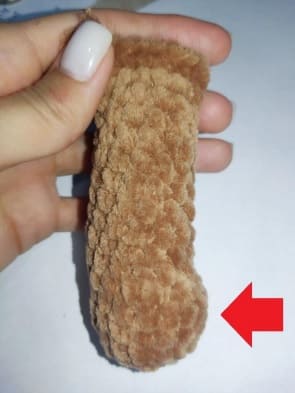
Be careful when knitting the upper legs, they should be located with the convex side towards your face, the side that the arrow shows should look at you. Also look at your knitting, displacement is possible, attach the paws to the body and see if they should be parallel to the lower legs. We stuff the body tightly, do not cut the thread, we will continue to knit the head.
We begin to crochet the head.
26. We make 18 increases = 36 sc
27. 5sc+inc*times=42 sc
28. 6sc+inc*6times=48 sc
29-35. 7 rows without changes in 48 sc.
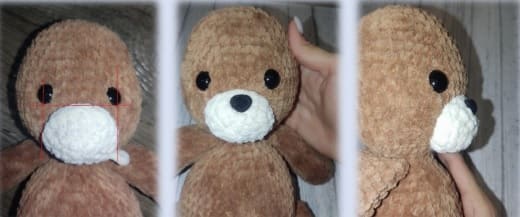
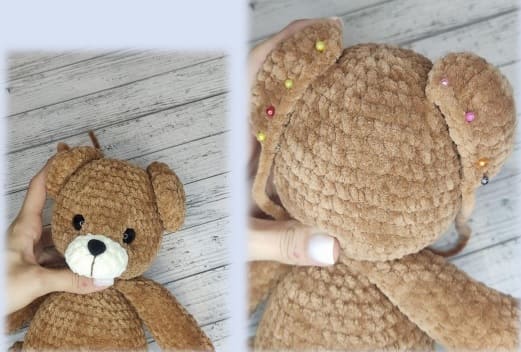
We insert the eyes between 33 and 34 rows, at a distance of 5 sc. Stuff the head and visually check that the eyes are at an equal distance.
36. 6sc+dec*6times=42 sc
37. 5sc+dec*6times=36 sc
38. 36sc
39. 4sc+dec*6 times=30 sc
40. 3sc+dec*6times=24 sc
41. 2sc+dec*6times=18 sc
42. 1sc+dec*6times=12 sc
43. 6dec=6sc
Close with a needle, hide the thread.
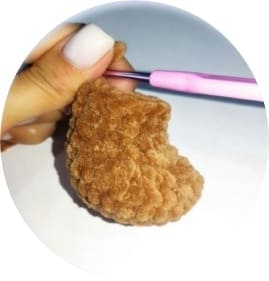
Muzzle
1. In MR 6sc=6 sc
2. 6 inc=12 sc
3. 1sc+inc*6times=18 sc
4. 18sc
We make a connecting column, cut the thread. I sew the muzzle with a regular white thread, so you can’t see that it was sewn on.
We proceed to the design of the muzzle. Attach the muzzle and mark for yourself where you will have a nose, it should be located between the eyes, between 3 and 4 rows. Fasten the nose. We sew the muzzle with an ordinary white thread in two additions. Placing it below the eyes, the place where you finished knitting down. See photo below.
Next, we will tighten the muzzle.
We take the thread to match the color of the thread with which the bear was knitted, I have a yarnart jeans, in one addition and a needle with a large eye. We mark the points on the muzzle with colored needles as shown in the photo. We find the middle of the muzzle from below (POINT A), insert the needle and leave the tip of the thread, withdraw the needle from point 1, insert the needle from point 1 to point 2 and return back to point A, at a distance of 1sc (POINT B). pull the thread, making a tightening. From point B we bring the needle to point 3, insert it to point 4 and bring the thread to point A, make a tightening and tie the threads together. Next, we make a tightening where the spout is, we circle the thread around the spout and fasten the muzzle at the bottom, hide the ends with a hook or needle.

We try on our ears and sew them on with the end that was left for sewing. The ears are located from the 3rd to the 11th row (count from the top of the head).
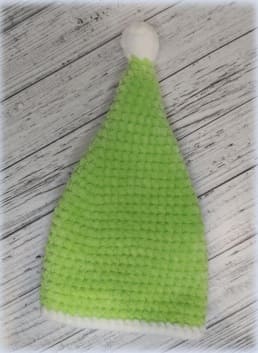
Hat
white color.
1. In MR 6sc= 6 sc
2. 6 inc= 12 sc
3. 12 sc
4. 6 dec= 6 sc
5. Change to the main color, crochet 6 sc
6. 2sc+inc*2 times=8 sc
7. 3sc+inc*2 times=10 sc
8. 4sc+inc*2 times=12 sc
9. 12sc
10. 5sc+inc*2 times=14 sc
11. 6sc+inc*2 times=16 sc
12. 7sc+inc*2times=18 sc
13. 8sc+inc*2times=20 sc
14. 9sc+inc*2times=22 sc
15. 10sc+inc*2times=24 sc
16. 11sc+inc*2times=26 sc
17. 12sc+inc*2times=28 sc
18. 13sc+inc*2times=30 sc
19. 14sc+inc*2times=32 sc
20. 15sc+inc*2times=34 sc
21. 16sc+inc*2times=36 sc
22. 36sc
23. 17sc+inc*2 times=38 sc
24. 18 sc+inc*2 times=40 sc
25-28. 4 rows unchanged, 40 sc each
29. 19sc+inc*2times=42 sc
30-34. 5 rows without changes in 42 sc
35. Change to white and knit 42sc, at the end we make a connecting post and fasten the thread.
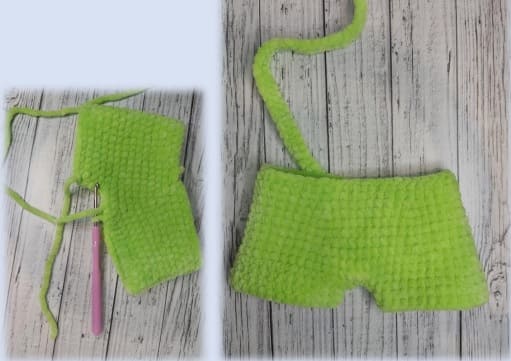
Pants
1. We make 45 ch and connect them into a ring with a connecting column. We make a lifting loop and knit 45 sc, in each row we make a lifting loop.
2. 8sc+inc*5 times=50 sc
3. 9sc+inc*5times=55 sc
4-6. 3 rows without changes, 55 sc
7. 10sc+inc*5times=60 sc
8-9. 2 rows without changes, 60 sc
We turn inside out, count 26 sc and knit 4 connecting posts for both walls. It turns out 2 legs of 16 sc, we do not cut the thread. We turn the knitting back to the front side.
We begin to knit the trouser leg, knit 4 rows of 26 sc, fasten and cut the thread, return to the second trouser leg, join and also knit 4 rows of 26 sc. For straps, join the back of the pants, I put pants on the bear and roughly marked where I want to make a strap, and we make 32 ch, we make 3 loops for a button, and starting from 4 loops we knit 32 sc. We fasten the thread and cut it off. Sew a button on the front. Pants are ready!
Leave a Comment