
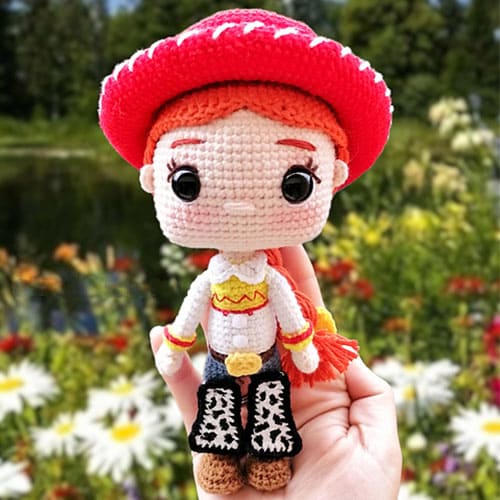
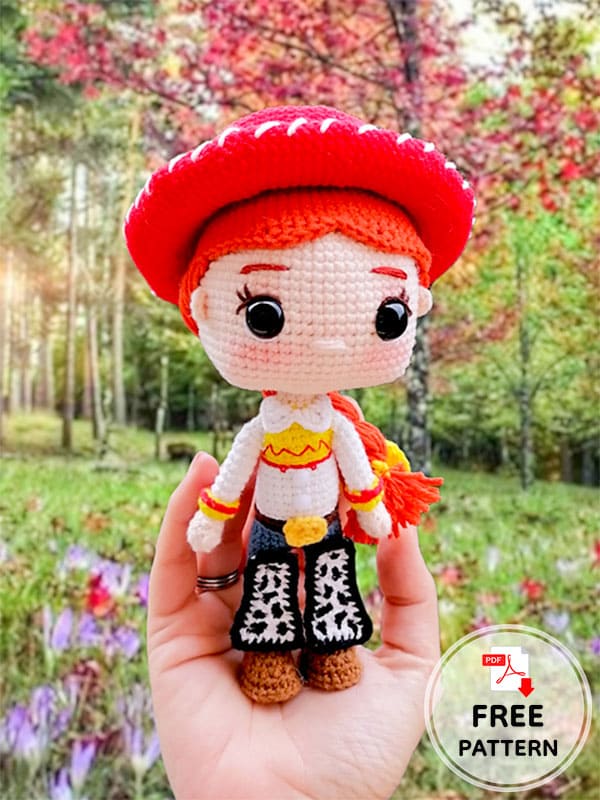
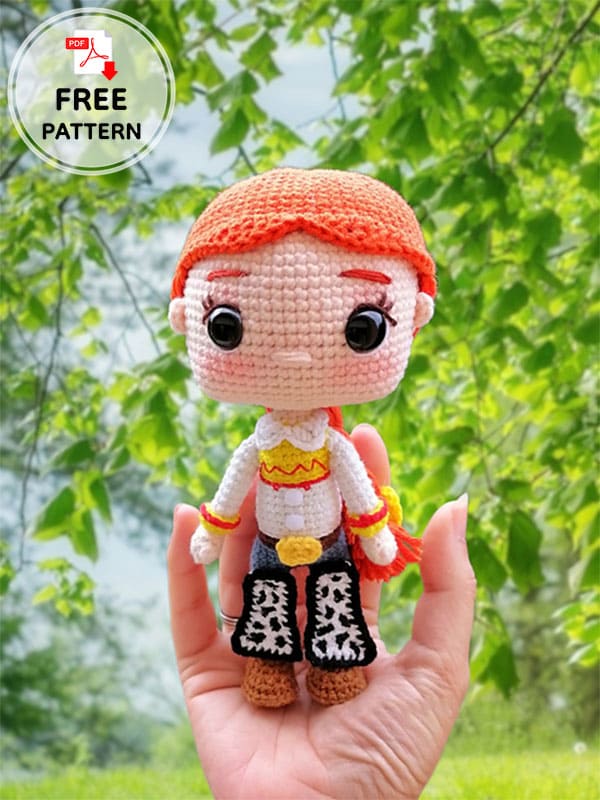
I am with you today with Jessie, one of the main heroes of Disney Pixar Toy Story. Jessie, whom you know from Toy Story 2, is a very cute character. She is loved by children as much as Woody. If I had to tell her story briefly, she is a very brave and very excited doll who is very sad when her owner abandons her. She became a bit introverted because she was locked up in the warehouse for long periods of time. He is later rescued by the hero Woody and waits to keep his new friend company. Jessie has become one of the indispensable characters of the toy story. Complete this crochet doll now and add a new beauty to your collection.
Jessie Toy Story Crochet Doll PDF Free Pattern
Designer: hidarikiki_crochet
Materials and tools
Threads: I used Cotton Milk, 60% cotton, 40% acrylic, 4 strands, in the following colors:
Skin, bright yellow, blue jeans, red, medium brown, dark brown, dark orange, white, gold yellow, black.
White (B5200), red (999), chocolat (938) and medium
copper (920) embroidery thread
2,00 mm crochet hook
12 mm safetys eyes
Stitch marker
Textile glue (optional)
2mm wire
Scissors, yarn needle and pins
Fiberfill for stuffing
Pink blush
Silicone bar (optional)
Black acrylic paint
White felt
Abbreviations
ch: chain
Rnd: Round
st/sts: Stitch/stitches
mr: Magic ring
sc: single crochet
slst: slip stitch
hdc: half double crochet
dc: double crochet
inc: increase
dec: decrease
tc: treble crochet
Puff stitch: 3 hdc closed together
BLO: Crochet through back loops only
FLO: Crochet through front loops only
3dec: Decrease taking 3 stitches
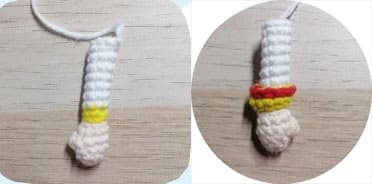
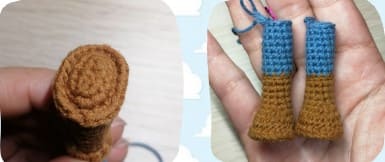
Arms
Make two. Start with skin color. Fill only the hand.
Rnd1.- 6 sc in mr (6)
Rnd2.- (1 sc, 1 inc)*3 (9)
Rnd3.- 9 sc (9)
Rnd4.- 1 puff stitch, 8 sc (9)
Rnd5.- 1 dec, 4 sc. Change to bright yellow and start counting the new round from this stitch.
Rnd6.- BLO 8 slst (8)
Rnd7.- BLO 8 sc (8) Change to white.
Rnd8-Rnd14.- 8 sc (8) (7 rounds)
1 slst in the next stitch.
Fasten off.
Now we will make the cuffs of the shirt in the free front loops of Rnd6.
Placing the hand facing you, insert bright yellow thread, 1 ch and 1 hdc in each stitch (8)
Close round with 1 slst in the first stitch changing to red. Make 1 slst in each stitch and fasten off.
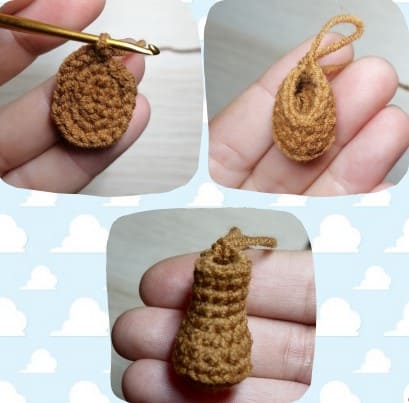
1st leg:
Rnd1.- Ch 5, starting from 2nd ch from the hook, 3 sc, 3 sc together in last chain, working on the other side: 2 sc, 1 inc (10)
Rnd2.- 1 inc, 2 sc, 3 inc, 2 sc, 2 inc (16)
Rnd3.- 1 sc, 1 inc, 2 sc, (1 sc, 1 inc)*3, 2 sc, (1 sc, 1 inc)*2 (22)
Rnd4.- BLO 22 sc (22)
Rnd5.- 1 dec, 3 sc, 5 dec, 5 sc, 1 dec (15)
Rnd6.- 4 sc, 3 dec, 5 sc (12)
Rnd7.- 4 sc, 1 dec, 6 sc (11)
Rnd8-Rnd11.- 11 sc (11) (4 rounds) Change to blue jeans color, leaving the light brown yarn outside from the piece to make the edge of the boots later.
Rnd12.- BLO 11 sc (11)
Rnd13-Rnd18.- 11 pb (11) (6 rounds)
Crochet as many extras sts as you need to place the maker at the nearer lateral point. According to the tension of each person and the way crocheting, you’ll need more or less sts. I made 4 extras sts to reach the indicated point. Make a slst in the next st and fasten off.
2nd leg:
Follow the same pattern as for 1st leg to Rnd18. DON’T CUT THE YARN. Reserve the pieces.
Now, we´ll make sole’s edge. I recommend that you make this part before continuing with the body to make work more comfortable.
Sole’s edge
With the leg up side down, join the medium brown yarn in the last FLO loop on Rnd3. Ch 1 and make 1 sc in each of the free FLO loops. You´ll have 22 sc,
Finish the round making 1 slst in the first st you made. Cut the yarn, fasten off and hide the tail.
Body
Now, let´s go to the blue jeans yarn we reserved. We will join the legs,
Rnd19.- 9 sc in the 2nd leg, ch 3, 11 sc around the 1st leg, 3 sc in the chains, 2 sc in 2nd leg (28)
Rnd20-Rnd22.- 28 sc (28) (3 rounds)
Rnd23.- 25 sc. This rnd is to place the marker on the centre of Woody’s back. Change to dark brown.
Rnd24.- BLO 28 slst (28)
Rnd25.- BLO 28 sc (28) Change to white.
Rnd26.- BLO 28 slst (28)
Rnd27.- BLO 28 sc (28)
Rnd28.- (7sc, 1 dec)*3, 1 sc (25)
Rnd29-Rnd30.- 25 sc (25) (2 rounds)
Rnd31.- (6 sc, 1 dec)*3, 1 sc (22)
Rnd32.- 22 sc (22) Change to red.
Rnd33.- 22 slst (22) Change to bright yellow.
Rnd34.- 22 slst (22)
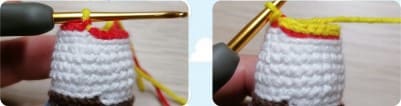
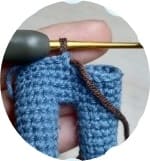
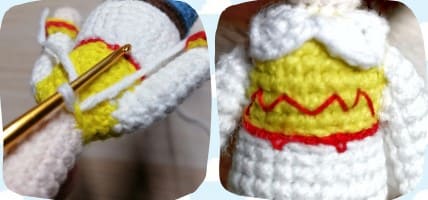
IMPORTANT NOTE: The next three rounds will be done alternating between white and bright yellow. To crochet more comfortably, I advise using two balls of white or cutting 1 meter of white thread and reserving it to work on the color change. (See image)
The stitches will be indicated in the color in which they should be crocheted. Change color before closing the previous stitch.
sts in Grey: Crochet with white.
sts in Yellow : Crochet with yellow.
Now, we wiil join the arms. Check the thumbs look towards the front side. You should be at the center of the back when starting this round. If not, make as many extra sts as you need to.
Rnd35.-BLO 6 sc in the body, 8 sc around on arm, BLO 11 sc in the body, 8 sc around on 2nd arm, BLO 5 sc in the body (38)
Rnd36.- 5 sc, 1 dec, 2 sc, 1 dec, 2 sc, 1 dec, 9 sc, 1 dec, 2 sc, 1 dec, 2 sc, 1 dec, 4 sc (32)
Rnd37.- 6 sc, 1 dec, 3 sc, 3 sc, 1 dec, 6 sc, 1 dec, 3 sc, 3 sc, 1 dec (28), Insert the wire as shown in the image.
From now on it will be crochet with a single color. Continue with bright yellow thread.
Rnd38.- (5 sc, dec)*4 (24)
Rnd39.- (1 sc, dec)*8 (16)
Rnd40.- (2 sc, 1 dec)*4 (12)
Change to skin.
Rnd41.- BLO 12 sc (12)
Rnd42-Rnd50.- 12 sc (12) (9 rounds)
You can insert in the body a silicone bar to make it more stability.
Rnd51.- 6 dec (6)
Cut the yarn leaving a long tail.
Close the hole with a yarn needle.
Shirt collar:
We´ll work in the free FLO of Rnd41. With body towards down, insert the white yarn in the last loop of this round and ch 1:
4 hdc, 1 dc, 1 tc, ch 4, 1 slst in the same previous stitch, ch 4, 1 tc, 1 dc, 4 hdc.
1 slst in first st for closed round and fasten off.
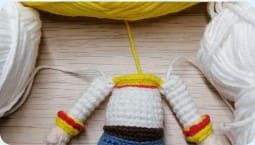
With red embroidery thread we will make the details of the shirt as in the image.
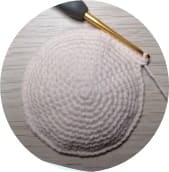
Head
With skin color.
Rnd1.- 6sc in mr (6)
Rnd2.- 6 inc (12)
Rnd3.- (1 sc, 1 inc)*6 (18)
Rnd4.- (2 sc, 1 inc)*6 (24)
Rnd5.- (3 sc, 1 inc)*6 (30)
Rnd6.- 2 sc, 1 inc, (4 sc, 1 inc)*5. 2 sc (36)
Rnd7.- (5 sc, 1 inc)*6 (42)
Rnd8.- 3 sc, 1 inc, (6 sc, 1 inc)*5, 3 sc (48)
Rnd9.- (7 sc, 1 inc)*6 (54)
Rnd10.- 4 sc, 1 inc, (8 sc, 1 inc)*5, 4 sc (60)
Rnd11.- (9 sc, 1 inc)*6 (66)
Rnd12.- (32 sc, 1 inc)*2 (68)
Rnd13-Rnd27.- 68 sc (68) (15 rounds)
Rnd28.- 8 sc, 1 3dec, 12 sc, 1 3dec, 16 sc, 1 3dec, 12 sc, 1 3dec, 8 sc (60)
Rnd29.- 7 sc, 1 3dec, 10 sc, 1 3dec, 14 sc, 1 3dec, 10 sc, 1 3dec, 7 sc (52)
Place now the eyes between Rnd20 and Rnd21, leaving 12 sts among them.
Rnd30.- 6 sc, 1 3dec, 8 sc, 1 3dec, 12 sc, 1 3dec, 8 sc, 1 3dec, 6 sc (44)
Rnd31.- 5 sc, 1 3dec, 6 sc, 1 3dec, 10 sc, 1 3dec, 6 sc, 1 3dec, 5 sc (36)
Rnd32.- (4 sc, 1 dec)*6 (30) Start stuffing, in a uniform way, insisting on the 4 corners, to give it’s shape to the head.
Rnd33.- 15 dec (15)
Rnd34.- BLO 15 sc (15)
Rnd35-Rnd41.- 15 sc (15) (7 rounds) Make 1 slst in the next st and fasten off
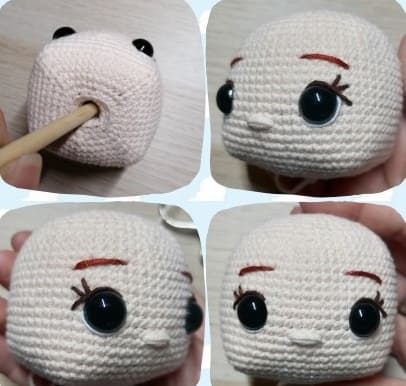
Making use of a wooden stick or the back part of the hook, insert neck into the head.
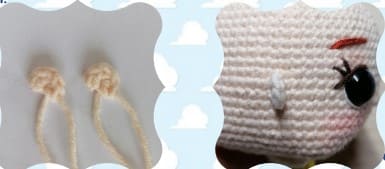
Embroider the nose between rnd22 and rnd23, taking 3 sts. Pass the yarn 2 or 3 times.
Embroider eyes, eyelashes and eyebrows with brown, white and copper thread, as you can observe in the pictures.
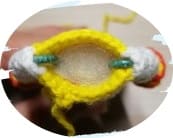
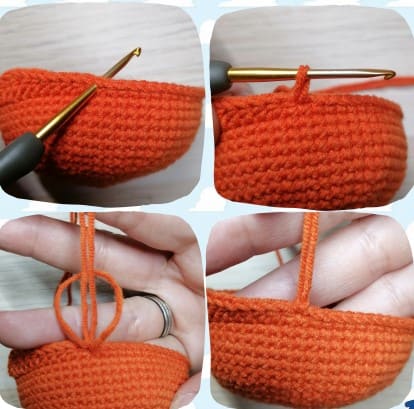
Head assembly
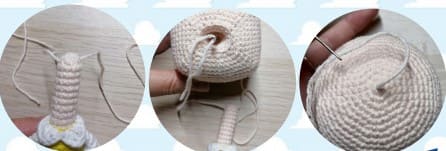
Next, we’ll join the head to the body. For that, use a yarn needle with a thread (20 cm approximately). Pass it through the penultimate round of the long neck of the body, leaving 10 cms of yarn on each side. (image 1)
Now, take one of these strands in the needle again and pass it through the hole of the head, pulling it out the top of it. Make the same with the other strand. (images 2 and 3)
Attach the head to the body, inserting the long neck into the head’s hole, leaving visible around 2 or 3 rounds. Once we’ve positioned it, make a firm tie with the 2 strands we’ve just passed. Hide now the threads.
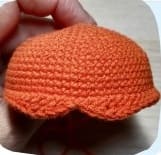
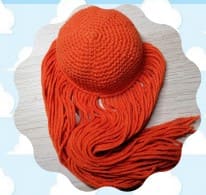
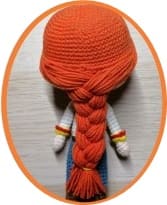
Wig
Start with dark orange color.
Rnd1.- 6 sc in mr (6)
Rnd2.- 6 inc (12)
Rnd3.- (1 sc, 1 inc)*6 (18)
Rnd4.- (2 sc, 1 inc)*6 (24)
Rnd5.- (3 sc, 1 inc)*6 (30)
Rnd6.- 2 sc, 1 inc, (4 sc, 1 inc)*5. 2 sc (36)
Rnd7.- (5 sc, 1 inc)*6 (42)
Rnd8.- 3 sc, 1 inc, (6 sc, 1 inc)*5, 3 sc (48)
Rnd9.- (7 sc, 1 inc)*6 (54)
Rnd10.- 4 sc, 1 inc, (8 sc, 1 inc)*5, 4 sc (60)
Rnd11.- (9 sc, 1 inc)*6 (66)
Rnd12-Rnd17.- 66 sc (66) (6 rounds)
Rnd18.- 20 sc, 5 hdc, 2 dc, 2 tc, 2 dc, 1 hdc, 1 slst, 1 hdc, 2 dc, 2 tc,
2 dc, 5 hdc, 21 sc.
Fasten off.
Hair
Now we will place the threads that will later form the braid.
To do this we will cut 41 strands of dark orange color of 40 cm.
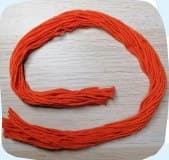
We will place a thread in each of the sc that we made in Rnd18.
To do this, we will fold the 40 cm strand in half and with the help of the crochet we will pass it through the stitch.
Through the gap formed when passing the thread we will insert the two ends of the strand and pull so that it remains firmly attached.
We will do this on each of the 41 sc of Rnd18.
Look at the images on the next page. In them you can see the process of placing the strands.
Ears
Make two. Start with skin color.
Rnd1.- 5sc in mr
Sew the ears 6 sc away from the eye, between Rnd19 and Rnd21.
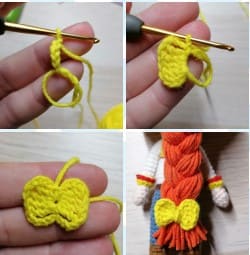
Ribbon
Crochet with bright yellow yarn. Work in magic ring:
(4 ch, 4 tc, 4 ch, 1 slst)*2
We finish off leaving a long thread and close the magic ring.
With the long thread that we left when finishing off we roll in the center and tie from behind with the excess thread from closing the magic ring.
Do not cut threads, they will be used to tie the bow in the braid.
Wig assembly
We place the wig on the head.
We can sew it or glue it with textile glue or liquid silicone.
With the strands that we insert we will make a braid, dividing them into three groups and braiding them until we have the preferred length.
Close witha piece of yellow thread and cut excess threads if necessary.
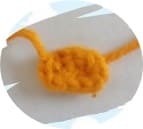
Belt buckle
In golden yellow.
ch 4, start to crochet in 2nd ch from hook, 1 inc, 1 sc, 4 sc in last ch, we’ll continue working on the other side of the chains, 1 sc, 1 inc. 1 slst in first st and fasten off. Sew or glue on the center of the belt.
Shirt buttons
Cut out two small circles from white felt and glue to the shirt.
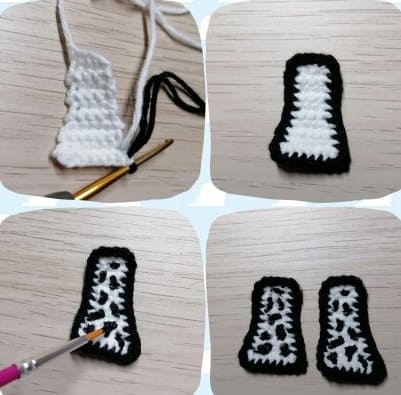
Chaps
Make two equal pieces. We start with white thread. Work in rows, turning at the end of each row and making 1 ch before starting the new row.
NOTE: Measure on the doll’s legs in case it is necessary to add or remove any rows. The measurement of the chaps will be right from the row where we join the legs to the base of the boots.
Row1.- 5 ch, start in the 2nd ch from the hook, 4 sc (4) turn and 1 ch
Row2-Row6.- 4 sc (4) turn and 1 ch (5 rows)
Row7.- 1 inc, 2 sc, 1 inc (6) turn and 1 ch
Row8-Row9.- 6 sc (6) turn and 1 ch (2 rows)
Row10.- 1 inc, 4 sc, 1 inc (8) Change to black thread. Turn.
Now we will continue crocheting, but around the entire piece:
7 sc, 1 inc in the corner, 10 sc in one side, 1 inc in the corner, 2 sc in the top, 1 inc in the corner, 10 sc in the other side, 1 inc in the corner, 1 slst in next st. Fasten off and hide threads.
You paint spots with black acrylic paint.
Sew or glue on pants.
Hat
Crochet with red thread.
Rnd1.- 8 sc in mr (8)
Rnd2.- 8 inc (16)
Rnd3.- (1 sc, 1 inc)*8 (24)
Rnd4.- ( 3 sc, 1 inc)*6 (30)
Rnd5.- 2 sc, 1 inc, (4 sc, 1 inc)*5. 2 sc (36)
Rnd6.- (5 sc, 1 inc)*6 (42)
Rnd7.- 3 sc, 1 inc, (6 sc, 1 inc)*5, 3 sc (48)
Rnd8.- (7 sc, 1 inc)*6 (54)
Rnd9.- 4 sc, 1 inc, (8 sc, 1 inc)*5, 4 sc (60)
Rnd10.- (9 sc, 1 inc)*6 (66)
Rnd11.- BLO 66 sc (66)
Rnd12-Rnd17.- 66 sc (66) (6 rounds)
Change to white.
Rnd18-Rnd19.- 66 sc ( 66) (2 rounds)
Change to red.
Rnd20.- 66 sc (66)
From now on we will close the rounds with 1 slst and 1 ch at the beginning of the new round:
Rnd21.- BLO 5 sc, 1 inc (10 sc, 1 inc)*5, 5 sc (72) 1 slst and 1 ch
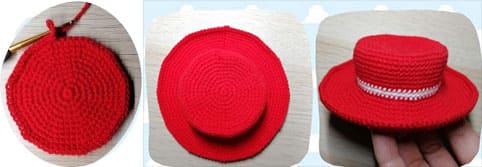
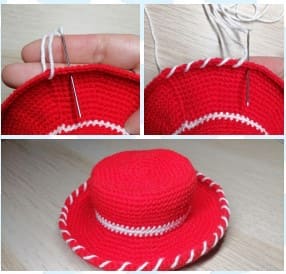
Hat’s edge
Using the yarn needle and a white thread of approximately 30 cm, we will begin to make the adornment of the hat’s edge. We passed the needle and thread through the stitch where we join the last round of the hat and counting three distance stitches we will insert the needle again to create lines that wrap the edge.
Do this procedure throughout the edge (see photos)
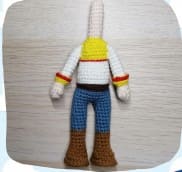
Toy story Jessie is complete! For more crochet dolls, you can check out other topics.

Leave a Comment