
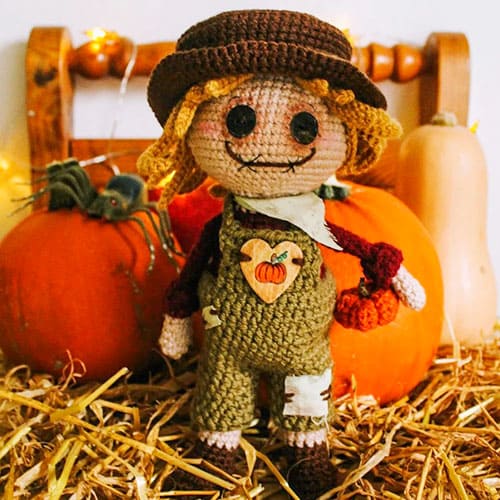
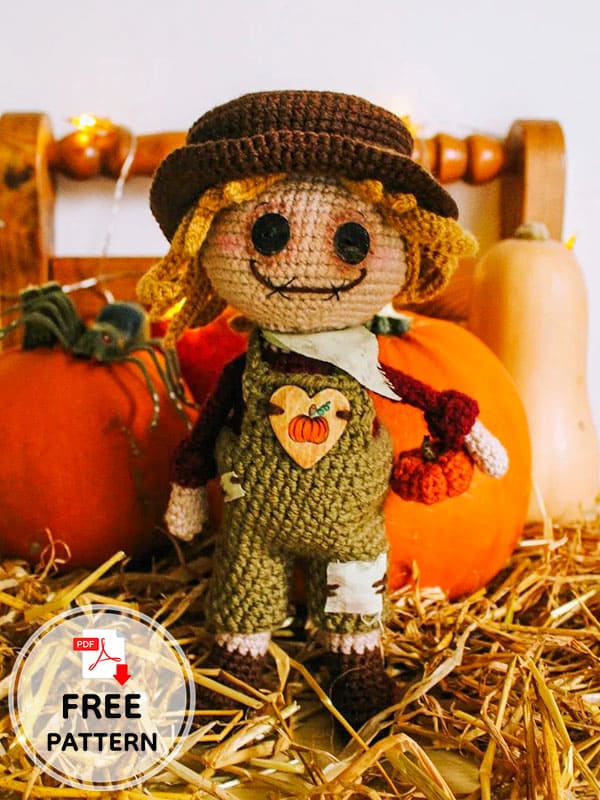
Greetings, I continue with the Halloween concept. Are you ready to make a scary but sweet scarecrow amigurumi doll? This cute scarecrow amigurumi doll will be great for Halloween decor as it is a unique and eye-catching design. He will be the guest of a fun Halloween celebration with his remarkable smile and straw-filled outfit. Detailed pictures will guide you so you can follow the amigurumi doll pattern step by step. To make a crochet doll for Halloween, take a look at the list of materials needed right now and get to work. Because we have very little time left. Happy Halloween to all of you in advance!
Crochet For Halloween Scarecrow Amigurumi Doll Free Pattern
Designer: tobbys_handcraft
Abbreviations
ch-chain
st-stitch
inc – increase
dec-decrease
mr-magic ring
sc-single crochet
BLO-back loop only
FLO-front loop only
hdc-half double crochet
sl st -slip stitch
Materials and tools
– 4mm hook
– stuffing
– red yarn
– brown yarn
– beige yarn
– green yarn
– yellow yarn
– scissors needle/ black thread
– fabric scraps/buttons
Body
Start with beige yarn.
R1: 6 sc in mr (6)
R2: 6 inc (12)
R3: 1 sc 1 inc (18)
R4: 2 sc 1 inc (24)
R5: 3 sc 1 inc (30)
R6: 4 sc 1 inc (36)
R7: 5 sc 1 inc (42)
R8: 6 sc 1 inc (48)
R9: 48 sc (48)
R10: 6 sc 1 dec (42)
R11-12: 42 sc (42)
Change to red yarn.
R13: 5 sc 1 dec (36)
R14: 36 sc (36)
R15: 36 sc (36)
R16: 4 sc 1 dec (30)
R17: 30 sc (30)
R18: 30 sc (30)
R19: 3 sc 1 dec (24)
R20: 24 sc (24)
R21: 24 sc (24)
Start filling with stuffing.
R22: 2 sc 1 dec (18)
Change to beige yarn
R23: 18 sc (18)
R24: 18 sc (18)
Finish filling with stuffing, leave the body open with 18 sc, leave a long tail for sewing the head.
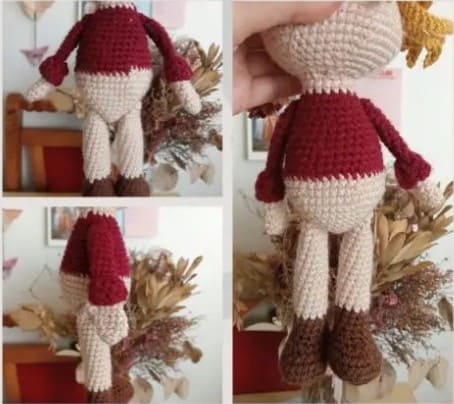
Legs X 2
Start with brown yarn.
R1: 6 sc in mr (6)
R2: 2 inc 1 sc (10)
R3: 4 inc 1 sc (18)
R4: 2 sc 1 inc (24)
R5: 24 sc in BLO (24)
R6: 24 sc (24)
R7:3 sc, 6 dec, 9 sc (18)
R8:4 sc, 2 dec, 10 sc (16)
R9: 2 sc 1 dec (12)
R10-24: 12 sc (12)
change to beige yarn at row 13.
R25: 2 sc 1 dec (9)
R26: 1 sc 1 dec (6)
R27: 6 dec (3)
Close the leg sewing.
Cut off the yarn.
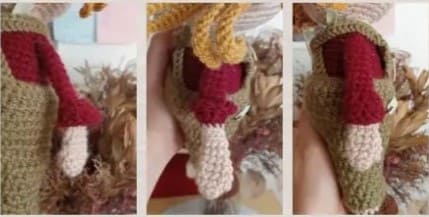
Arms X 2
Start with beige yarn.
R1: 6 sc in mr (6)
R2: 6 inc (12)
R3: 12 sc (12)
R4: 12 sc (12)
R5: 12 sc (12)
R6: 12 sc (12)
R7: 5 sc, 1 dec. 3 sc. 1 dec (10)
R8: 10 sc (10)
Change to red yarn.
R9: BLO 10 sc (10)
R10-17 (8 rows): 10 sc (10)
R18: 3 sc 1 dec (8)
R19: 2 sc 1 dec (6)
Close the arm sewing.
Leave a long tail for sewing.
Filling with stuffing only half arm (not to much).
Once you have finished making the arm, go back to round 9 and with the red color insert the hook into the BLO work of the round, make two chains and work two rounds of half double crochets.
10 stitches for each round for a total of 20.
Head
With beige yarn.
R1: 6 sc in mr (6)
R2: 6 inc (12)
R3: 1 sc 1 inc (18)
R4: 2 sc 1 inc (24)
R5: 3 sc 1 inc (30)
R6: 4 sc 1 inc (36)
R7: 36 sc (36)
R8: 5 sc 1 inc (42)
R9: 42 sc (42)
R10: 42 sc (42)
R11: 6 sc 1 inc (48)
R12: 48 sc (48)
R13: 7 sc 1 inc (54)
R14: 8 sc 1 inc (60)
R15: 60 sc (60)
R16: 8 sc 1 dec (54)
R17: 7 sc 1 dec (48)
R18: 6 sc 1 dec (42)
R19: 5 sc 1 dec (36)
R20: 4 sc 1 dec (30)
R21: 3 sc 1 dec (24)
Start filling the head with stuffing.
R22. 2 sc 1 dec (18)
R23. 1 sc 1 dec (12)
Finish filling with stuffing the head.
R24. 6 dec (6)
Close the head with a needle and cut the beige yarn.
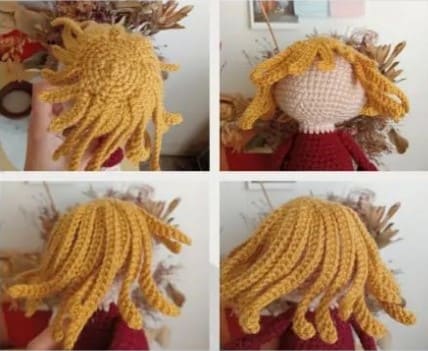
Hair
With yellow yarn.
R1: 6 sc in mr (6)
R2: 6 inc (12)
R3: 1 sc 1 inc (18)
R4: 2 sc 1 inc (24)
R5: 3 sc 1 inc (30)
Now we start the hair (H).
H1-2: 9 ch. from the second ch 8sc, attach the hair to the base with a slip stitch.
H3-4: 13 ch 12 sc (12)
H5-23: 23 ch 22 sc (22)
H24-25: 13 ch 12 sc (12)
H26-27: 9 ch 8 sc (8)
Now you’re almost done and you’re back to the center of the base of the hair. Work 3 slip stitches to leave a central space between the shorter hair.
Leave the thread long to sew the hair to the head.
Hat
With brown yarn.
R1: 6 sc in mr (6)
R2: 6 inc (12)
R3:1 sc 1 inc (18)
R4: 2 sc 1 inc (24)
R5:3 sc 1 inc (30)
R6:4 sc 1 inc (36)
R7: 5 sc 1 inc (42)
R8: 6 sc 1 inc (48)
R9:7 sc 1 inc (54)
R10: BLO 54 sc (54)
R11-17 (7 rows): 54 sc (54)
R18: FLO 54 sc (54)
R19: 8 sc 1 inc (60)
R20: 9 sc 1 inc (66)
R21: 10 sc 1 inc (72)
R22: 11 sc 1 inc (78)
R23: 78 sc (78)
Close the hat with a slip stitch.
With green yarn made 78 ch, from the second ch work 77 hdc, attach the line to the base of the hat.
Dungarees
With green yarn start 42 ch.
Insert the hook in the first ch and join with a slst the foundation ch.
Continue working in spiral.
R1-10 (10 rows): 2 ch 41 hdc (42)
Legs:
R11: divide the round indentifying 3 ch for front central space, 3 ch for the back and 18 ch for each leg.
First leg R11-15 (5rows): 2 ch 17 hdc (18)
Cut the yarn.
Second leg rejoin the yarn.
R11-15 (5 rows): 2 ch 17 hdc (18) cut the yarn.
Sewing the 6 ch in the middle with a needle.
Upper part of the dungarees
Mark 12 ch in the front center and attach a new thread.
R1-14 (4 lines): 2 ch 11 hdc (12)
Suspenders X 2
Work 18 ch and from the second ch, 17 sc.
Sew fabric scraps to the dungarees for a rustic look.
Assembling the scarecrow
The body
1. Sew the HEAD to the body with the needle following the 18 st left open.
The part with the decreases is located at the base of the neck. (In reverse of how we made it)
2. Sew the HAIR to the top of the head.
3. Attach the LEGS laterally to the base of the body by piercing it with the needle.
4. Sew the ARMS 3 rows below the neck.
The face
5. Sew the EYES (buttons) between rounds 13 and 14, leaving 4 st between one eye and the other (the st can change depending the dimensions of the buttons)
6. Sew the MOUTH between rounds 16-17-18 leaving 1 st between the eyes.
7. Sew the details with embroidery thread and enrich the scarecrow with shades using fabric colors. (optional)

Leave a Comment