
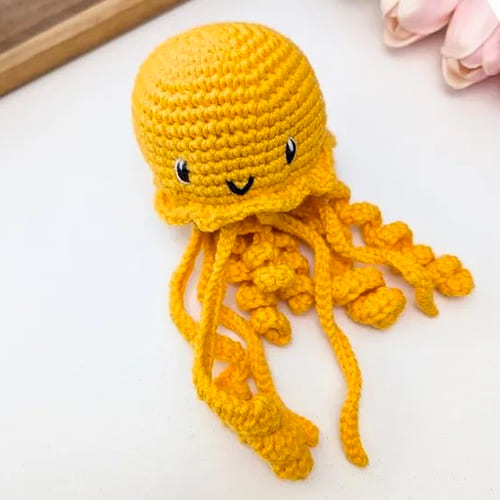
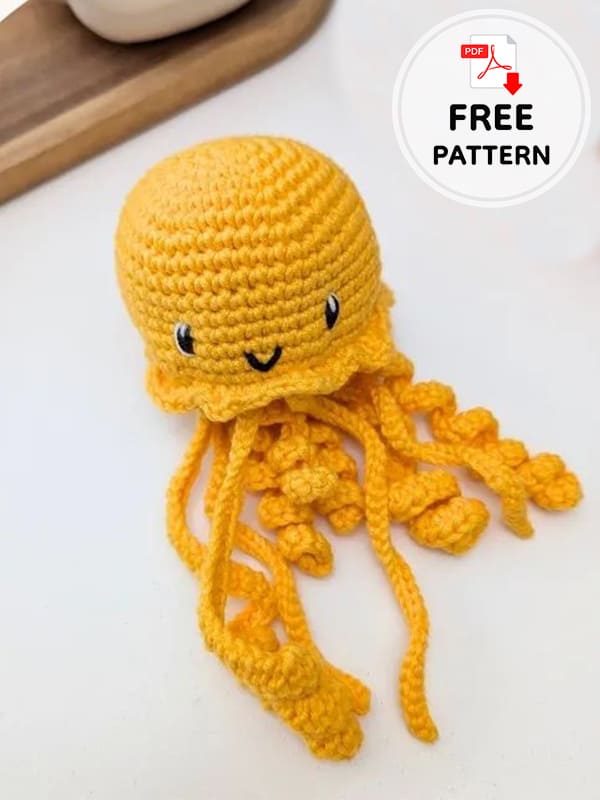
Good morning girls. I came up with a beautiful amigurumi jellyfish crochet pattern. Since it is very easy, our beginner friends can easily make this crochet jellyfish. If you have a baby, you can even turn this jellyfish into a rattle. All you have to do is put a rattle inside the head part. You can even assemble a wooden ring. You can choose the color of the crochet jellyfish as multiple colors or a single color of your choice and customize it according to your needs. It’s all up to your choice. A wonderful and easy crochet jellyfish pattern that you can completely customize is now available below for free.
Jellyfish Crochet Pattern
Pattern: natkascraftycorner
Materials:
2.5 mm crochet hook.
Cotton yarn, in colours you like.
Embroidery or tapestry needle.
Scissors.
Stuffing for toys.
Stitch marker.
Abbreviations:
Mg- Magic ring
St- Stitch
Sc- Single crochet
Inc- Increase
Dec- Decrease
Slst- Slip stitch
Ch- Chain
Hdc- Half double crochet
Dc- Double crochet
Tr- Treble crochet
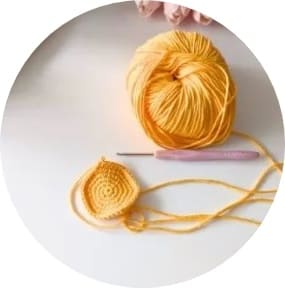
Top part (head)
8 in a magic ring (8)
8 inc (16)
(1inc,1sc)x8 (24)
(1inc,3sc)x6 (30)
(1inc,4sc)x6 (36)
(1inc,5sc)x6 (42)
(1inc,6sc)x6 (48)
48 sc (5 rows) (48)
(1inc,7sc)x6 (54)
54 sc (54)
(1dec,7sc)x6 (48)
Don’t close, leave final loop, but cut the yarn leaving really long tail as we are going to connect top and bottom part with it, adding in each stitch 3 sc.
Bottom part
Can be in one color or multiple for the tentacles.
Below is the base for the bottom part.
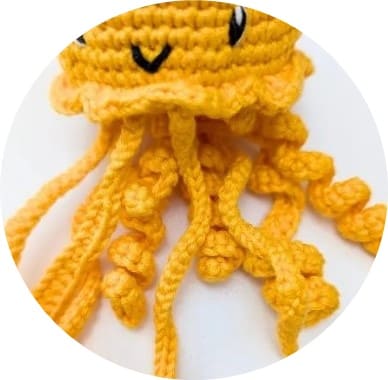
Starting from the 3rd row we will add tentacles evenly spread out.
How?
e.g. start the 3rd row with 1 inc and 1 sc, but instead of the next inc, start making a chain on the created sc. Chain about 40 loops, turn, and in 2nd loop from the hook make slst.
Continue till the final/beginning loop and the continue to the next inc. Spread them evenly and add in each row except the last one.
8 in a magic ring (8)
8 inc (16)
(1inc, 1sc)x8 (24)
(1inc, 2sc)x8 (32)
(1inc, 3sc)x8 (40)
(1inc, 4sc)x8 (48)
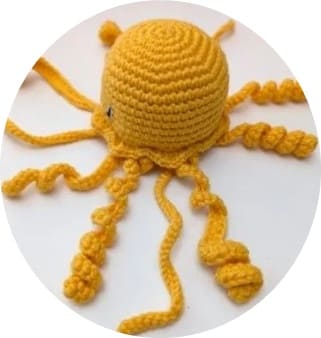
Tips: vary the curls according to your prefence. Different curls are made by using different stitches – slst, sc, hdc, dc and adding one, two or three stitches into one loop. More stitches into one loop, more curly the tentacle will be. Experiment, play.
Once the bottom with tentacles is finished, fasten off and weave in the tail of the yarn.
Now we will connect it with the head (top part) buy using long thread left on the top part.
Position parts in a way that edge of the bottom part is aligned with the edge of the top part, leaving tentacles outside of the toy.
Pull hook through both loops on the top and both loops on the bottom and make sc all along the edges connecting them.
If you want to make curly edge, add 2 or 3 sc in one loop.
Before closing stuff the toy and optionally add the rattle.
Finish circle by connecting with first stitch.
Fasten off, weave in and cut off the thread.
Leave a Comment