
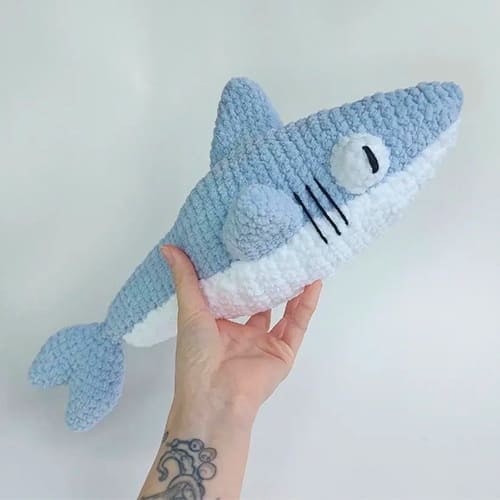
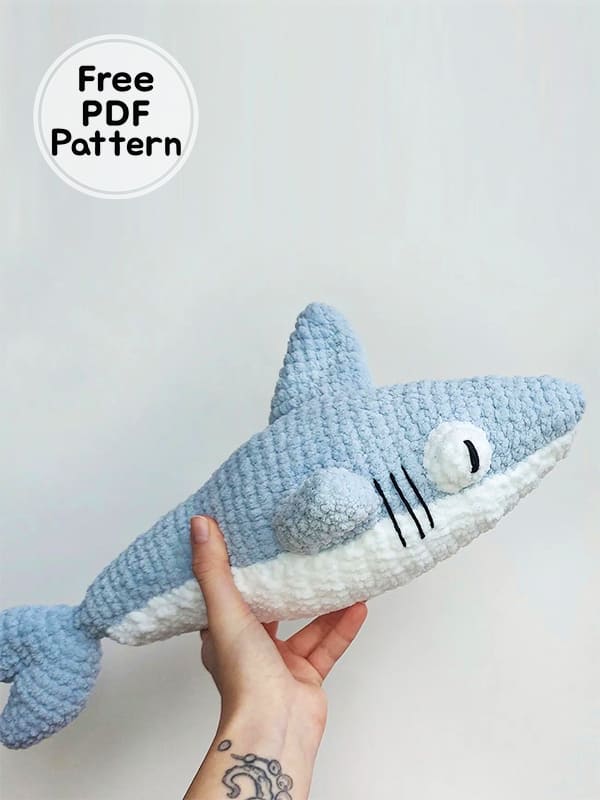
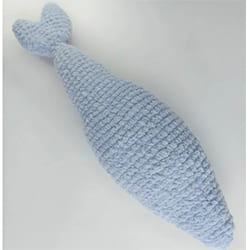
Hi friends, when you complete the crochet shark, its height will be approximately 39 cm. To embroider such a large shark, our designer used plush yarn and a 4mm crochet hook. The body and tail of the shark consist of a single piece. The remaining parts are fixed later. The crochet shark pattern is detailed step by step and will help you with pictures. I will try to share more types of shark amigurumi toys as I get the opportunity. Today I am sharing the first free pattern with you. Complete the free amigurumi crochet shark right now and give your kids a safe play experience. Happy weeks.
Crochet Plush Shark PDF Amigurumi Free Pattern
Designer: marina.plush
Materials
1) Alize Velluto yarn (any color, I have 416) – about 1.5 skeins;
2) Alize Velluto yarn (white color, 55) – for eyes and belly;
3) Any black yarn for embroidering gills and pupils (I have YarnArt Jeans, 53);
4) White thread for sewing details;
5) Sewing needle;
6) Scissors;
7) Markers for knitting;
8) Filler (I have holofiber);
9) Hook 4 mm
Abbreviations
Sc: Single crochet
Inc: Increase
Dec: Decrease
MR: Magic ring
ll: Lifting loop
Slst: Slip stitch
• The height of the toy is approximately 39 cm.
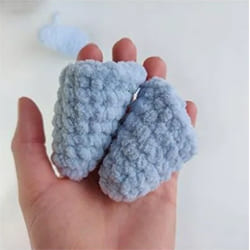
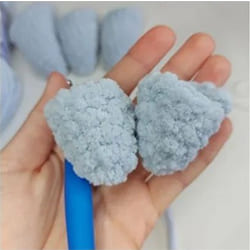
Small fins (2 pcs)
1) 6 sc in MR (6)
2) 2 sc, 2 inc, 2 sc (8)
3) 3 sc, 2 inc, 3 sc (10)
4) 4 sc, 2 inc, 4 sc (12)
5) 5 sc, 2 inc, 5 sc (14)
6) 6 sc, 2 inc, 6 sc (16)
7) 7 sc, 2 inc, 7 sc (18)
8) 8 sc, 2 inc, 8 sc (20)
Slst, fasten and cut the thread.
Big fin (1 pc)
1) 6 sc in MR (6)
2) 2 sc, 2 inc, 2 sc (8)
3) 3 sc, 2 inc, 3 sc (10)
4) 4 sc, 2 inc, 4 sc (12)
5) 5 sc, 2 inc, 5 sc (14)
6) 6 sc, 2 inc, 6 sc (16)
7) 7 sc, 2 inc, 7 sc (18)
8) 8 sc, 2 inc, 8 sc (20)
9) 9 sc, 2 inc, 9 sc (22)
10) 10 sc, 2 inc, 10 sc 24)
Slst, fasten and cut the thread.
Eyes (2 pcs)
1) 6 sc in MR (6)
2) 6 inc (12)
3) 12 sc (12)
Slst, fasten and cut the thread.

We make 3-4 stitches.
Tail tips (2 pcs)
1) 6 sc in MR (6)
2) (2sc,inc)x2 (8)
3) (3sc,inc)x2 (10)
4) (4sc,inc)x2 (12)
5) (5sc,inc)x2 (14)
We make slst at one tail, fasten the thread and cut it off, leave it at the second and continue to knit it.
Tail and body
We continue to crochet.
6) 14 sc on one tip, 14 sc on the second tip. (28)
7) 28 sc (28)
8) (5sc,dec)x4 (24)
9) (4sc,dec)x4 (20)
10) (3sc,dec)x4 (16)
11) (2sc,dec)x4 (12)
12) 6 dec (6)
13) (1sc,inc)x3 (9)
14) (2sc,inc)x3 (12)
15) (3sc,inc)x3 (15)
16) 15 sc (15)
17) (4sc,inc)x3 (18)
18) 18 sc (18)
19) (5sc,inc)x3 (21)
20) 21 sc (21)
21) (6sc,inc)x3 (24)
22) 24 sc (24)
23) (7sc,inc)x3 (27)
24) 27 sc (27)
25) (8sc,inc)x3 (30)
26) 30 sc (30)
27) (9sc,inc)x3 (33)
28) (10sc,inc)x3 (36)
29) (11sc,inc)x3 (39)
30) (12sc,inc)x3 (42)
31) (13sc,inc)x3 (45)
32) (14sc,inc)x3 (48)
32-41) 48 sc (9 row)
42) (10sc,dec)x4 (44)
43) (9sc,dec)x4 (40)
44) (8sc,dec)x4 (36)
45) 36 sc (36)
46) (7sc,dec)x4 (32)
47) 32 sc (32)
48) (6sc,dec)x4 (28)
49) 28 sc (28)
50) (5sc,dec)x4 (24)
51) 24 sc (24)
52) (4sc,dec)x4 (20)
53) 20 sc (20)
54) (3sc,dec)x4 (16)
55) 16 sc (16)
56) (2sc,dec)x4 (12)
57) 6 dec (6)
Slst, we fix the thread, cut it off and hide it inside the body.
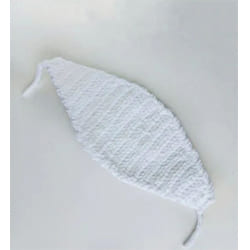
White underside of body:
We knit in turning rows. We make 4 ch.
1) 3 sc (3)
2) ll, inc, sc, inc (5)
3) ll, 5 sc (5)
4) ll, inc, 3 sc, inc (7)
5) ll, 7 sc (7)
6) ll, inc, 5 sc, inc (9)
7) ll, 9 sc (9)
8) ll, inc, 7 sc, inc (11)
9) ll, 11 sc (11)
10) ll, inc, 9 sc, inc (13)
11) ll, 13 sc (13)
12) ll, inc, 11 sc, inc (15)
13) ll, 15 sc (15)
14) ll, inc, 13 sc, inc (17)
15) ll, 17 sc (17)
16) ll, inc, 15 sc, inc (19)
17-25) ll, 19 sc (9 rows)
26) ll, dec, 15 sc, dec (17)
27) ll, 17 sc (17)
28) ll, dec, 13 sc, dec (15)
29) ll, 15 sc (15)
30) ll, dec, 11 sc, dec (13)
31) ll, 13 sc (13)
32) ll, dec, 9 sc, dec (11)
33) ll, 11 sc (11)
34) ll, dec, 7 sc, dec (9)
35) ll, 9 sc (9)
36) ll, dec, 5 sc, dec (7)
37) ll, 7 sc (7)
38) ll, dec, 3 sc, dec (5)
39) ll, 5 sc (5)
40) ll, dec, 1 sc, dec (3)
We fasten the thread and cut.
Now we sew all the details together, embroider the gills and enjoy the new crochet shark 🙂

Leave a Comment