
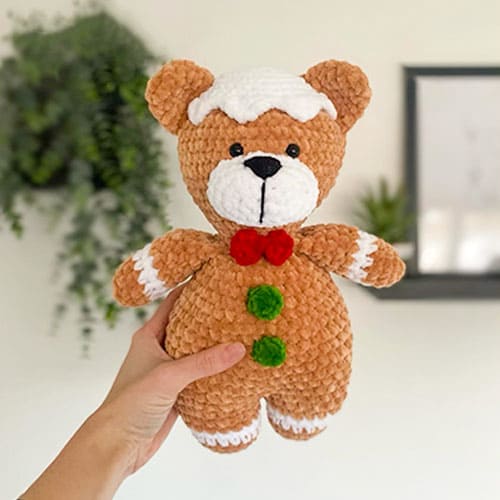
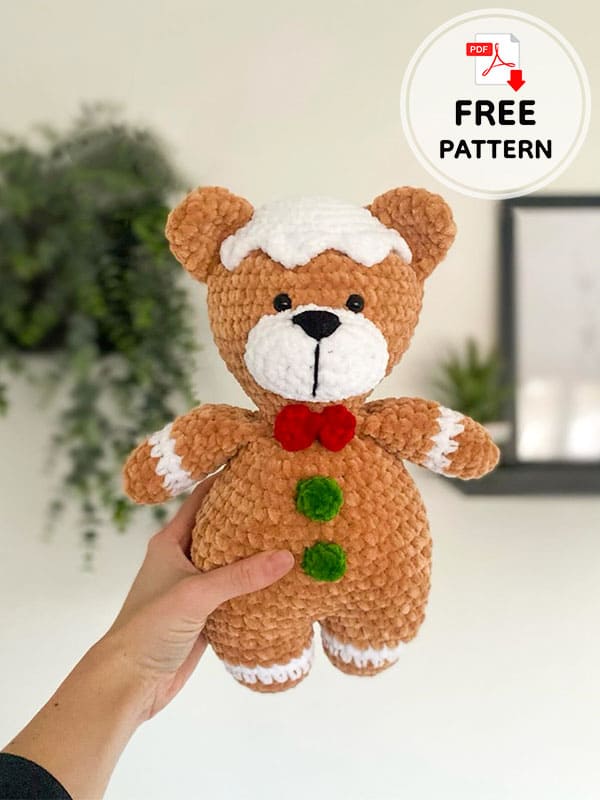
You’re feeling the Christmas spirit, right? Here today I have a crochet teddy bear pattern that will get you feeling. Gingerbread teddy bear is with you. Gingerbread crochet teddy bear pattern is beginner level. Since it is an easy level, anyone can do it easily. The teddy bear’s legs and body consist of a single piece. Then, you fix it by making its head and arms. Of course, you ice a piece of ice into his head to make it look like a gingerbread. If you want to see this wonderful crocheted teddy bear toy in your home in the new year, follow the free pattern instructions step by step right now. Many more free christmas amigurumi patterns are waiting for you.
Crochet Gingerbread Teddy Bear Amigurumi Free Pattern
Designer: innoscent_teddies
Materials
Honey bunny nougat super chunky yarn (100% supersoft polyester, tension:9 stitches, 18 rows to 10 cm/4″)
5 mm crochet hook
10 mm safety eyes
Softy toy filling (100% hi-loft polyester)
Scissors
Stitch marker
Sewing needle
Abbreviations
Ch- Chain
St- Stitch
Sc- Single crochet
Inc- Increase (2 sc in one st)
Dec- Decrease (2 sc together)
BLO- Back loops only
Ears (X2)
1. 6 sc in a magic circle
2. (inc)x6 (12)
3. (5sc,inc)x6 (14)
4. 14 sc (14)
5. (2sc,dec)x3, dec (10)
Flatten and slst across the base of the ear. Cut the yarn, leaving a tail to use to sew onto the head later.
Buttons
1. 4 sc in magic cirlce
2. (inc)x4 (8)
3. (dec)x4 (4)
Bow
Chain 2, work 5 dc in the first chain then so at into the same stitch, chain 2, then another 5 dc into the same stitch, chain 2, slst.
Close the circle, use the remaining yarn to wrap around the centre and create a bow.
Muzzle
Chain 7, in white yarn make an oval shape by working into both sides of the chain.
1. Starting in the 2nd chain from the hook: 5 sc, 3 sc in the last chain, turn and crochet up the other side of the chain: 4 sc, inc (14)
2. 1 ch, inc, 4 sc, (inc)x3, 4 sc, (inc)x2 (20)
3. 1 ch, inc, 5 sc, (1sc,inc)x4, 5 sc, inc (26)
4. 1 ch, inc, 6 sc, (2sc,inc)x4, 6 sc, inc (32)
5. 32 sc (32)
Slst, and fasten off yarn.
Carrying on from the legs
8. 36 sc (18 sc round the first leg, 18 sc around the 2nd leg) (36)
9. (5sc,inc)x6 (42)
10-17. 42 sc (42) (8 rounds)
Stuff the body.
18. (5sc,dec)x6 (36)
19. 36 sc (36)
20. (4sc,dec)x6 (30)
21. 30 sc (30)
22. (3sc,dec)x6 (24)
23. (2sc,dec)x6 (18)
24. 18 sc (18)
Continue onto the head and change colour to primary yarn colour.
Head
1. 18 sc (18)
2. (2sc,inc)x6 (24)
3. (3sc,inc)x6 (30)
4. (4sc,inc)x6 (36)
5. (5sc,inc)x6 (42)
6. (6sc,inc)x6 (48)
7-12. 48 sc
Places eyes between rows 9-10 roughly 5 stitches apart.
Start to stuff the head.
13. (6sc,dec)x6 (42)
14. (5sc,dec)x6 (36)
15. (4sc,dec)x6 (30)
16. (3sc,dec)x6 (24)
17. (2sc,dec)x6 (18)
18. (sc,dec)x6 (12)
19. dec x6 (6)
Fasten off leaving a small tail.
Weave the yarn tail into the front loops of the 6 stitches and pull to close the hole.
Arms (X2)
1. 6 sc in a magic ring
2. (inc)x6 (12)
3-4. 12 sc (12)
5-6. (change to white yarn) 12 sc (12)
7-11. (change back to brown yarn) 12 sc
Stuff the arms, then flatten and slst through both sides 6 times. Cut the yarn leaving enough to sew the arm onto the body later.
Legs (X2)
1. 6 sc in a magic ring (6)
2. (inc)x6 (12)
3. (sc,inc)x6 (18)
4. 18 sc (18)
5-6. (change to white yarn) 18 sc (18)
7. (change back to brown yarn) 18 sc (18)
1st leg only: slst to finish and cut yarn after row 7 (leave a tail to sew up possible holes that may occur between the legs)
2nd leg: do not close or cut yarn after Rnd 7, join to the 1st leg with a sc.
Continue onto the body.
Frosting
1. 8 sc in a MR
2. (inc)x8 (16)
3. (sc,inc)x8 (24)
4. (3sc,inc)x6 (30)
5. (4sc,inc)x6 (36)
6. 42 sc
7. (6sc,inc)x6 (48)
8. sc, (4 dc in the same stitch, 4 sc)x8 , 2sc.
Assembly
Pins arms to body symmetrically and sew on just below the head.
Sew the muzzle onto the head just below safety eyes.
Sew the buttons and bow onto the front of the bear.
Sew the frosting and ears onto the head.
Sew nose detail onto muzzle.

Leave a Comment