
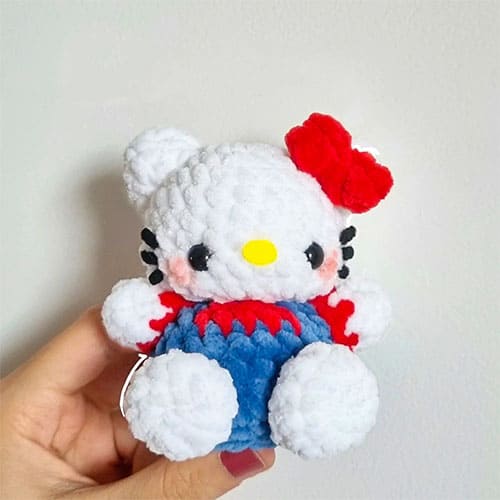
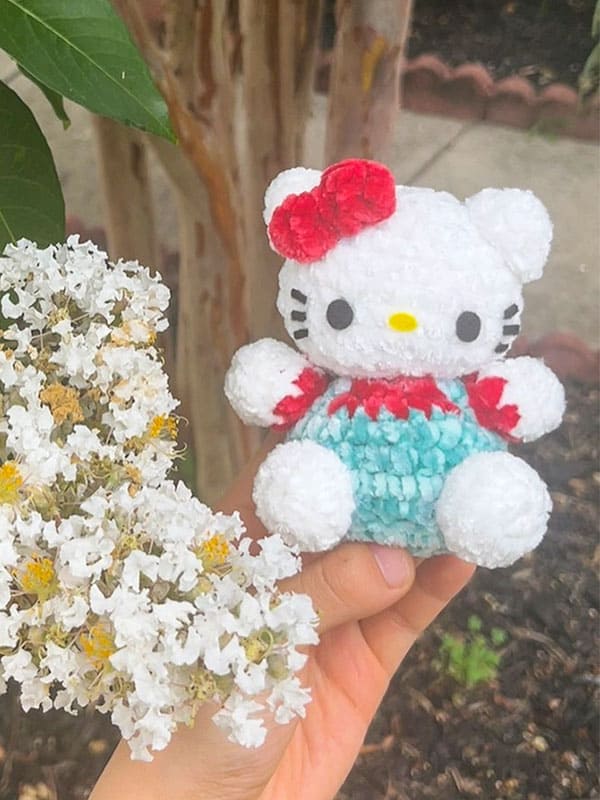
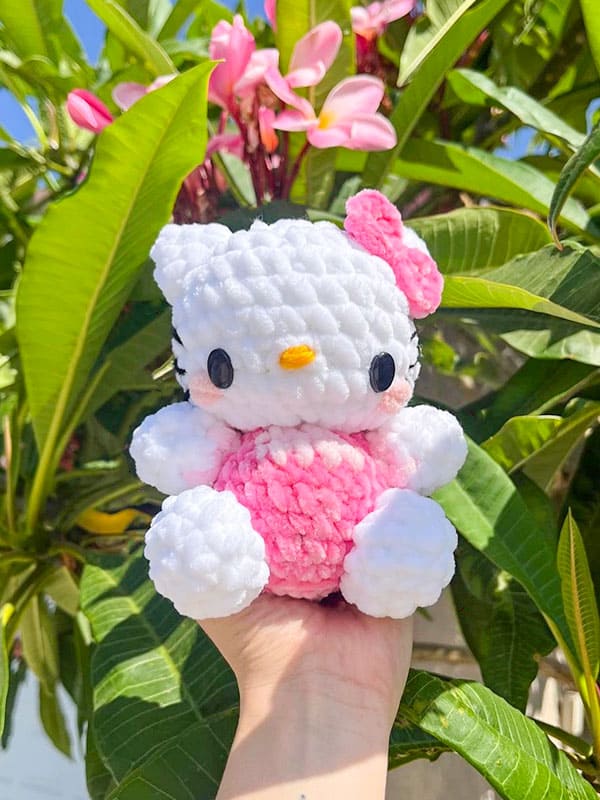
Today I continue with the second free amigurumi pattern. My energy is on point, everything is great. It’s going to be a good weekend for me. I am very pleased to share the hello kitty crochet plush toy with you for free. In general, crochet cat patterns are very popular. But because crochet hello kitty patterns are especially loved, I wanted to make you such a surprise today. Follow the detailed step-by-step pattern instructions and quickly complete the cute hello kitty toy in no time. For thread colors, either use the colors specified by the designer, or choose your own colors according to your own imagination. I will leave a few different hello kitty completed amigurumi toy pictures to give you an idea. Stay tuned for many more free amigurumi patterns.
Plushie Baby Hello Kitty Crochet Amigurumi Free Pattern
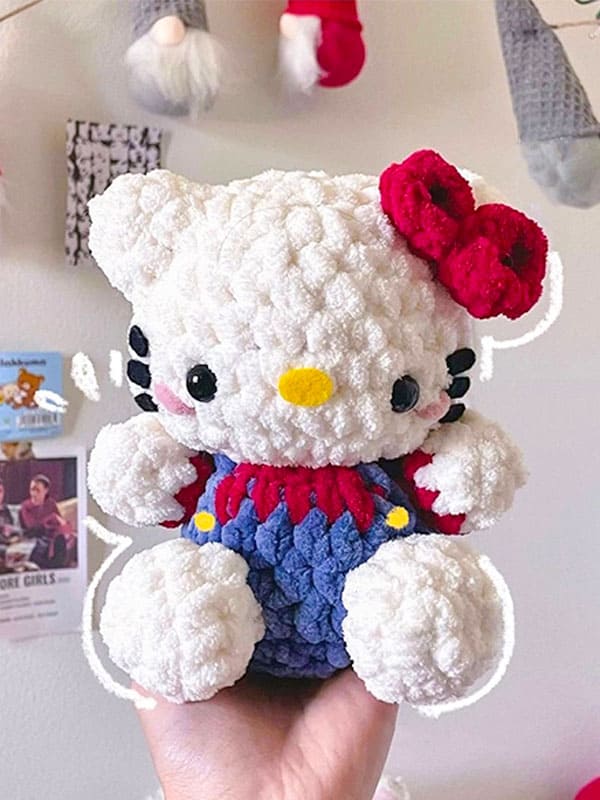
Designer: iuli.crochets
Abbreviations
MR: Magic ring
Ch: Chain
Sc: Single crochet
Inc: Increase
Dec: Decrease
Hdc: Half double crochet
Slst: Slip stitch
BLO: Back loop only
Materials
White, red and dark blue yarn
4.5 mm crochet hook
8 mm eyes (you may use smaller/ bigger depending on how big your plushie is yellow and black felt)
Scissors
Hot glue
Yarn needle and stuffing
Optional: red chalk pastel for cheeks.
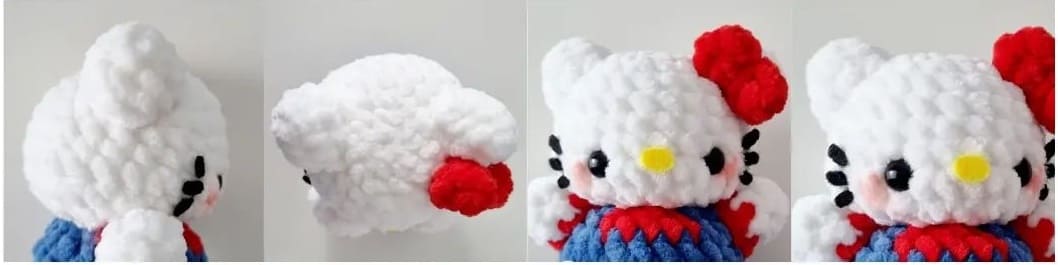
Head
In white.
Rnd 1. 6 sc in MR (6)
Rnd 2. 6 inc (12)
Rnd 3. (sc,inc)x6 (18)
Rnd 4. (2sc,inc)x6 (24)
Rnd 5-7. sc around (24×3)
Rnd 8. (3sc,inc)x6 (30)
Insert safety eyes 5 stitches apart.
Rnd 9. sc around (30)
Rnd 10. (sc,dec)x10 (20)
Rnd 11. 10 dec (10)
Stuff the head.
Slst and fasten off.
Body
Start in blue.
Rnd 1. 4 ch.
Rnd 2. 2 sc, inc in 3rd chain, 2 sc (6)
Rnd 3. 6 inc (12)
Rnd 4. 12 inc (24)
Rnd 5. sc around in BLO (24)
Rnd 6-7. sc around (24)
Rnd 8. (dec,10sc)x2 (22)
Rnd 9. sc, change to red, 5 sc, change to blue, 16 sc (22)
Rnd 10. dec, dec (drag red yarn through second stitch), dec, dec (drag blue yarn through second stitch), 7 dec (11)
Stuff the body.
Slst. Cut off red tail, leave long blue tail for sewing.
Arms (make 2)
Start in white.
Rnd 1. 6 sc in MR (6)
Rnd 2-3. sc around (6)
Change to red.
Rnd 4. sc around (6)
Don’t stuff.
Slst and leave long tail for sewing.
Ears (make 2)
In white.
Rnd 1. 4 sc in MR (4)
Rnd 2. (sc,inc)x2 (6)
Rnd 3. (sc,inc)x3 (9)
Rnd 4. (2sc,inc)x3 (12)
Don’t stuff.
Slst and leave long tail for sewing.
Legs (make 2)
In white.
Rnd 1. 6 sc in MR (6)
Rnd 2. 6 inc (12)
Rnd 3. sc around (12)
Rnd 4. (sc,dec)x4 (8)
Don’t stuff.
Slst and leave long tail for sewing.
Bow
In red.
Rnd 1. 5 ch.
Rnd 2. Start from 2nd ch from hook, 3 hdc, 2 hdc in 4th chain, 3 hdc on other side of chains (8)
Rnd 3. sc around (8)
Slst, leave long tail to wrap around the middle of the bow.
Felt cutouts
Cut one small piece of oval yellow felt for the nose.
Cut six small pieces of black oval felt for whiskers.

Assembly
1. Sew the body to the head using the long tail from earlier. Make sure the red part is in the middle. (aligned to both eyes)
2. Sew the arms 2 stitches further from the red, on each of the body, starting between rnd 8-9 to the last row of the body.
3. Sew the legs 3 stitches apart from rnd 5-6 to rnd 7-8.
Assembly: ears, bow, felt
1. Sew the ears onto the head starting between rnd 2-3. Sew around the ears, down to rnd 5-6.
2. Fold the bow in half and bring the long string around the middle 3 times to create the bow shape. Sew the bow between the head and the right side ear (looking at hello kitty). Optional: use glue to secure it in place.
3. Glue the yellow nose in between the eyes, between rnd 8-9.
4. Glue the whiskers 2 stitches away from the eyes.
Congratulations, you’ve completed the hello kitty crochet toy!

Leave a Comment