

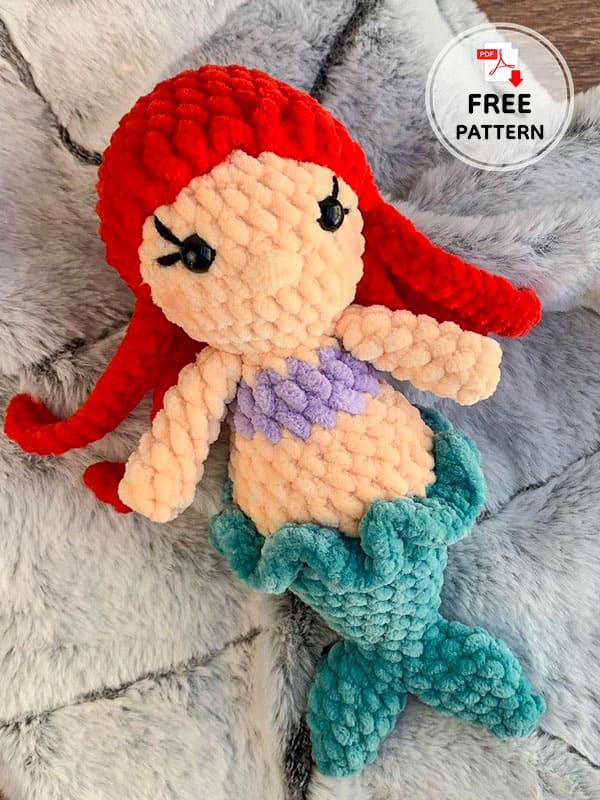
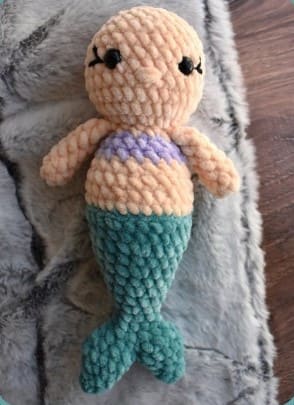
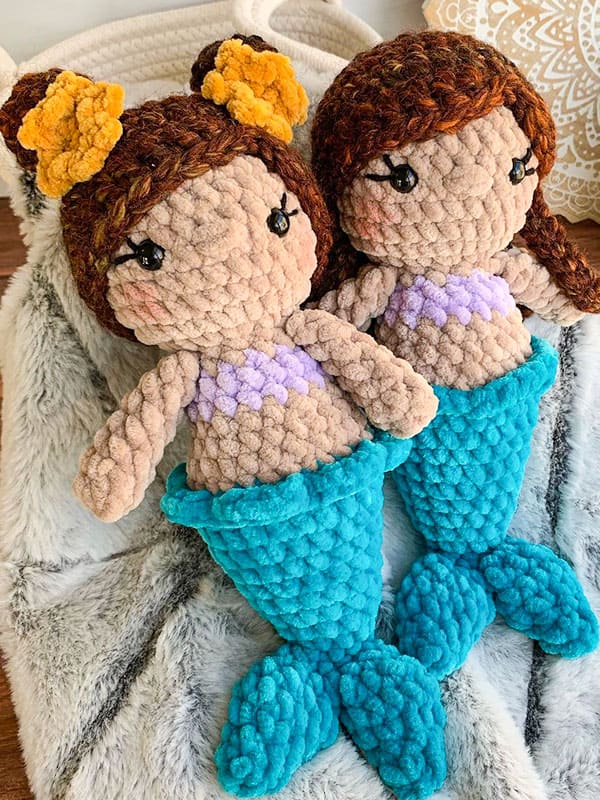
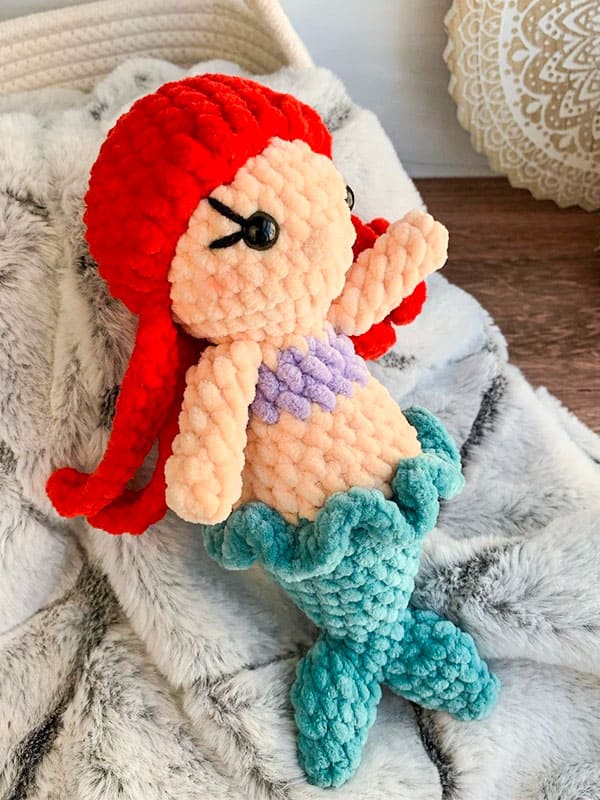
It’s a great summer day and today is the weekend guys. Special for today, I brought you an incredibly cute amigurumi pattern. The little mermaid crochet pattern you know from Disney animations. You can get a much softer texture by making the cute mermaid amigurumi toy from plush yarn. So your little children can play their games much more safely. Now take a look at the free mermaid crochet pattern and follow the step-by-step instructions. Don’t worry, pattern difficulty is for beginners. So you can also start learning how to make amigurumi. The little mermaid has two different hairstyles and two different waist fins. You can get two different little mermaid amigurumi toys by making them different. Now I wish you success.
Mermaid Crochet Pattern
Designer: atomic.crochet
Abbreviations
MR: Magic ring
Ch: Chain
Sc: Single crochet
Inc: Increase
Dec: Decrease
BLO: Back loop only
Slst: Slip stitch
Crochet hook size: 4.25 mm.
Safety eyes size: 10 mm.
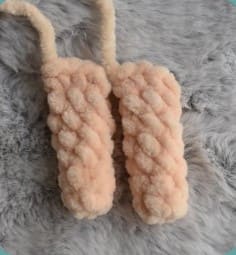
Arms (make 2)
R1. In MR 6 sc
R2-7. 6 sc around for 6 rows
R8. Fold the arm flat and sc across. I do not stuff them.
Tail fins (make 2)
R1. In MR 4 sc
R2. (inc,sc)x2
R3. 6 sc
R4. inc x6
R5. 12 sc
R6. (sc,dec)x4
Do not finish off the 2nd fin. Join your first fin to the second with a slst.
Place stitch marker in the next st and continue onto the bodu and head section.
Stuff body as you go.

Body and head
Continuing around the fins.
R1. (2sc,dec)x4
R2. (sc,dec)x4
R3. 8 sc around
R4. (sc,inc)x4
R5. 12 sc around
R6. (2sc,inc)x4
R7. 16 sc around
R8. (3sc,inc)x4
R9. 20 sc around
R10. (4sc,inc)x4
R11. 24 sc around
R12. (3sc,inc)x6
cc to skin color.
R13. in BLO, 30 sc around
R14. (3sc,dec)x6
R15. 24 sc around
R16. (2sc,dec)
cc to shirt color.
R17-18. 18 sc around for 2 rows
cc to skin color.
R19. (sc,dec)
sc the arms in the next row on each side of the body.
R20. sc around
R21. inc x12
R22. (3sc,inc)
R23-28. 30 sc around for 6 rows
Add eyes between rows 3 and 4 of the 6 you just crocheted with 5 visible sts between them.
R29. (3sc,dec)x6
R30. (2sc,dec)x6
R31. (1sc,dec)x6
R32. dec x6
Fasten off and weave in ends. Embroider nose and eyelashes.
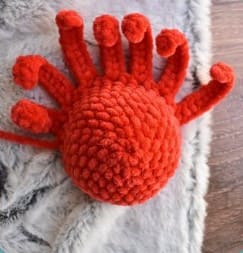
Hair
R1. in MR 6 sc
R2. inc x6
R3. (sc,inc)x6
R4. (2sc,inc)x6
R5. (3sc,inc)x6
R6-9. 30 sc around for 4 rows
R10. 2 hdc, 2 dc, 2 slst, 2 hdc, 3 dc, sc, (ch 12 and in 2nd ch from hook sc 11 back to the hair cap, sc in next two sts) repeat 9 times
Fasten off and leave a tail for sewing to the head.
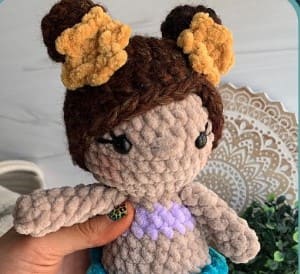
Make sure your front parts is slightly off to the left side as pictured here.
Waist fin
Make sure your mermaid is face down with the tail facing away from you.
Attach your yarn with a slst on the front loops of rnd 13, in the center of the back as pictured.
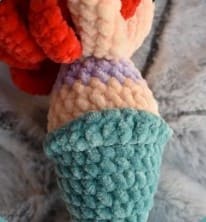
Continuing around the mermaid:
(slst, sc, 3 hdc, 5 dc, 3 hdc, sc, slst)x2
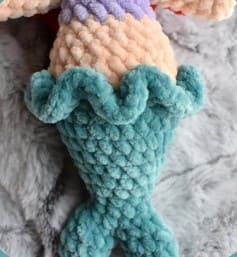
Alternate ruffle fin
If you would rather have the ruffle fin: After attaching the yarn in the same way as above, 3 hdc in each st around the mermaid.
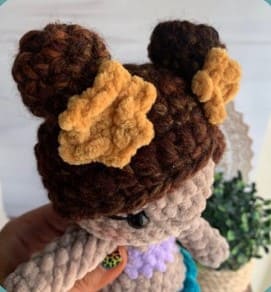
Hair buns (make 2)
R1. 6 sc in MR
R2. inc x6 (12)
R3. 12 sc
R4. (sc,dec)x4 (9)
Fasten off, leave a tail for sewing.
Star accessory
R1. 6 sc in MR
R2. (ch 2, slst) in the same st x6
That’s all, the little mermaid crochet ariel is ready!
Here is a different view.

Leave a Comment