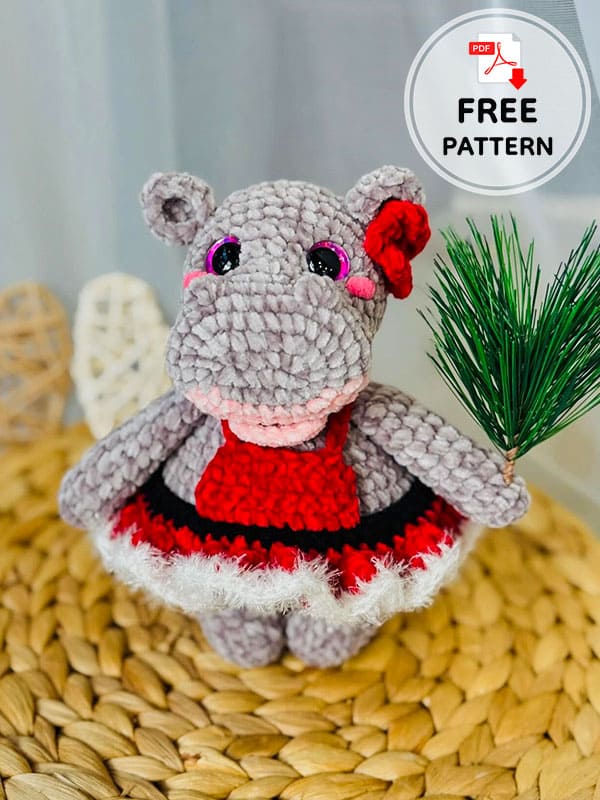
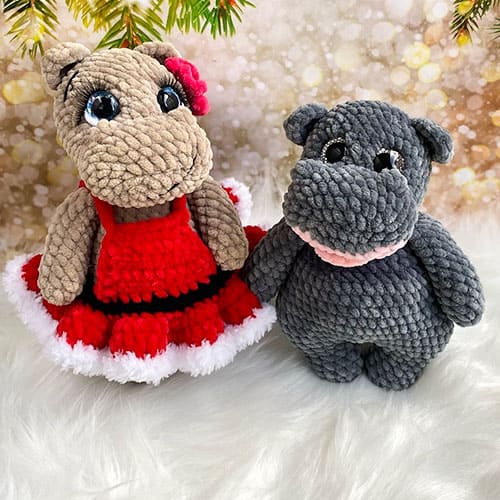
A very cute hippo crochet pattern with a red dress prepared for Christmas is with you. In this wonderful crochet hippo pattern, you will learn how to make a beautiful Christmas dress. You can make it with or without a dress. Or you can make two crochet hippos with one dress and one without a dress and display them as a beautiful Christmas couple. The crochet dress is not sewn onto the hippo. So you can take off the dress whenever you want. First of all, the crochet hippo is made. I have written it below in detail step by step and I am leaving a PDF file for your convenience. Stay tuned for more amigurumi crochet animals.
Designer: rosalie_toys
Hippo crochet pattern
For the hippo materials:
• yarn himalaya dolphin baby (super bulky 6)
– grey (80367) – main body color (71 g)
– pink (80319) – secondary color for the muzzle
• 4 mm crochet hook
• 18 mm safety eyes
• yarn needle
• scissors
• hollow fiber (polyfil)
• acrylic / cotton yarn for the face / eye details.
For the dress:
• yarn himalaya dolphin baby (super bulky 6)
– red (80318)
– black (80311)
• wolans fox yarn (109 yds / 100g)
– white (110-01)
• 4 mm crochet hook
Abbreviations:
MR- magic ring
ch- chain
slst- slip stitch
sc- single crochet
dec- decrease
inc- increase
dc- double crochet
BLO- back loop only
hdc- half double crochet
hdc-inc- half double crochet increase (2 hdc in one st)
3hdc- inc- (3 hdc in one st)
BBL- bobble stitch (4 double crochet bbl st)
cc- color change
Head
Start with grey.
R1. ch 6, from the 2nd ch from the hook: 4 sc, 4 sc in the last ch, 3 sc, 3 sc in the last ch (14)
R2. inc, 3 sc, 4 inc, 3 sc, 3 inc (22)
In R3-R13. you will be color changing. The black text = grey yarn, the brown text = pink yarn.
R3. sc, inc, 4sc, inc, sc, inc, (sc,inc)*2, 3 sc, (sc,inc)*2, 2sc, cc to pink and sc in the same st (30)
R4. 11 sc, 18 sc, sc (30)
Next, you can make the nostrils.
R5. 11 sc, 5 sc, BBL, 6 sc, BBL, 5 sc, sc (30)
16 sc, BBL, 6sc, BBL, 6 sc (0) (see pic)
R6. 11 sc, sc, dec, 13 sc, dec, sc (28)
R7. 11 sc, 4 sc, (hdc, hdc-inc)*4, hdc, 3 sc, sc (32)
R8. sc, dec, 5 sc, dec, sc, sc, dec, 2 sc, hdc, hdc-inc,6 hdc, hdc-inc, hdc, 4 sc, dec (30), cc to pink.
Depending on the tension it’s possible that nostrils don’t line up.
Adjust placement how you see fit.
Hdc should be in the middle of the snout, adjust if necessary.
Make the hdc’s very tight so that there are no holes.

R9. 9 sc, 5 sc, hdc, hdc-inc, 7 hdc, hdc-inc, hdc, 5 sc (32)
R10. 9 sc, 8 sc, inc, 5 sc, inc, 8 sc (34)
R11. 9 sc, 25 sc (34)
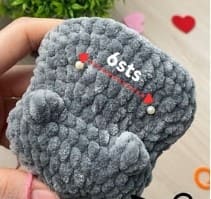
Place the eyes between R8 and R9, about 5-6 sts apart.
If you are using eyes of size 16 mm or smaller, place them close together (4sts apart).
R12. 9 sc, 11 sc, inc, sc, inc, 11 sc (36), cut the pink.
R13-14. 36 sc around (2 rounds)
R15. (4sc,dec)*6 (30)
R16. (3sc,dec)*6 (24)
Starting to stuff. Throughly stuff the forehead and muzzle.
R17. (2sc,dec)*6 (18)
R18. (sc,dec)*6 (12)
R19. 6 dec (6)
Cut the yarn, close the hole.
Lip
Start with pink.
R1. ch 4, from the 2nd ch from the hook: inc, sc, 4 sc in the last ch, sc, inc (10)
R2. inc, 3 sc, 2 inc, 3 sc, inc (14)
R3. 5 sc, slst, cut the yarn, FO, leaving a tail for sewing.
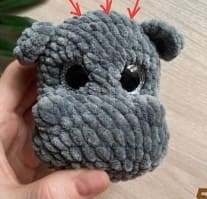
Sew the lip onto the head after shaping the face. Place the lip btw R8 and R10, and use a needle to sew from the 1st point to the 2nd.

Ears (X2)
R1. 5 sc in a MR
R2. 2 inc, hdc-inc, 2 inc (10)
R3. 4 sc, 2 hdc, 4 sc (10)
Cut the yarn, FO, leaving a tail for sewing.
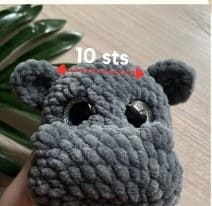
Place the ears between R12 & R13, 10 stitches between them.
Arms (X2)
R1. 5 sc in a MR
R2. 5 inc (10)
R3-12. 10 sc around (10 rounds)
Stuff it lightly until R8. Fold in half and crochet 5 sc through both sides.
Legs (X2)
R1. 8 sc in a MR (8)
R2. (sc,inc)x4 (12)
R3-6. 12 sc around (4 rounds)
R7. (2sc,inc)*4 (16)
FO after the 1st leg, but do not FO after the 2nd leg.
Yo’ll be connecting them and counting on to the body.
Body
2 ch after finishing the 2nd leg. Attach legs by 16 sc around the 1st leg, 2 sc into the chs, 16 sc on the 2nd leg and sc on the ch.
Now we are going to put a marker to mark the center.
I am using a constrasting thread. Then we continue with the body and this will be the first row. So the row numbering starts again.
R1. sc on the ch, (2sc,inc)*5, 3 inc, (2sc,inc)*4, sc, 3 inc (50)
R2. 2 inc, 20 sc, (inc,sc)*2, 24 sc (54)
R3. 25 sc, inc, 2sc, inc, 25 sc (56)
R4. 56 sc around (56)
The increases must fall on the increases of the 2nd row; adjust if necessary R1, R3, R5-7. [amigurumicat.com]
Keep your eye on the marker and ensure it goes straight down the middle of the back.
Adjust it by offseting the stitch. In R5, we’ll start shaping the hips.
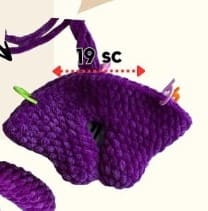
R5. 8sc, (sc,dec)*3, 19sc, (dec,sc)*3, 11 sc (50)
R6. 8sc, (sc,dec)*3, 14sc, (dec,sc)*3, 10 sc (44)
R7. (5sc,dec)*2, 10 sc, (5sc,dec)*2, 6 sc (40)

Start stuffing. Stuff the body as you go.
Pay special attention to the stuffing of the hips and tummy.
If yoo little stuffing is used, the hippo will lack the characteristic hips and belly.
R8-9. 40 sc around (2 rounds)
R10. (6sc,dec)*5 (35)
R11. (5sc,dec)*5 (30)
R12. 30 sc around (30)
R13. (3sc,dec)*6 (24)
R14. 24 sc around (24)
In R15 we’ll be adding the arms. Offset the stitches if necessary to ensure that the arms symmetrically positioned.
R15. 4 sc, 5 sc with arm, 6 sc, 5 sc with arm, 4 sc (24)
R16. (2sc,dec)*6 (18)
R17. (sc,dec)*6 (12), slst.
Cut the yarn, leaving a tail for sewing.
Sew the head to the body.
Dress
Start with black.
R1. ch 50 (pic1)
R2. connect to the first chain with a sc (this counts as your first sc), 49 sc (50) (pic2-3), cc to red.
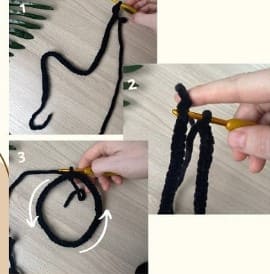
R3. 50 sc around (50)
Next, you don’t need to count the stitches, just make sure not to skip any stitches to achieve the desired shape of the dress. Trust the process and enjoy crocheting.
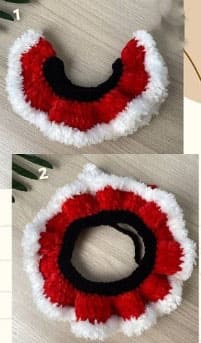
R4. ch 2, (FLO) (hdc-inc, 3 hdc-inc in the next st) repeat to the end of the round, slst, cc to white.
R5. hdc around (pics4-5), slst.
Cut the yarn, FO, hide the ends.
1. Mark the center ten stitches of the starting chain (pic3).
2. Take the red yarn and insert your hook into the green marked stitch on the right side, pull a loop through, ch 1 and start crocheting in that same stitch (pic4):
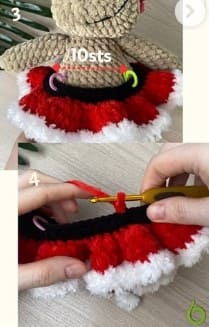
Row 1. 10 sc, ch 1, turn your work
Row 2-3. 10 sc (10), ch 1, turn (2 rows)
Row 4. dec, 6 sc, dec (8), ch 1, turn
Row 5. dec, 4 sc, dec (6), ch 1, turn
Row 6. slst, ch 1
3. continue crocheting from the side:
3 slst, 2 sc, hdc in the waistband of the dress (pic1-2).
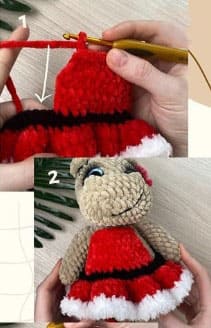
Cut the yarn, FO, hide the ends.
4. Join the yarn in the last stitch of row 6 and make ch 12 (pic3).
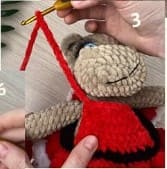
5. Connect to the waistband at the back by making a sc.
Continue crocheting 10 sc (pic4).
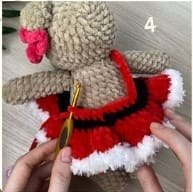
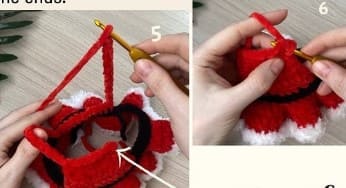
6. Make ch 12 and connect to the front side by making a slst (pic 5-6).
Cut the yarn, FO, hide the ends.
For more detailed PDF;

Leave a Comment