
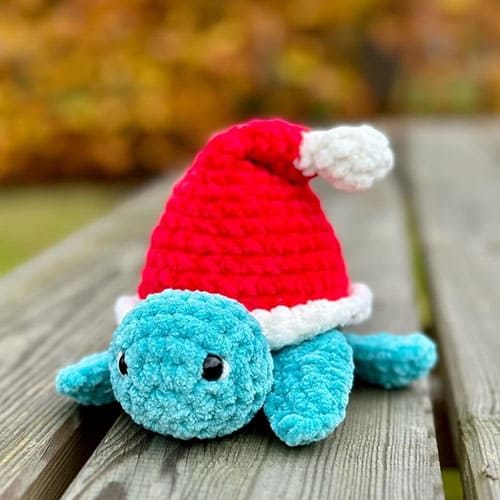
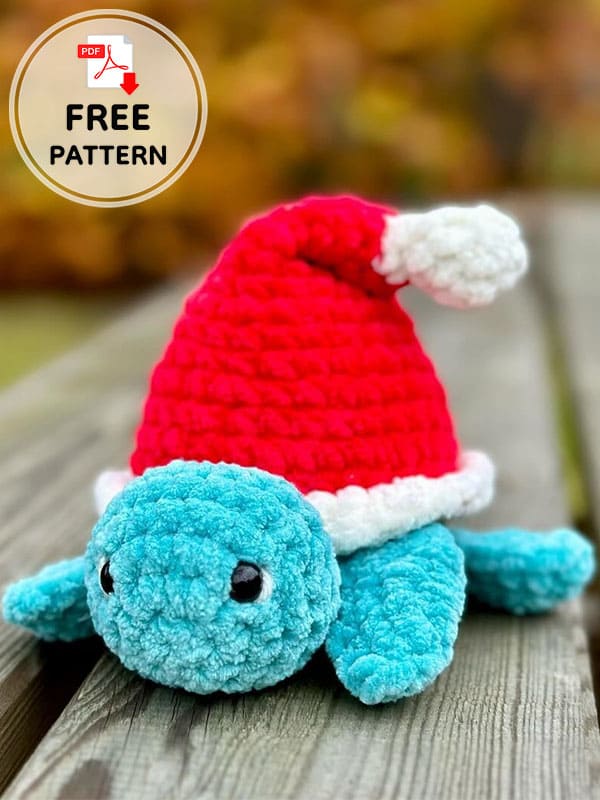
We are starting a good week and leaving November behind. I can say that we are now a little closer to Christmas time. Today, a Christmas themed amigurumi pattern is here and it is completely free. The free crochet turtle pattern will be yours as PDF. Amigurumi turtle is at the beginner level and beginners will be able to make their own santa turtle. We are making a crochet santa hat instead of the turtle’s shell. This is where all its beauty begins. If you wish, you can decorate your turtle with different Christmas decorations. Don’t be afraid to use your imagination.
Free Crochet Santa Turtle Amigurumi Pattern
Designer: tinyyarnhugs
Materials and tools
Crochet hook (I used 5 mm but use a hook that best suits your yarn)
Yarn in three colors (I used white, red and green but you can of course use other colors)
Stuffing
Stitch markers
Embroidery needles
Safety eyes
Abbreviations
Mr- Magic ring
Sc- Single crochet
Inc- Increase
Dec- Decrease
Flo- Front loop only
BLO- Back loop only
Ch- Chain
Sk- Skip
Slst- Slip stitch
Fo- Fasten off
Head
Use belly color.
R1. 6 sc in MR (6)
R2. 6 inc (12)
R3. (1sc,inc)x6 (18)
R4. (2sc,inc)x6 (24)
R5-6. sc around (24)
R7. (2sc,dec)x6 (18)
R8. (1sc,dec)x6 (12)
Slst and fasten off, leave a long tail for sewing.
Insert eyes between R 3-4. Stuff.
Fins (make 4)
Use belly color.
R1. 8 sc in MR (8)
R2. 8 inc (16)
R3. sc around (16)
R4. Fold in 2, crochet 8 sc along.
Slst and fasten off, leave a tail for sewing.
Tail
Use belly color.
R1. 4 sc in MR (4)
R2. 4 inc (8)
R3-4. sc around (8)
Slst and fasten off, leave a tail for sewing.
Crochet santa hat
Now here we will make a crochet santa hat and turtle shell. The whole feature of this crocheted turtle will be this crochet santa hat.
Start with white for the pom pom.
R1. 4 sc in MR (4)
R2. 4 inc (8)
R3-4. sc around (8)
R5. 4 dec (4)
Change color to red.
R6. FLO: 4 inc (8)
R7. (1sc,inc)x4 (12)
R8-9. sc around (12)
R10. (1sc,inc)x6 (18)
R11-12. sc around (18)
R13. (2sc,inc)x6 (24)
R14-15. sc around (24)
R16. (3sc,inc)x6 (30)
R17-18. sc around (30)
R19. (4sc,inc)x6 (36)
R20. sc around (36)
Change color to white again.
R21. FLO: sc around (36)
R22. (5sc,inc)x6 (42)
Do some slst and fasten off.
Belly
Start in back loops of R 20.
Use belly color.
R23. BLO: sc around (36)
R24. 3 sc, ch 3, sk 3, 6 sc, ch 3, sk 3, 2 sc, ch 2, sk 2, 2 sc, ch 3, sk 3, 6 sc, ch 3, sk 3, 3 sc (36)
R25. 18 dec (18)
Sew fins and tail in the holes, round sides of the fins should face front (sewing tips in assembly part)
Fold hat at preferred height, sew on lower hat.
Stuff the hat, continue as you go.
R26. 9 dec (9)
R27. 4 dec, 1 sc (5)
Sew hole and hide end.
Assembly
Sew head between front fins around rows 20-24.
When sewing the fins, round sides should face front.
Insert fins and tail into body holes and do some stitches through: body stitch – fin/tail- body stitch.
You are done!

Leave a Comment