
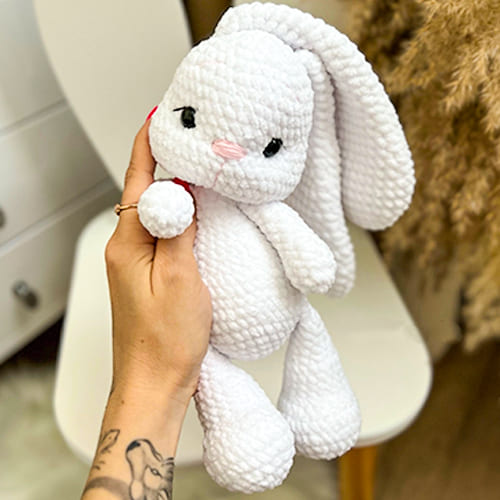

My friends, I will give you the step by step instructions for making a plush crochet bunny the Elya. The finished size of the crochet bunny is 24 cm, excluding its ears. The designer uses Lavita plush yarn and a 3.25-4mm crochet hook to make such a cute bunny. All parts of the cute plush crochet bunny pattern are crochet separately step by step. It is then carefully fixed. That’s all. Beginners will be able to easily make a cute plush bunny. This wonderful cute crochet bunny is not just an amigurumi toy, it is a symbol of love and care that can delight its owner for years. For many more crochet bunny free amigurumi patterns, take a look at our category. I wish you all a nice weekend.
Elya The Crochet Bunny Amigurumi Free Pattern
Designer: zefirka.vlg
List of materials
1. Super bulky/14 ply chenille yarn LaVita yarn Velur (100g/120m) No: 1002- 2 skeins of the main color. You can take DMC embroidering floss of fine yarn for decoration. I used 4 ply yarn YarnArt Jeans (50g/160m) No: 74.
2. Black safety eyes size 12 mm.
3. Toy stuffing material- synthetic filling.
4. Hook, I used 3.25 mm by clover for the toy and 4 mm for the ears, you can choose any suitable hook size.
5. Needle, scissors.
Abbreviations
MR: Magic ring
Slst: Slip stitch
Sc: Single crochet
Inc: Increase
Dec: Decrease
Ch: Chain
First of all, we start crocheting the head of the cute plush bunny.
Head
1. 6 sc in a MR
2. 6 inc (12)
3. (1sc, inc)*6 (18)
4. (2sc, inc)*6 (24)
5. (3sc, inc)*6 (30)
6. (4sc, inc)*6 (36)
7. (5sc, inc)*6 (42)
8-11. 42 sc
12. 9 sc, 3 inc- cheek, 18 sc, 3 inc- cheek, 9 sc (48)
13-17. 48 sc
18. (6sc, dec)*6 (42)
19. (5sc, dec)*6 (36)
20. (4sc, dec)*6 (30)
Insert safety eyes between rounds 11 and 12 (you can use eyes 10 or 12 mm. I have 12 mm). The distance between the extreme increases on the cheeks and the eyes, 3 sc each, distance between the eyes, 7-8 sc. Stuffing the head well.
21. (3sc, dec)*6 (24)
22. (2sc, dec)*6 (18), slst.
Needle sculpting. Outline points. The first point will be between rounds 21 and 22 a little to the left of the middle of the muzzle (the middle between the eyes), after 1 sc from the first point (T1) we have point T4. Points T2, T3, T5 and T6 under the eyes from the inside and outside. This is between rounds 12 and 13. T1- T2 (left eye, outer side), T3 (inner side of the left eye), then T1-T4-T5 (outer side of the right eye), T6 (inner side of the right eye), T4.
Fix with a knot and hide the ends inside the head. Bring the working thread from the tightening into the hole of the head and fix it there in the back loop.
Then repeat the tightening, only in points T1 and T4 and do not exit. Exit the thread through the hole only after points T2, T3, T5 and T6. Fix the thread.
Then you can embroider the eyebrows and nose. Next, crochet the ears and sew between rounds 4 and 5 of the head.
Ears (make 2)
1. 6 sc in a MR
2. 6 inc (12)
3. (1sc, inc)*6 (18)
4. (2sc, inc)*6 (24)
5. (3sc, inc)*6 (30)
6-9. 30 sc
10. (dec, 13 sc)*2 (28)
11. 28 sc
12. (dec, 12 sc)*2 (26)
13. 26 sc
14. (dec, 11 sc)*2 (24)
15. 24 sc
16. (dec, 10 sc)*2 (22)
17. 22 sc
18. (dec, 9 sc)*2 (20)
19. 20 sc
20. (dec, 8 sc)*2 (18)
21. 18 sc
22. (1 sc, dec)*6 (12)
23-30. 12 sc + 1 extra sc at the end of round 30, fold in half and crochet 6 sc through both sides, leave a long yarn end for sewing pieces.
Hind legs (make 2)
1. 6 sc in a MR
2. 6 inc (12)
3. (1sc,inc)*6 (18)
4. (2sc,inc)*6 (24)
5. (3sc,inc)*6 (30)
6-7. 30 sc
8. 6 sc, (1sc,dec)*6, 6sc (24), Marker runs along the heel.
9. 6 sc, 6 dec, 6 sc (18)
10-13. 18 sc
14. (1sc,dec)*6 (12), Stuff until this round.
15-18. 12 sc, fold in half and crochet 6 sc through both sides.
If you want to sew on the legs- leave a long yarn and for sewing pieces.
Forelegs (make 2)
1. 6 sc in a MR
2. 6 inc (12)
3-4. 12 sc. Stuff until this round.
5. (2sc, dec)*3 (9)
6-15. 9 sc, fold in half and crochet 4 sc through both sides.
If you want to sew on the legs- leave a long yarn end for sewing pieces.
Tail
1. 6 sc in a MR
2. 6 inc (12)
3. 12 sc
4. (2sc,dec)*3 (9) leave a long yarn end for sewing pieces. Sew the tail slightly above the hind legs. Stuff well.
Now, finally, we are working on the body part of the crochet bunny.
Body
The hind legs and forelegs are crocheted into the body.
Depending on the location of the marker, you need to crochet more or less sc. If you do not like to join them, then you can simply sew them on, but leave the threads for sewing on the legs.
1. 6 sc in a MR
2. 6 inc (12)
3. (1sc,inc)*6 (18)
4. (2sc,inc)*6 (24)
5. (3sc,inc)*6 (30)
6. (4sc,inc)*6 (36)
7. (5sc,inc)*6 (42)
8. 8 sc, 6 sc with the hind leg, 14 sc, 6 sc with the hind leg, 8 sc (42)
9-12. 42 sc
13. 12 sc, (1sc,dec)*6, 12 sc (36)
14-15. 36 sc
16. (4sc,dec)*6 (30)
17-18. 30 sc
19. (3sc,dec)*6 (24)
20. 24 sc
21. (2sc,dec)*6 (18)
22. 4 sc, 4 sc with the foreleg, 4 sc, 4 sc with the foreleg, 2 sc (18)
23. 18 sc, slst. Leave a long yarn end for sewing pieces.
Sew the ears to the head, sew the tail to the body, then hide the ends inside, fix them. Sew on the head.

Leave a Comment