
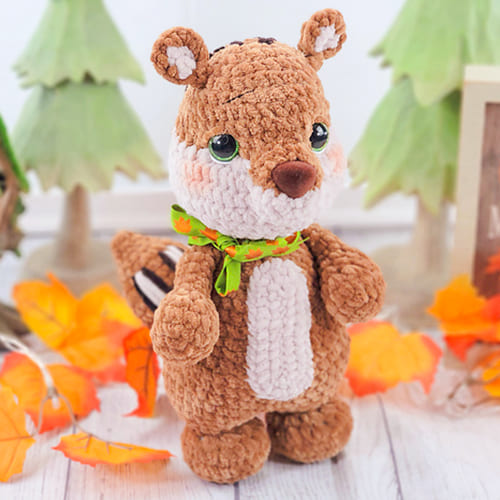
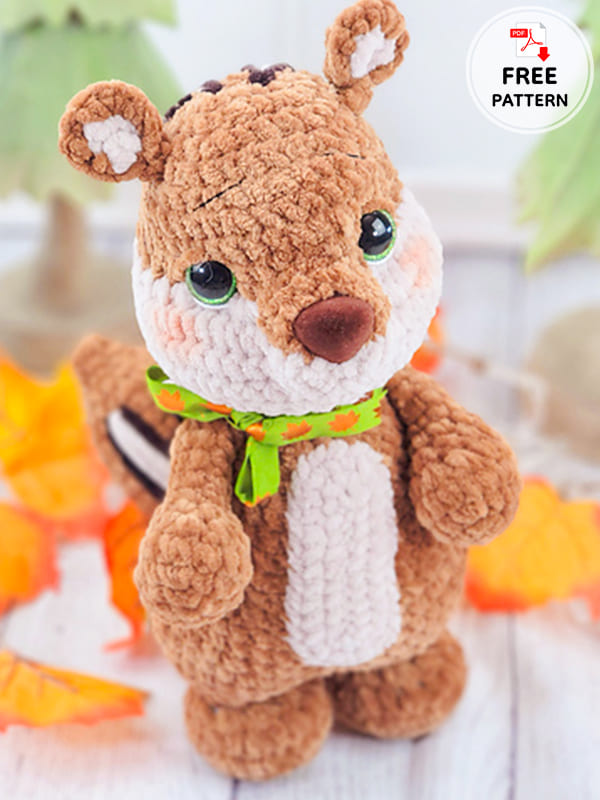
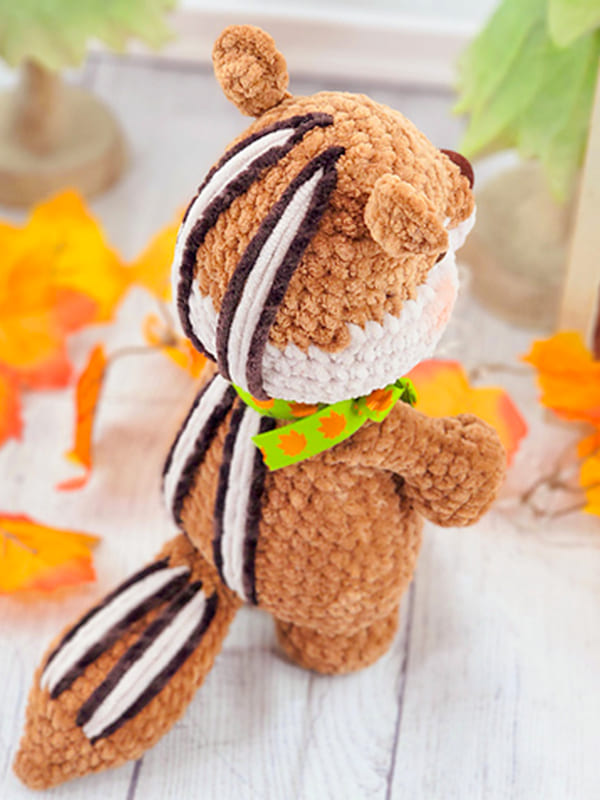
Do you like crochet squirrels? If you say yes to this, you are in the right place. You can make a detailed crochet squirrel amigurumi toy step by step. To make a fluffy squirrel amigurumi toy for your kids, all you have to do is follow the free pattern instructions. The pattern is of medium difficulty. Therefore, beginners may find it a bit difficult. However, there are many detailed pictures for you. I think this will help you a lot. Check out the instructions right now and complete the cute crochet squirrel.
Crochet Squirrel Christopher Amigurumi Free Pattern
Designer: sweetoddityart
Materials Needed:
Yarn: Chenille, Weight #6, bulky yarn
Color A: Brown, Color B: Cream, Color C: Dark Brown
Hook Size: F hook or 3.75 mm
21 mm safety eyes, 26 mm safety nose
Scissors, sewing needle, stitch marker, fiberfill stuffing
Abbreviations
MR: Magic ring
Ch: Chain
Sc: Single crochet
Slst: Slip stitch
Inc: Increase
Dec: Decrease
Dc: Double crochet
BLO: Back loops only
FLO: Front loops only
Hdc: Half double crochet
Inc3: 3 sc in the same stitch
Skill Level: Intermediate.
Size: 12 inches from bottom to top of head with weight 6 yarn and a 3.75 mm hook.
Head
Crocheted from top of head to bottom
Starting with Color A:
Ch 6
1. inc in 2nd ch from hook, 3 sc, inc3 in last chain, working on opposite side of chain: 4 sc= 12
For help working on the opposite side of the chain, refer to pg. 18
2. inc x 2, 3 sc, inc x 3, 3 sc, inc= 18
3. (sc, inc) x 2, 3 sc, (sc, inc) x 3, 4 sc, inc= 24
4. (2 sc, inc) x 2, 3 sc, (2 sc, inc) x 3, 5 sc, inc= 30
5. sc in each st around
6. (4 sc, inc) x 6= 36
7-9. sc in each st around
*In round 10, mark the 3rd inc of each set of increases, this is for eye placement*
10. 3 sc, inc x 6, 6 sc, inc x 6, 15 sc= 48
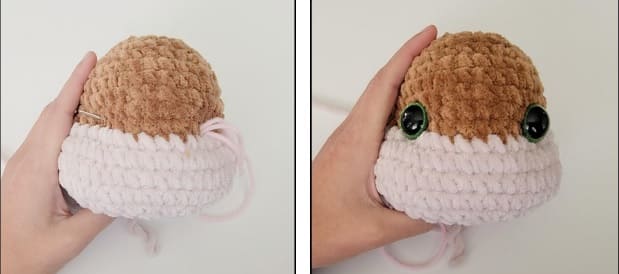
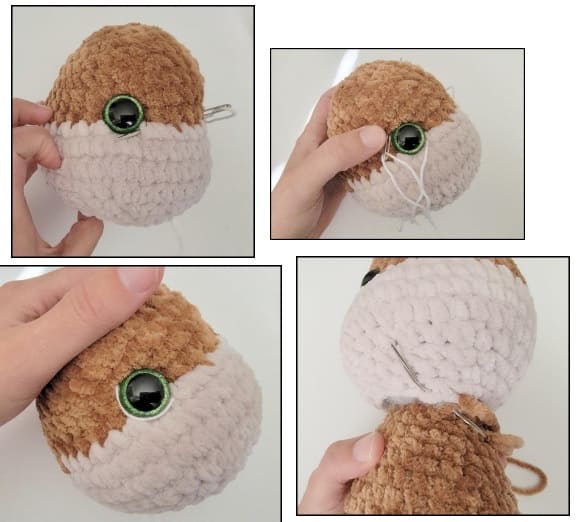
Place eyes between rounds 8 and 9, leaving 10 holes between them. Place them above the
stitch markers. Look to pictures on pg. 4 for reference. If you want the sunken eye look, do not
place the backs of the eyes on until round 15.
Change to Color B:
11-12. sc in each st around
13. 6 sc, dec x 3, 12 sc, dec x 3, 18 sc= 42
14. (sc, dec) x 14= 28
15. (5 sc, dec) x 4= 24
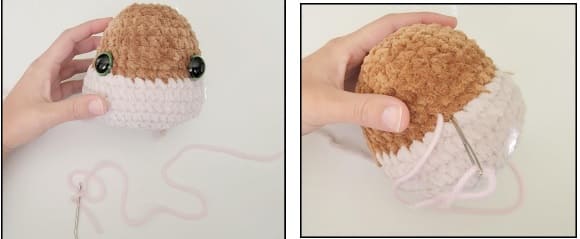
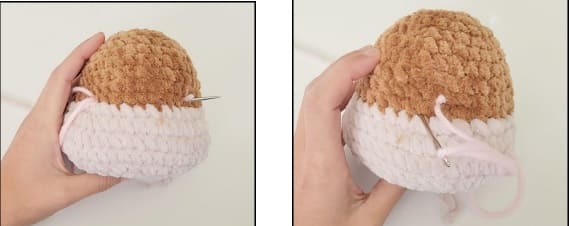
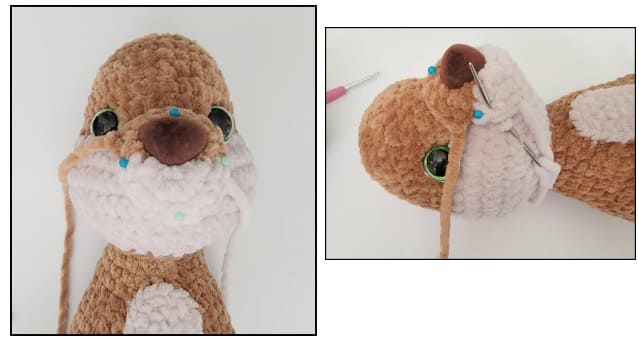
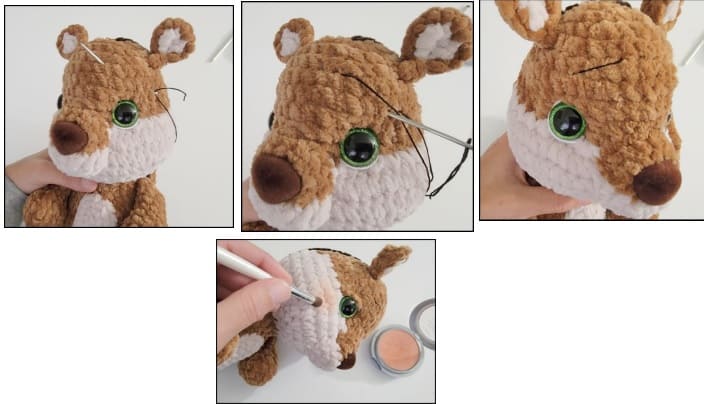
Now for the eyes. Stuff the head well. Cut a long piece of yarn and remove the eyes. Place the
needle in the hole where the first eye was and insert the needle into a hole next to the eye
hole. Go back and forth between each eye hole repeating the process from the first eye. Pull
slightly on the yarn after going through each hole. Do this about 3 times on each side until you
reach the look you want.
To place the backs of the eyes you will need to remove most of the stuffing to place the
washers on the eyes then re stuff it.
16. sc in each st around
17. (2 sc, dec) x 6= 18
Fasten off.
Arms (Make 2)
With color A:
1. Work 6 sc in a MR (6)
2. 6 inc (12)
3. (sc,inc)*6 (18)
4. sc in each st around.
5. (decx3, 3 sc)*2 (12)
Start stuffing the arms.
6. (sc,dec)*4 (8)
Stop stuffing the arms from here on
7-11. sc in each st around.
Fold the arms in half and sc the opening closed.
Fasten off and leave a long tail for sewing.
Ears (Make 2 in color A and color B)
With color B:
1. Make 4 sc in a MR (4)
2. 4 inc (8)
Do not Fasten off. Color A ear! Place the back sides of both ears together.
3. (2sc,inc)*3 (12)
Skip 3 stitches, then pinch the ears together.
Slst in the 4th st and slst across the next 2 stitches to close the ear and give the ears a pinched look.
Fasten off and leave a long tail for sewing.
Muzzle
Starting with Color B:
1. Make a magic ring, work 3 sc in Color B,
Work 3 sc in Color A= 6
2. Color B: inc x 3, Color A: inc x 3= 12
3. Color B: (sc, inc) x 3, Color A: (sc, inc) x 3= 18
4. Color B: 9 sc, (leave a long tail for sewing later) Color A: 9 sc
F/O and leave a long tail of Color A yarn for sewing too
Place nose between rounds 1 and 2.
Belly
With Color B:
Ch 12
1. sc in 2nd ch, 9 sc, inc3 in last chain,
working on opposite side of chain: 9 sc, inc= 24
2. inc, 9 sc, inc x 3, 9 sc, inc x 2= 30
F/O and leave a long tail for sewing.
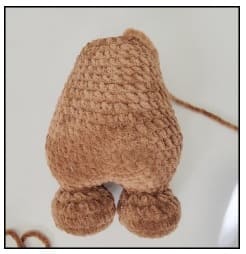
Body
With Color A:
Legs(Make 2):
1. Make 6 sc into a magic ring= 6
2. Increase in each st around= 12
3. Inc x 6, 6 sc= 18
4. (sc, inc) x 6, 6 sc= 24
5. sc in each st around
6. (sc, dec) x 6, 6 sc= 18
7. Dec x 6, 6 sc= 12
Start stuffing the legs
8. sc in each st around
9. (sc, inc) x 6= 18
On the 2nd leg, work an additional 15 sc to
move the starting point
Do not F/O the 2nd leg!
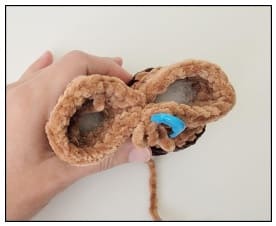
You will start connecting the legs:
1. work a sc onto the 1st leg to connect them,
Work 17 more sc around the 1st leg,
Work 18 sc around the 2nd leg= 36
2. (2 sc, inc) x 12= 48
3-5. sc in each st around
6. (6 sc, dec) x 6= 42
7-8. sc in each st around
Stuff the body as you work
9. (5 sc, dec) x 6= 36
10. sc in each st around
11. (10 sc, dec) x 3= 33
12. sc in each st around
13. (9 sc, dec) x 3= 30
14. sc in each st around
15. (8 sc, dec) x 3= 27
16. sc in each st around
17. (7 sc, dec) x 3= 24
18. (6 sc, dec) x 3= 21
19. (5 sc, dec) x 3= 18
F/O and leave a long tail for sewing.
Tail
With Color A:
1. Make 6 sc into a magic ring= 6
2. sc in each st around
3. Increase in each st around= 12
4. sc in each st around
5. (inc x 3, 3 sc) x 2= 18
Stuff the tail as you work
6. (inc x 3, 6 sc) x 2= 24
7-10. sc in each st around
11. (6 sc, dec) x 3= 21
12. sc in each st around
13. (5 sc, dec) x 3= 18
14. sc in each st around
15. (4 sc, dec) x 3= 15
Stop stuffing the tail
16. sc in each st around
17. (3 sc, dec) x 3= 12
Work 5 sc, fold the tail in half and sc the opening closed. F/O and leave a long tail for sewing.
Assembly
Head and Body:
1. Take a long strand of white yarn and thread your needle. Insert the needle into a hole in between the eyes. Bring the needle to the lower corner of the eye. Wrap the needle around the outside of the eye. Insert the needle into a hole on the top of the eye. Pull a little tightly to create a highlight for the eye. Repeat for the 2nd eye.
2. Sew the head to the body. You may need to add more stuffing as you sew.
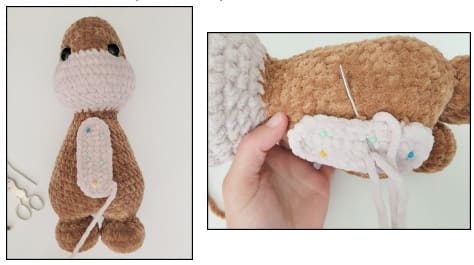
Belly:
1. Pin the belly onto the front of the body.
2. Sew the belly onto the body.
Muzzle:
1. Pin the muzzle onto the face between the eyes. Yes, you stuff the muzzle. The muzzle will start approximately between rounds 8 and 9.
2. Sew the muzzle onto the face. On the cream side, use the cream tail. On the brown side, use your brown tail to sew on the muzzle.
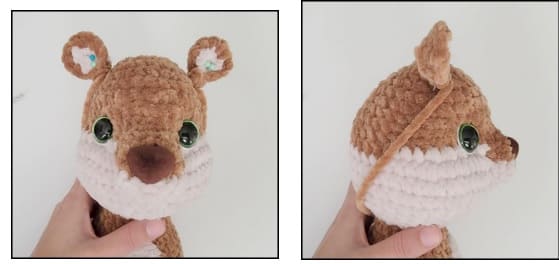
Ears:
1. Pin the ears onto the top of the head. The ears will be approximately between rounds
4 and 5 of the head.
2. Sew the ears onto the head.
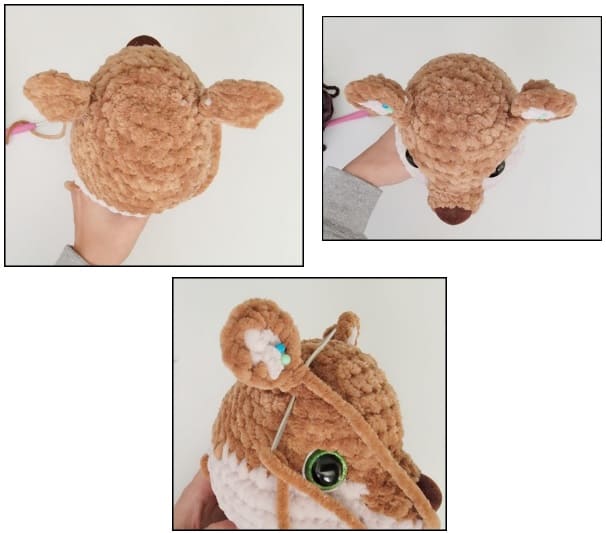
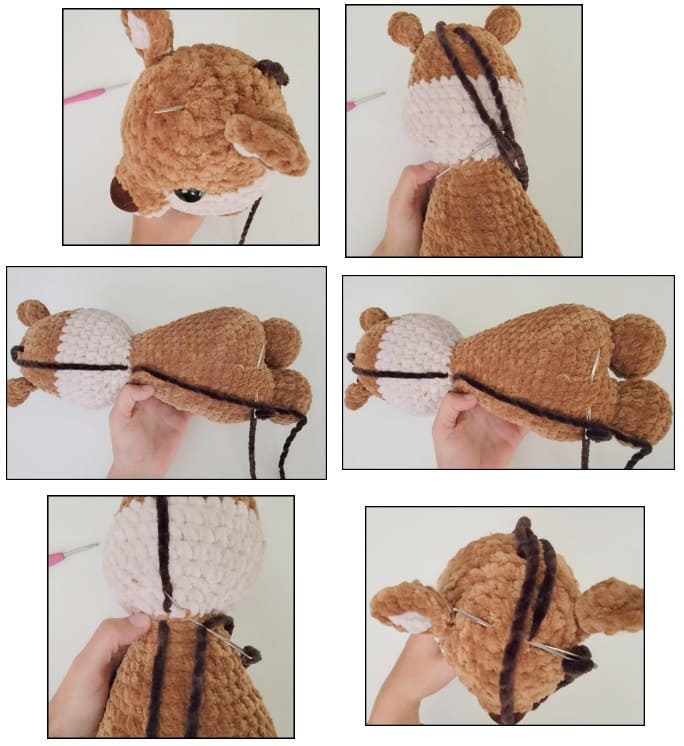
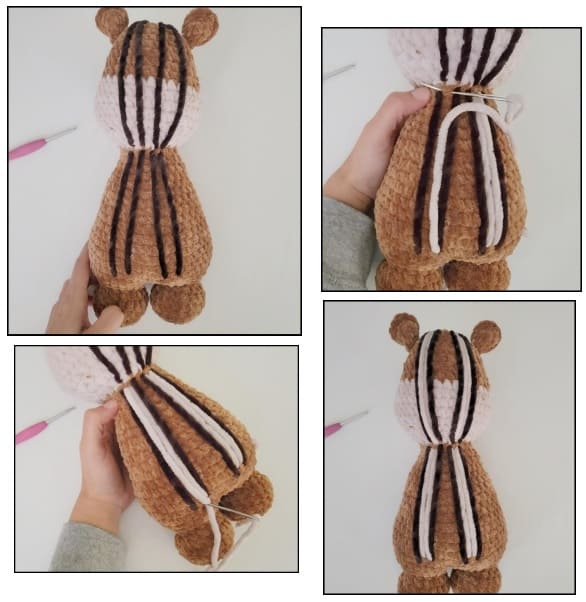
Stripes:
1. Thread your needle with a long strand of dark brown yarn. Insert the needle onto the head. The needle will come up in between rounds 1 and 2 of the head. Go down the back of the head with the needle and insert the needle into a hole on the back of the head. Bring the needle up and go down the back of the body to approximately between rounds 3 and 4 of the body to make lines.
2. Bring the needle over 2 holes and repeat step 1 to make another brown stripe going back up the body to the head.
3. Repeat the needle process to create 2 cream stripes inside the brown stripes.
4. Repeat this for another set of stripes on the other side of the body.
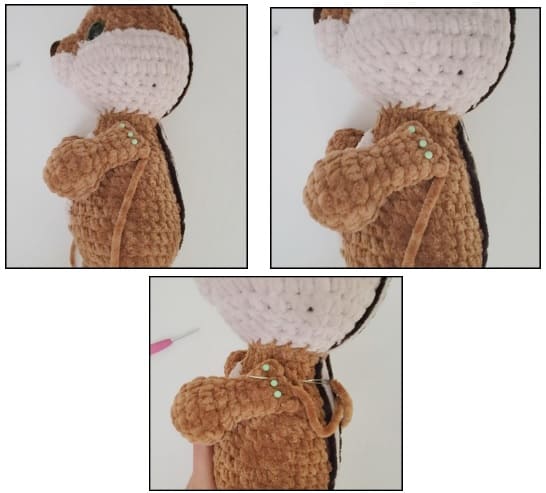
Arms:
1. Pin the arms onto the side of the body underneath the neck. I pin them going at a forward angle some.
2. Sew the arms onto the body.
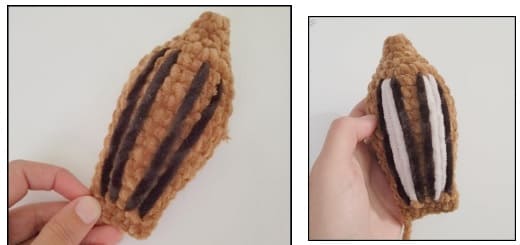
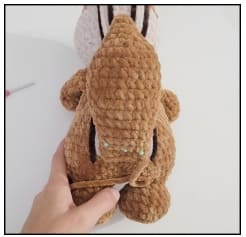
Tail:
1. Repeat the stripes process from the body onto the tail.
2. Pin the tail onto the body approximately between rounds 2 and 3.
3. Sew the tail onto the body.
Extras:
1. Thread your needle with a strand of black embroidery thread. Bring the needle above the eyes. Embroider an eyebrow. Repeat for the 2nd eyebrow. Weave in any tail ends.
2. Add some blush to the cheeks if you want with actual blush or pink crayon.
Exact Colors Used:
1. Brown: Premier Parfait Teddy Bear.
2. Cream: Premier Parfait Mushroom.
3. Dark Brown: Premier Parfait Espresso.

Leave a Comment