
We’re starting a new week with a free crochet snowman pattern. It is very enjoyable to make and is for intermediate level students. Beginners may find it a little difficult. Making a crochet beret may be challenging for you. You can use it without doing that. You can only make the scarf. It can be used that way too. Crocheted snowman figures in your home will return to you as positive energy in the new year. You will also learn how to make a crocheted New Year tree next to the snowman. The free crochet snowman pattern instructions include plenty of accessories. Check out the pattern now to experience the Christmas spirit.
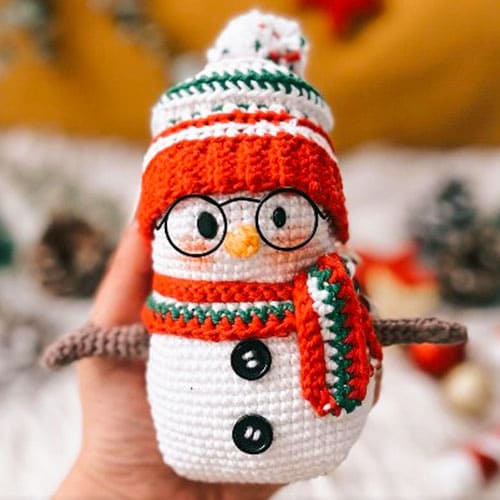
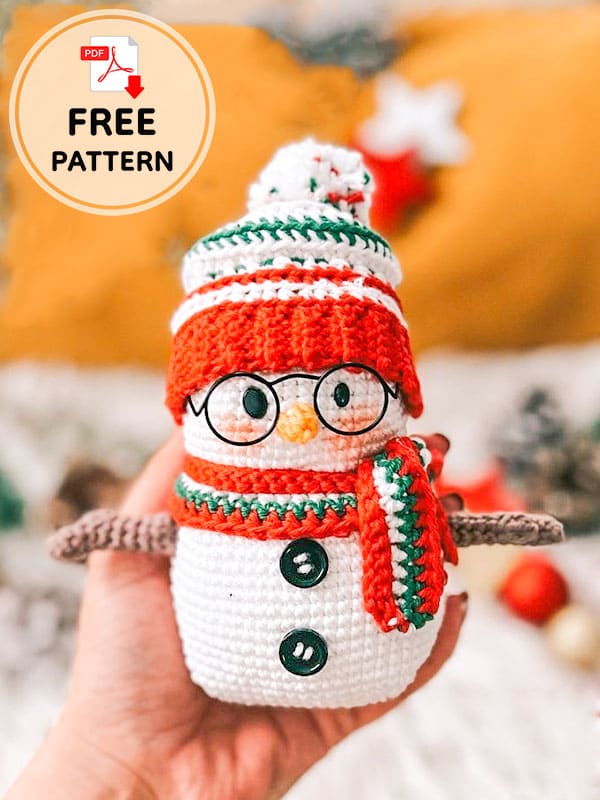
Crochet Snowman With Beanie Amigurumi Free Pattern
Designer: mrs.geegee.s
Abbreviations
St: Stitch
Ch: Chain
Tch: Turning chain
Hdc: Half double crochet
Sc: Single crochet
Slst: Slip stitch
Mr: Magic ring
Dec: Decrease
Inc: Increase
3sc/st: 3 sc in one stitch
3sc dec: crochet three stitches together
BLO: Back loop only
FLO: Front loop only
bst4: bobble stitch made of 4 hdc
Materials
Crochet hook in the size of your choice,
Yarn in the colors orange, brown, red, white, green and red,
Safety eyes size 6-8 mm or black yarn for embroidering the eyes,
2 small buttons,
fiberfill,
darning needle,
scissors,
Cardboard or pompom maker,
Stitch markers or contrasting thread,
Optional: A small pair of glasses.
Head and body (white,orange)
R1. 4 sc in MR (4)
R2. 3 sc in every st (12)
R3. (1sc,3sc/st,1sc)x4 (20)
R4. (2sc,3sc/st,2sc)x4 (28)
R5. (3sc,3sc/st,3sc)x4 (36)
R6. (4sc,3sc/st,4sc)x4 (44)
R7. (5sc,3sc/st,5sc)x4 (52)
R8-14. 52 sc (7 rounds)
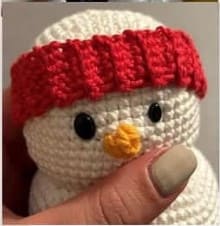
In the next round, we will crochet the nose.
R15. 25 sc, change color to orange, and crochet 3 hdc in the next two stitches.
Insert your hook into the 1st hdc and crochet it together with the 6th hdc.
Change color back to white and crochet 2 sc in the next stitch. Crochet until the end of the round (52)
R16-20. 52 sc (5 rounds)
Attach the safety eyes slightly above, to the left and right of the nose.
In the next two rounds, increase 2 sc at each corner. Crochet the next round completely into FLO.
R21. FLO (6sc,3sc/st,6sc)x4 (60)
R22. (7sc,3sc/st,7sc)x4 (48)
R23-36. 68 sc (14 rounds)
R37. (7sc,3sc/st,7sc)x4 (60)
R38. (6sc,3sc/st,6sc)x4 (52)
R39. (5sc,3sc/st,5sc)x4 (44)
R40. (4sc,3sc/st,4sc)x4 (36)
R41. (3sc,3sc/st,3sc)x4 (28)
R42. (2sc,3sc/st,2sc)x4 (20)
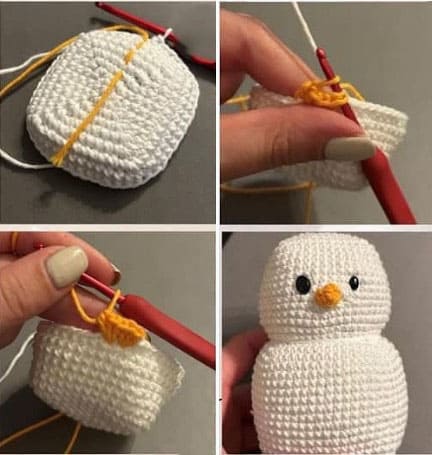
Stuff with fiberfill. When stuffing, make sure that the filling is not too tight.
Snowman should have a square shape.
R43. (1sc,3sc dec, 1sc)x4 (12)
R44. (3sc dec)x4 (4)
Cut the yarn long. Using a darning needle, thread the yarn through the front loops of the 4 remaining stitches and pull everything together. Sew the thread. Sew the two buttons onto the belly. Place a thread around the neck and pull it together a little for the shape.
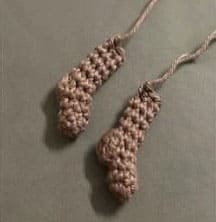
Arms (2x)
Brown.
Are not stuffed.
R1. 6 sc in MR (6)
R2-4. 6 sc (3 rounds)
R5. 1sc, 1 bst4, 4 sc (6)
Bst4: crochet 4 hdc in 1 stitch, but do not cast off the hdc completeyl until the end.
R6-9. 6 sc (4 rounds)
Crochet the arms together with 2 sc. Cut a long thread.
The arms are sewn to the sides approx. between rounds 27/28 of the body.
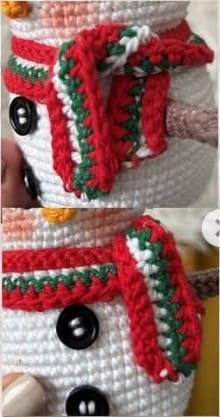
Scarf
Red, white, green.
Is crocheted in rows.
Crochet a chain long enough to wrap around the neck of snowman and for tying it into a knot afterwards. I crocheted 66 ch.
R1. Red: 65 sc, 2 tch with white.
R2. White: BLO 65 hdc, 1 tch with green.
R3. Green: 65 sc, 2 tch with red.
R4. Red: 65 hdc
Cut and sew the thread. Wrap the scarf around the body, tie the knot as shown, and secure the ends of the scarf to the belly with a few stitches.
Hat part 1
Red, white, green.
Is crocheted in rows. We will crochet a cuff consisting of sc. Star with a chain of 6 ch.
R1-44. BLO 5 sc, 1 tch
Continue crocheting this pattern until the hat fits around your head.
I crocheted a total of 44 rows. The number of rows you work will later be the number of stitches per round of the hat. Crochet the ends together with 5 sc.
Do not cut the thread.
Hat part 2
Green, red, white.
Is crocheted in joined rounds.
R1. Red: 1 ch, 44 sc, slst in the ch
R2. White: 2 ch, BLO 44 hdc, slst in the 2nd ch
R3. Red: 2 ch, BLO 44 hdc, slst in the 2nd ch
R4. White: 2 ch, BLO 44 hdc, slst in the 2nd ch
R5. White: 2 ch, 44 hdc, slst in the 2nd ch
R6. Green: 1 ch, BLO 44 hdc, slst in the 2nd ch
R7. White: 2 ch, BLO 44 hdc, slst in the 2nd ch
R8. Red: 2 ch, BLO 44 hdc, slst in the 2nd ch.
The decreases begin in the next round. If you have a different number of stitches, adapt the pattern to your hat. Decrease approx. 10-11 stitches per round.
You can also simply continue crocheting the pattern. It doesn’t matter if there are stitches missing of left over at the end of each round.
R9. Red: 2 ch, (2hdc,2 hdc dec) 11x, slst in the 2nd ch (33)
R10. Red: 2 ch, (1 hdc, 2 hdc dec)11x, slst in the 2nd ch (22)
R11. Red: 2 ch, (2 hdc dec)11x, slst in the 2nd ch (11)
Cut the yarn long. Using a darning needle, thread the yarn through the front loops of the 11 remaining stitches and pull everything together. Sew the thread.
Embroider a green row between rounds 4 & 5.
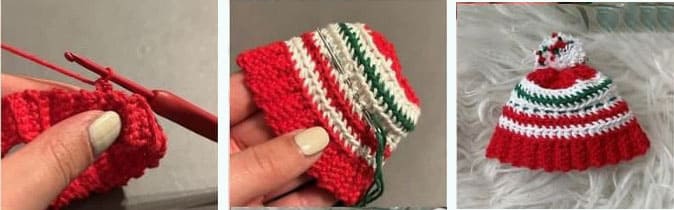
Pompom
Red, white, green.
Cut a piece of cardboard to the right size. The height of the cardboard determines how big your pompom will be in the end.
Cut a slit in both sides of the cardboard and thread a piece of yarn through them.
You will use this thread to pull the pompom tight later. Now wrap the different colors alternately around the cardboard. The main color used here is white.
Use only a few threads of the other colors as accents.
Now tie the thread from the beginning tightly together. Cut the wrapped threads at the top and bottom. If necessary, knot everything together again with a thread. Trim the pompom so that it looks neat and even.

Step by step pompom:

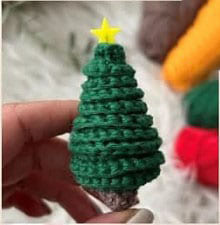
Little christmas tree
Green, brown.
Start in brown.
R1. 6 sc in MR (6)
R2-3. 6 sc (2 rounds)
Change color to green:
R4. inc x6 (12)
R5. (1sc,inc)x6 (18)
R6. (1sc,inc,1sc)x6 (24)
R7-8. BLO 24 sc (2 rounds)
R9. BLO (6sc,dec)x3 (21)
R10. BLO (5sc,dec)x3 (18)
R11. BLO (4sc,dec)x3 (15)
R12. BLO 15 sc
Stuff the tree with filling.
R13. BLO (3sc,dec)x3 (12)
R14. BLO 12 sc
R15. BLO (2sc,dec)x3 (9)
R16. BLO (1sc,dec)x3 (6)
Cut the yarn long. Using a darning needle, thread the yarn through the front loops of the 6 remaining stitches and pull everything together. Sew the thread.
Reattach the green yarn to the first visible stitch at the bottom and crochet sc until you reach the top. Cut and sew the yarn.

Leave a Comment