
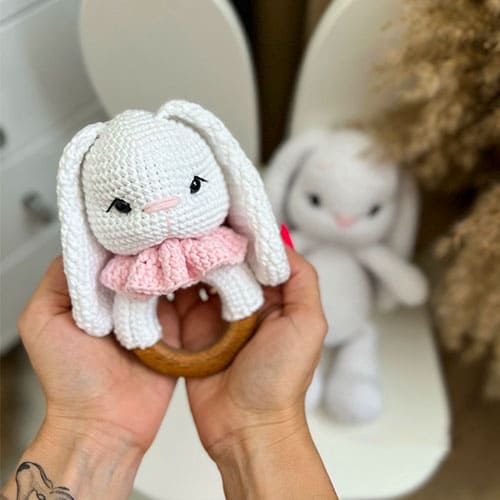
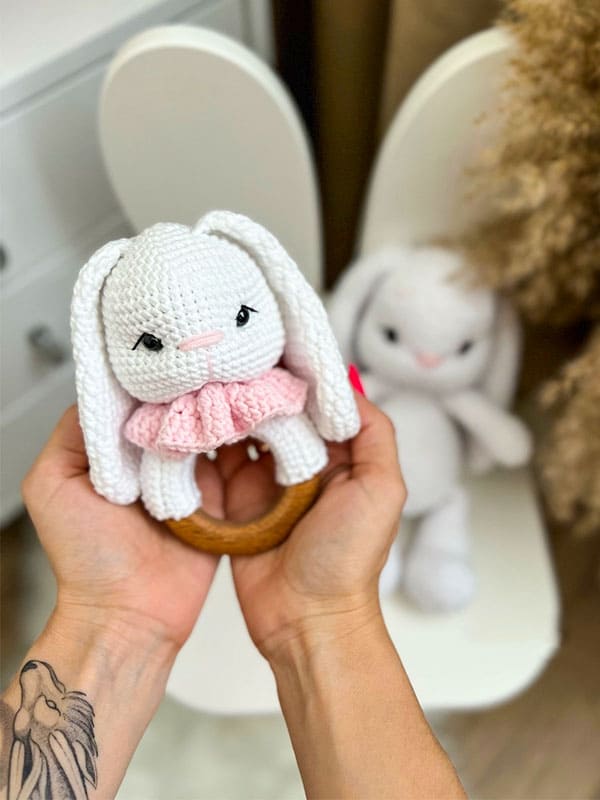
I shared with you a crochet bunny pattern called elya. This time I brought the crochet rattle pattern. Since you love the Elya bunny, I think you will love the rattle too. Making the cute bunny is quite simple. Because there is only head and ear part. The remaining parts are fixed to the rattle. All you have to do is follow the amigurumi pattern instruction step by step. Our designer used a 2.2.25 crochet hook to make a cute crochet bunny. You will also need a wooden ring with a diameter of 65-70 mm and a rattle. Check out our free instruction right now to make a handmade and safe rattle for your babies.
Crochet Rattle Bunny Elya Free Amigurumi Pattern
Designer: zefirka.vlg
List of materials
1. sine/4 ply yarn YarnArt Jeans (50g/160m) No. 62 and No. 74;
2. Black safety eyes size 8 mm;
3. Toy stuffing material – synthetic filling;
4. Hook 2 – 2.25 mm by clover;
5. Wooden ring 65-70 mm;
6. Round rattle 24 mm;
7. Needle, scissors
Abbreviations
MR: Magic ring
Slst: Slip stitch
Ch: Chain
T-ch: Turning chain
Sc: Single crochet
Inc: Increase
Dec: Decrease
Hdc: Half double crochet
Hdcinc: Half double crochet increase (2 hdc in one stitch)
Hdc2tog: Crochet 2 hdc together
BLO: Back loops only
Head
1. 6 sc in a MR
2. 6 inc (12)
3. (1sc,inc)*6 (18)
4. (2sc,inc)*6 (24)
5. (3sc,inc)*6 (30)
6. (4sc,inc)*6 (36)
7. (5sc,inc)*6 (42)
8. (6sc,inc)*6 (48)
9-13. 48 sc
14. 10 sc, 3 inc- cheek, 21 sc, 3 inc- cheek, 11 sc (54)
15-20. 54 sc
21. (7sc,dec)*6 (48)
22. (6sc,dec)*6 (42)
23. (5sc,dec)*6 (36)
24. (4sc,dec)*6 (30)
Insert safety eyes between rounds 12 and 13. The distance between the extreme increases on the cheeks and the eyes 4 sc each. Stuff the head well and insert a rattle.
25. (3sc,dec)*6 (24)
26. BLO: (2sc,dec)*6 (18)
27. (1sc,dec)*6 (12), slst. Stuff the head with fiberfill, spread it from the center to the sides, paying special attention to the cheeks.
Needle sculpting: outline points. The first point will be between rounds 24 and 25 a little to the left of the middle of the muzzle (the middle between the eyes), after 1 sc from the first point (T1) we have point T4. Points T2, T3, T5 and T6 under the eyes from the inside and outside. This is between rounds 13 and 14. T1-T2 (left eye, outer side), T3 (inner side of the left eye), then T1-T4-T5 (outer side of the right eye)- T6 (inner side of the right eye)- T4. Fix with a knot and hide the ends inside the head. Bring the working thread from the tightening into the hole of the head and fix it there in the back loop. Then repeat the tightening, only in points T1 and T4 and do not exit. Exit the thread through the hole only after points T2, T3, T5 and T6. Fix the thread. Then you can embroider the eyebrows and nose. Next, crochet the ears and sew between rounds 4 and 5 of the head.
Ears (make 2)
1. 6 sc in a MR, Next work with hdc stitches.
2. 6 hdcinc (12)
3. (1hdc,hdcinc)*6 (18)
4. (2hdc,hdcinc)*6 (24)
5-6. 24 hdc
7. (hdc2tog,10 hdc)*2 (22)
8. 22 hdc
9. (hdc2tog,9 hdc)*2 (20)
10. 20 hdc
11. (hdc2tog,8 hdc)*2 (18)
12. 18 hdc
13. (1hdc,hdc2tog)*6 (12)
14-20. 12 hdc
21. 6 dec (work with sc)+ 1 extra sc, fold in half and crochet 3 sc through both sides, leave a long yarn end for sewing pieces. Sew the ears between rounds 4 and 5.
Collar
Work in front loops of round 26:
1. (3 sc in one stitch)*24 (72)
2-4. 72 hdc or dc (if you want the collar longer and looser), or you can work with dc stitches only 2 rounds instead of 3.
+ 3 extra sc at the end of round 4, slst. Weave in the ends on the wrong side.
Ring edging
1. Ch 31, work in rows
2. 30 sc, t-ch hide the yarn end from the beginning into stitches.
3-11. 13 rows of 30 sc. The number of rows may depend on the width of the ring. The most important thing is that it is tightly pressed to the ring when you sew it on. Otherwise, the rattle itself will hang out.
Sew the edging to the ring with a needle.
How to sew on the head.

Leave a Comment