
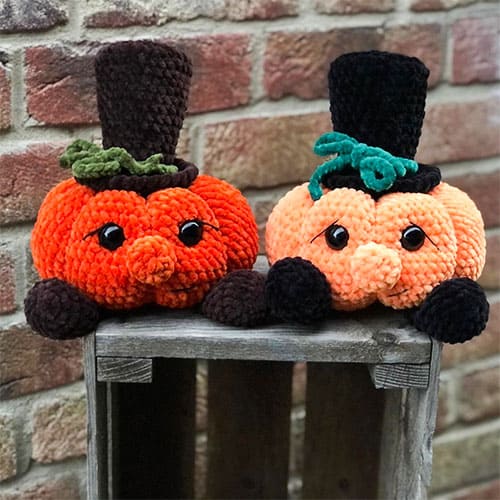
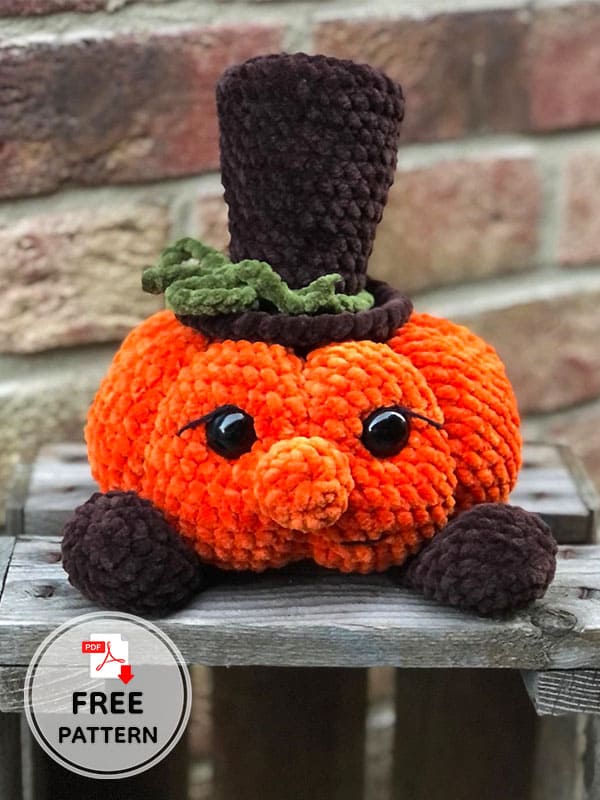
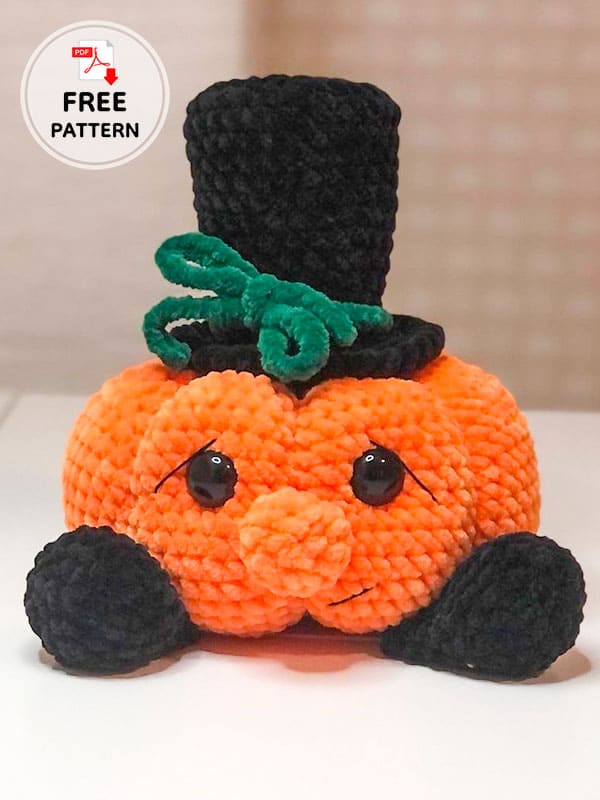
Continue reading our article for crochet pumpkin and complete this cute pumpkin. The height of the crochet pumpkin will be 8 cm. But only if you use the specified materials and a 2mm crochet hook. You may not be able to achieve the same size with different materials. As Halloween approaches, the pumpkin crochet pattern free is available for. You’ll also find a hat pattern instruction to decorate your pumpkin in the free pattern. So this Halloween you will have the coolest pumpkin. Read our list of step by step instructions and start processing your pumpkin right now. There’s very little time left until Halloween, so be quick. Happy Halloween!
Crochet Pumpkin With Hat Free Amigurumi Pattern
Designer: shema_toys
Necessary materials:
• Primary color yarn. I have Gazzal baby cotton (orange, black and green/purple);
• Crochet hook No. 2 mm;
• Filler;
• Eyes size:6 mm;
• Thread to match the color of the toy for sewing on parts. Brown thread of the “Floss” type for embroidering a face.
Abbreviations
MR- Magic ring
Ch- Chain
Sc- Single crochet
Dec- Decrease
Inc- Increase
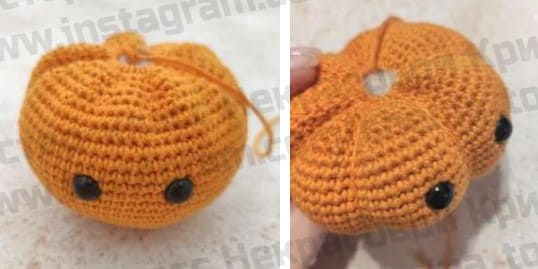
Pumpkin
This piece is crochet from bottom to top.

1: 9 sc in MR (9);
2: 9 inc (18);
3: (1 sc, inc)*9 (27)
4: 1 sc, inc,(2 sc, inc)*8, 1 sc (36)
5: 36 sc (36);
6: (5 sc, inc)*6 (42);
7: 3 sc, inc, ( 6 sc, inc)*5, 3 sc (48);
8: (5 sc, inc)*8 (56);
9: 3 sc, inc, (6 sc, inc)*7 (64);
10: (7 sc, inc)*8 (72);
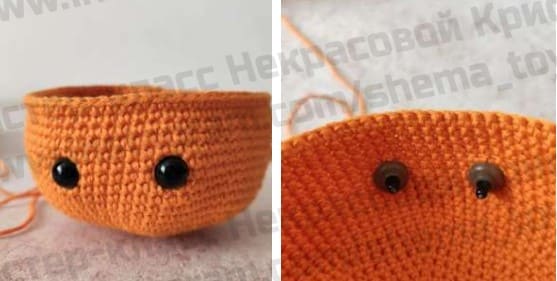
11-22: 72 sc (72);
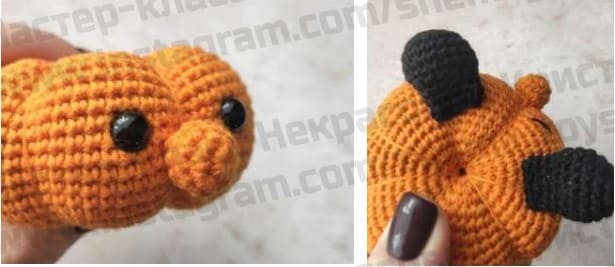
If you are using safety eyes, they should be insert at a distance of 7-8 sc between the 17th and 18th rows.
23: (7 sc, dec)*8 (64);
24: (6 sc, dec)*8 (56);
25: (5 sc, dec)*8 (48);
26: (4 sc, dec)*8 (40);
27: (3 sc, dec)*8 (32), slst.
Leave a long thread so that you can use it to decorate the shape of the pumpkin itself (veins).
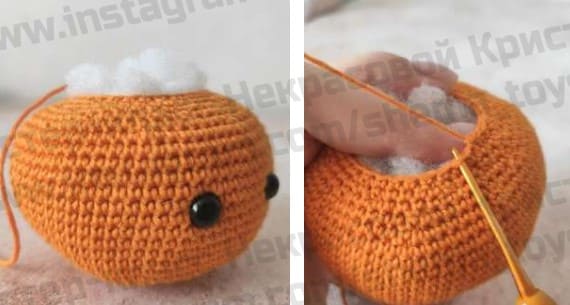
Fill the part.
Next there will be a tightening, you should pull the loops behind the front wall of the loops, pull them carefully, slowly, so as not to break the thread. Also, for convenience, you can continue tightening to the required level and then tighten the part.
The first vein runs between the eyes.
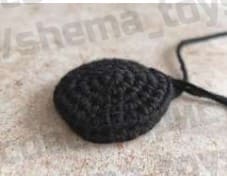
Nose
1: 6 sc in MR (6);
2: 6 inc (12);
3: 12 sc (12);
4: (2 sc, dec)*3, slst.
Leave a long thread to sew on the nose.

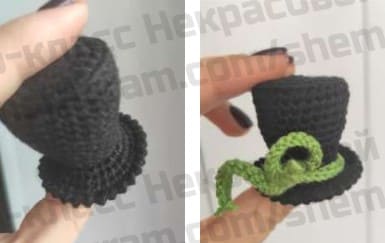
Hat
1: 6 sc in MR (6);
2: 6 inc (12);
3: (1 sc, inc)*6 (18);
4: (2 sc, inc)*6 (24);
5: Behind the back walls of the loops (3 sc, inc)*6 (30);
6: 30 sc(30);
7: (8 sc, dec)*3 (27)
8-10: 27 sc (27);
Place a base (plastic or cardboard, according to the size of your circle, i.e. hat) on the bottom of the hat.
11: (7 sc, dec)*3 (24);
12: 24 sc(24);
13:(6 sc, dec)*3 (21);
14-17: 21 sc (21);
18: behind the front walls of the loops (inc, 1 sc)*10, inc (32);
19-20: 32 sc (32);
The hat should also be filled to better hold its shape.
Using a green thread, tie 1 or 2 laces or a string depending on your preference.
Paws
1: 6 sc in MR(6);
2: 6 inc(12);
3: (1 sc, inc)*6(18);
4-6: 18 sc(18);
7: (1 sc, dec)*6(12);
8-9: 12 sc(12);
Fill the paws, fold the piece and knit it on both sides. Leave thread on one of the feet for sewing.

Assembly
Since the eyes are already attached when crocheting, we sew the nose next; I placed it between my eyes, at a slightly lower level. Then you sew the hat and paws, locating them yourself, ALWAYS do an assembly first using a needle. After everything is sewn, you need to embroider the face (eyelids, eyebrows if desired, mouth, as shown in the photo). You can also apply light coloring around the eyes.

Leave a Comment