
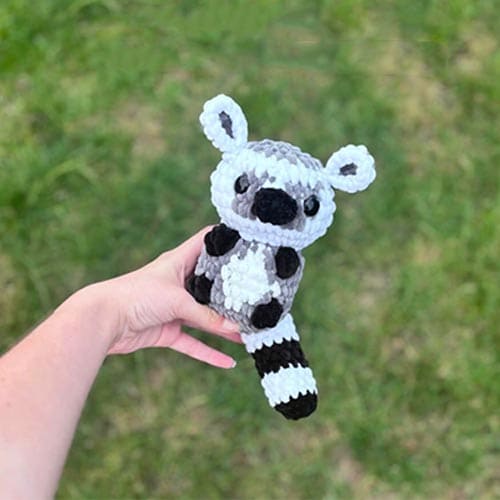
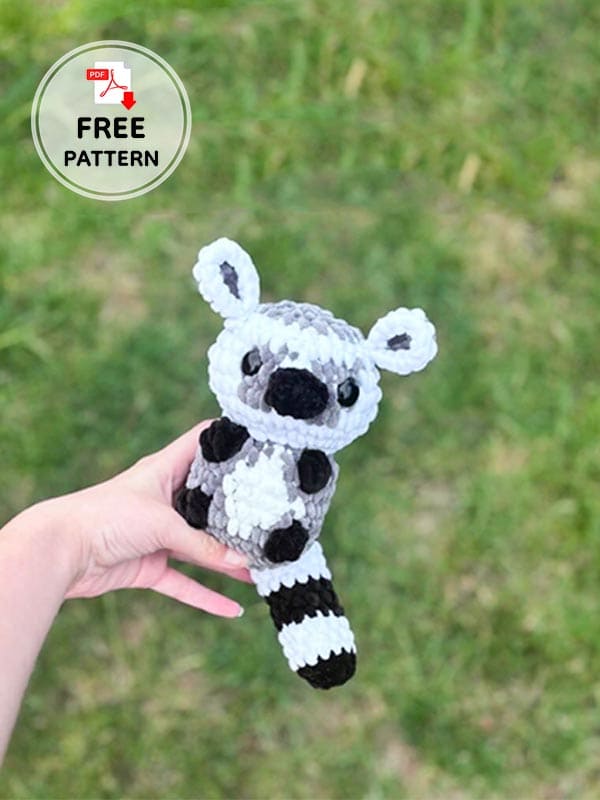
Hello, we continue with our crochet animal series on a beautiful Monday. Today we have a crochet lemur in our crochet animal series. Since I don’t see crochet lemur amigurumi very often, I wanted to share it with you for a change. You will have a lot of fun making this crochet animal, which looks very cute. This crochet lemur is very cute with its long tail and big nose. I wrote in detail the color changes while making its striped body. If you follow the pattern instructions carefully, you can make this cute crochet lemur without any difficulty. Since the body and head are made in one piece, most of the work will be finished in one go.
Design by: crochetedbyholly
Materials:
I used a 4 mm crochet hook.
16 mm eyes.
Sewing needle.
Scissors.
Yarn: grey, white, black (or whatever colours you’d like).
Abbreviations:
Ch- Chain
Sc- Single crochet
Inc- Increase
Dec- Decrease
Slst- Slip stitch
MR- Magic ring
CC- Colour change
BO- Bobble stitch
FO- Fasten off
Crochet Lemur Pattern
Body & head
Worked from bottom up.
Starting in grey:
R1. 6 sc in MR
R2. inc x6 (12)
R3. sc, inc x6 (18)
R4. 2 sc, inc x6 (24)
R5. 3 sc, inc x6 (30)
R6. sc all around (30)
R7. 9 sc (grey) BO (black) 2 sc (grey) 2 sc (white) 2 sc (grey) BO (black) 13 sc (grey) (30)
R8. 11 sc (grey) 4 sc (white) 15 sc (grey) (30)
R9. 10 sc (grey) 6 sc (white) 14 sc (grey) (30)
R10. 13 sc (grey) 4 sc (white) 13 sc (grey) (30)
R11. 10 sc (grey) BO (black) 2 sc (grey) 2 sc (white) 2 sc (grey) BO (black) 12 sc (grey) (30)
R12. 15 dec (15)
CC to white.
R13. 15 inc (30)
Stuff the body well.
R14. 4 sc, inc x6 (36)
R15. 5 sc, inc x6 (42)
R16. 20 sc (white) 3 sc (grey) 3 sc (white) 3 sc (grey) 13 sc (white) (42)
R17. 19 sc (white) 3 sc (grey) 5 sc (white) 3 sc (grey) 12 sc (white) (42)
R18. 5 sc, dec x2 5 sc (white) dec, 3 sc (grey) 2 sc (white) dec, 2 sc (grey) 3 sc, dec, 5 sc, dec (white) (36)
R19. 4 sc, dec x6 (30)
R20. 3 sc, dec x6 (24)
CC to grey.
R21. 2 sc, dec x6 (18)
R22. 1 sc, dec x6 (12)
R23. dec x6 (6)
Add safety eyes between R17-18 about 6 stitches apart.
Due to tension you may have o move around the colour changes, make sure they line up with the belly patch and bobble stitches.
Ears & nose
Ears – make 2:
Start in grey.
R1. 6 sc in MR
R2. 1 sc, inc x3 (9)
CC to white.
R3. 2 sc, inc x3 slst (12)
Pinch together and slst 1.
FO & leave a long tail to sew onto head.
Nose:
In black.
R1. Ch 4
2 sc, 3 scinc
1 sc on the opposite side inc
R2. sc 8 slst
FO & leave a long tail to sew onto head.
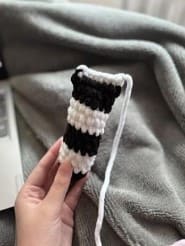
Tail
Start in black.
R1. 6 sc in MR
R2. inc x6 (12)
R3. 5 sc, inc x2 (14)
CC to white.
R4-6. sc all around (14)
CC to black.
R7-9. sc all around (14)
CC to white.
R10-12. sc all around (14)
CC to black.
R13-15. sc all around (14)
Stuff lightly.
CC to white.
R16. sc through both sides (7)
FO & leave a long tail to sew onto body.
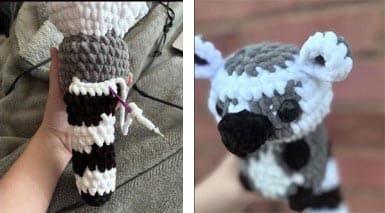
Assemble
Sew the tail onto the back of the body in between R6-7.
Sew the ears in between R19-20 3 stitches behind the eyes.
Sew the nose in between R16-18 in the middle of the eyes.
And you’re done!
Leave a Comment