
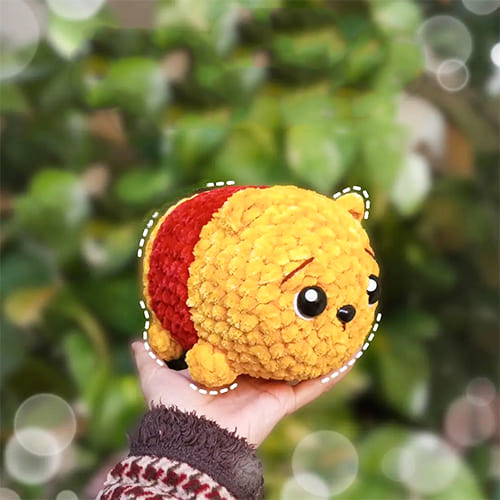
The best surprise of the day has arrived. Here is the winnie the pooh crochet pattern with you. You will have a lot of fun while making this easy level crochet winnie the pooh pattern. The head and body of the crochet winnie the pooh are made of one piece. The remaining parts are made separately and assembled to the body. Since the feet, arms and tail are the same, they are all made at the same time. Since the ears are different, you only make them separately. Here is a wonderful easy crochet winnie the pooh pattern that will be completed quickly below. You can easily complete the amigurumi bear crochet winnie the pooh pattern with many detail photos.
Design by: crochet_nuna
Crochet Winnie The Pooh
Supplies
• Yarn in yellow, red, small amount of dark brown yarn, white and black for adding features
• Crochet hook
• Stitch marker
• Nose (Optional. You can embroider if you want.)
• Safety eyes (I used 18mm)
• Fiberfill
• Yarn needle
• Scissors
• Hot glue (for gluing the eyes on)
Abbreviations
• mr – magic ring
• sc – single crochet
• ch – chain
• inc – increase
• dec – decrease
• st – stitch
• sts – stitches
We will be inserting the eyes at the end.
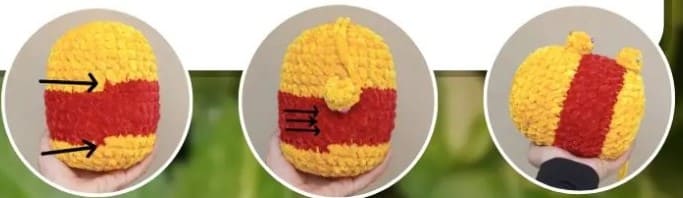
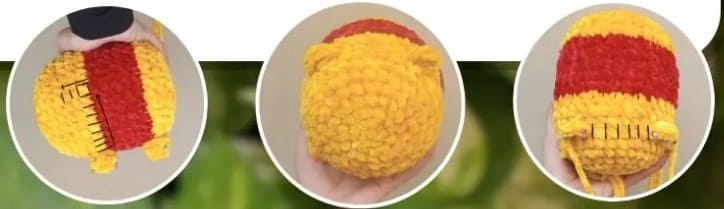
Head and body
Start with yellow.
R1. 5 sc in the mr (5)
R2. (inc)x5 (10)
R3. (1sc,1inc)x5 (15)
R4. (2sc,1inc)x5 (20)
R5. (3sc,1inc)x5 (25)
R6. (4sc,1inc)x5 (30)
R7. (5sc,1inc)x5 (35)
R8-R11. 35 sc for 4 rows (35)
R12-R16. 35 sc for 5 rows (35)
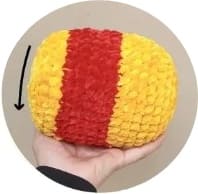
Change color to yellow.
R17. 1 sc in each st (35)
R18. (5sc,1dec)x5 (30)
R19. (4sc,1dec)x5 (25)
Start stuffing.
R20. (3sc,1dec)x5 (20)
R21. (2sc,1dec)x5 (15)
We want this side flat so stuff accordingly.
R22. (1sc,1dec)x5 (10)
Sew the hole with needle and fasten off.
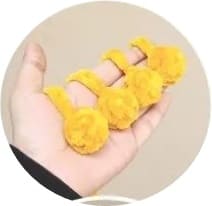
Hands (X2), feet (X2) & tail
Start with yellow.
R1. 6 sc in the mr (6)
R2. 1 sc in each st (6)
Leave a tail for sewing. Don’t stuff.
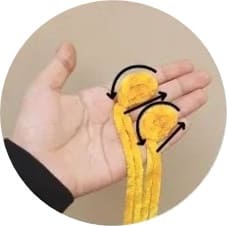
Ears (X2)
Start with yellow.
R1. 4 sc in the mr (4)
Leave a tail for sewing. Don’t tighten the magic circle too much as we’ll need one side round and one side flat.
Assembly
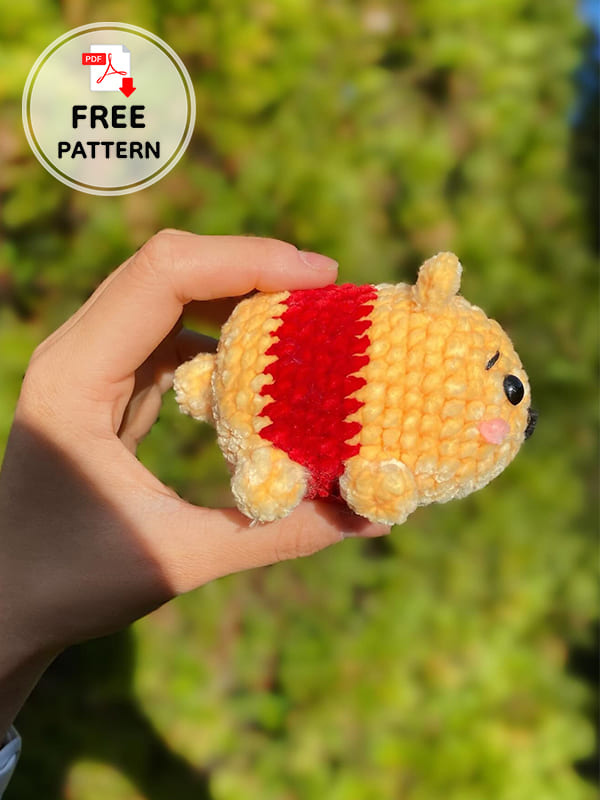
Hands and feet:
Place one hand on the uneven row. Count 3 rows as shown in the 2nd picture and place the foot covering the 2nd uneven row.
Then starting from the first hand skip 6sts and place the 2nd hand on the 7th st. Do the same for 2nd foot.
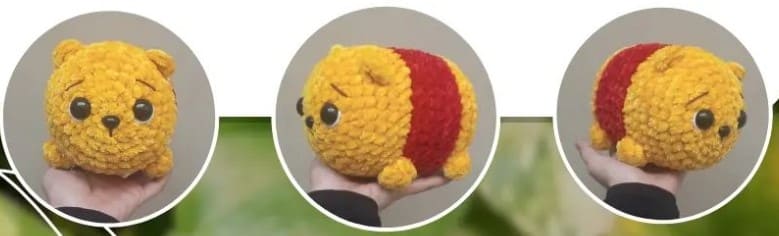
Ears:
Start from the hand and skip 8sts (going up) and skip 3 rows horizontally. Place the ear between the 3rd and 4th row. Do the same for 2nd ear.
The should be a distance of 5-6 sts between the ears (I had 5sts).
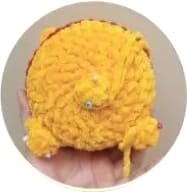
Tail:
Place the tail in the middle of the bottom.
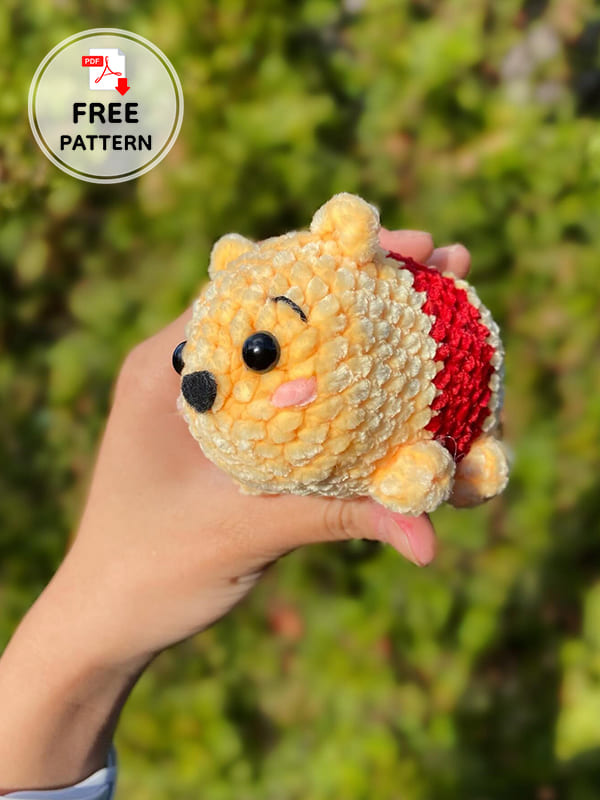
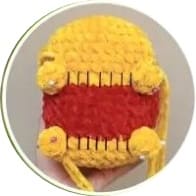
Eyes, nose and eyebrows:
We’re gonna be attaching the eyes now. Starting from the ears, count 5 rows and place the eyes between 5th and 6th row. There should be a distance of 4-5 sts between both eyes.
Attach or embroider nose. Embroider eyebrows using the pictures as reference.
Optional: Add final touches around the eyes and nose.
Leave a Comment