
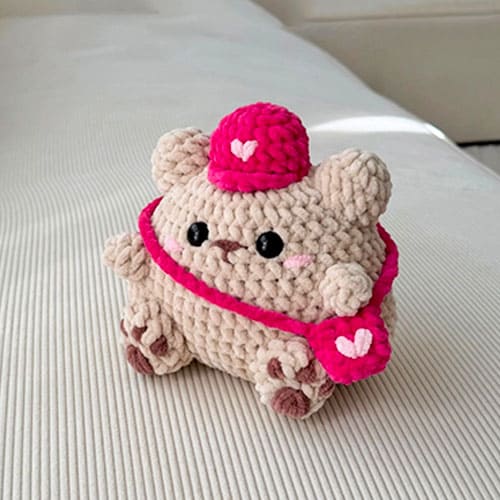
If you are looking for a cute and quick crochet project, a mini crochet teddy bear is the perfect choice. These tiny amigurumi bears are popular as handmade gifts, keychains, or decorative items, especially for Valentine’s Day and baby showers. Thanks to their small size, they can be completed in a short time and require only basic crochet skills.
A small crochet teddy bear pattern is ideal for beginners who want to practice amigurumi techniques such as single crochet, increasing, decreasing, and working in the round. Using simple yarn colors and minimal sewing, this project helps build confidence while creating an adorable finished toy. The compact size also makes it a great option for using leftover yarn from other projects.
Mini crochet teddy bears are lightweight, customizable, and easy to personalize with accessories like hats, scarves, or tiny bags.
How to crochet a mini teddy bear for beginners
Learning how to crochet a mini teddy bear for beginners starts with choosing the right materials. A soft cotton or acrylic yarn and a small crochet hook will help you achieve tight, even stitches. Most mini teddy bear patterns are worked in continuous rounds, which is ideal for beginners learning amigurumi basics.
Start by crocheting the head and body as one piece to reduce sewing. Then create small arms and legs separately and attach them securely. Safety eyes or embroidered details can be used depending on whether the teddy bear is intended for decoration or for children.
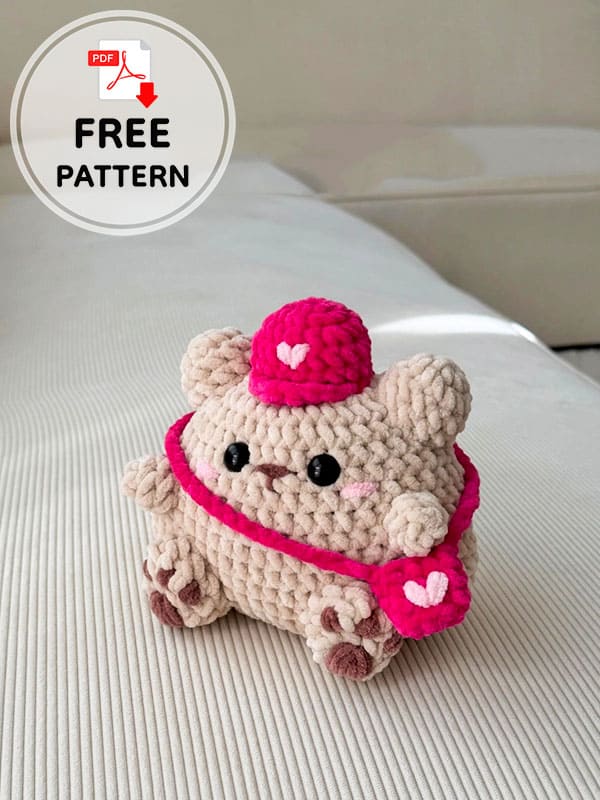
Designer: lau_crochetstudio
Materials for the Small Crochet Teddy Bear:
• Beige yarn for the body.
• Pink yarn for the accessories.
• Light pink yarn for the heart detail and cheeks.
• Brown yarn for the paw pawds.
• Hook (5 mm and 4 mm for the accessories)
• Safety eyes.
• Needle
• Scissors
• Stuffing
Abbreviations:
MR- magic ring
sc- single crochet
inc- increase
dec- decrease
ch- chain
hdc- half double crochet
dc- double crochet
tr- treble crochet
BLO- back loop only
FLO- front loop only
slst- slip stitch
Let’s get started.
Body
Begin with beige yarn:
R1. ch 18 (18)
Skip first ch.
R2. 16 sc, 3 sc in one, 15 sc, inc (36)
R3. inc, 15 sc, 3 inc, 15 sc, 2 inc (42)
R4. sc, inc, 15sc, (sc,inc)x3, 15 sc, (sc,inc)x2 (48)
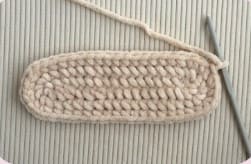
This is how the body will look at the end of R4.
R5-8. 48 sc (48)
R9. (22sc,dec)x2 (46)
R10. 46 sc (46)
R11. (21sc,dec)x2 (44)
R12. 44 sc (44)
R13. (20sc,dec)x2 (42)
R14. (19sc,dec)x2 (40)
R15. (18sc,dec)x2 (38)
R16. (17sc,dec)x2 (36)
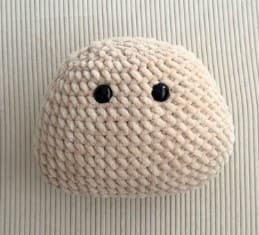
Insert eyes R12-13 4 stitches apart.
R17. 18 dec (18)
R18. 18 sc (18)
Stuff.
R19. (sc,dec)x6 (12)
R20. 6 dec (6)
Cut the yarn and leave a tail to sew the hole closed.
Ears (2)
R1. 6 sc in MR (6)
R2. 6 inc (12)
R3-4. 12 sc (12)
Cut the yarn and leave a tail for sewing.
Stuff.
Now that we’ve made the ears, we can move on to making the arms. The little bear is slowly starting to take shape, isn’t it?
Hands (2)
R1. 4 sc in MR (4)
R2. (sc,inc)x2 (6)
R3. 6 sc (6)
Cut the yarn and leave tail for sewing.
Stuff.
We’ve finished the arms, now let’s make the little bear’s legs.
Legs (2)
R1. 6 sc in MR (6)
R2. (sc,inc)x3 (9)
R3. 3sc, 3 dc in one, 5 sc (11)
R4. 11 sc (11)
Cut the yarn and leave a tail for sewing.
With brown yarn embroider the paw pads.
Stuff.
We finished the teddy bear. Isn’t making a teddy bear so easy?
Now we’ll make the accessories; you can use a 4mm crochet hook for this.
Cap
R1. 7 sc in MR (7)
R2. 7 inc (14)
R3. (sc,inc)x7 (21)
R4-5. 21 sc (21)
R6. FLO: 9 slst, sc, hdc, dc, tr, dc, hdc, sc, 5 slst (21)
Cut the yarn and leave a tail for sewing.
Stuff.
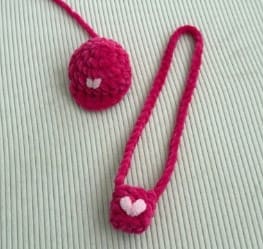
Bag
R1. Ch 4 skip first ch.
R2. 2 sc, 3 sc in one, 2 sc, inc (9)
R3. BLO: 9 sc (9)
R4-5. 9 sc (9)
For the strap I made ch 52, but check if the length fits your teddy bear.
Than slst on the other side of the bag to create the strap.
The last thing to do is to embroider the small heart detail.
Now, all that’s left to do is to sew all the pieces together, embroider the teddy’s nose and cheeks and add its accessories.
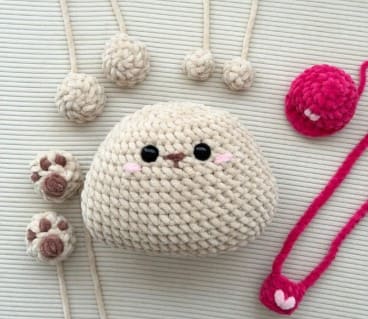
And this is finished teddy bear!
Leave a Comment