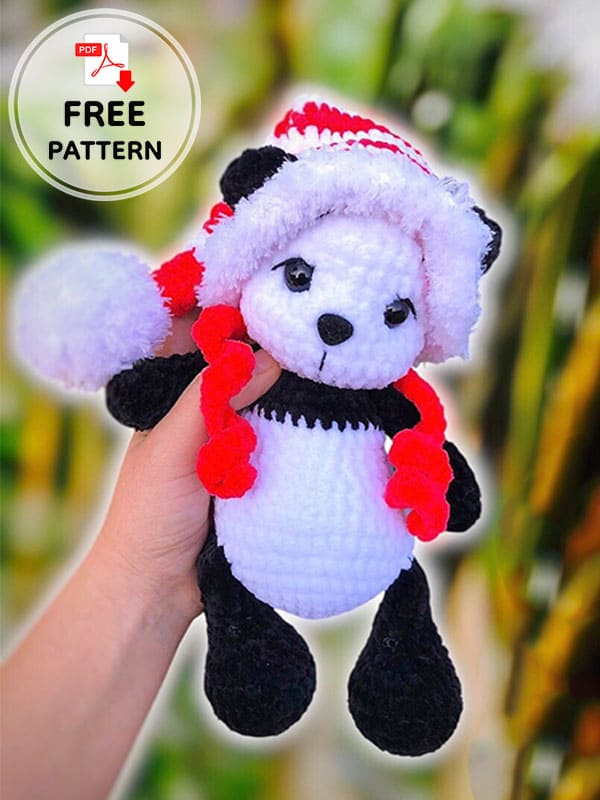
Free crochet panda pattern and crochet christmas hat come together. I can say that this is one of the most beautiful amigurumi patterns that you should make this Christmas. This crochet panda made with plush yarn that children will love looks very nice with the christmas hat. After making the panda separately, you will make a christmas hat to decorate it. You can use this hat separately, or you can use only the panda without using it at all. But it looks much better with the hat. A detailed crochet panda pattern is waiting for you below, step by step.
Design by: plushworld_by_stefi
Free crochet panda with christmas hat pattern
Materials and tools:
1. Plush yarn (I used wolans bunny baby white, black and red color).
Fluffy yarn for the pom-pom.
Little bit of black and white cotton yarn for the face sculpting and to embroider the mouth, eyes and eyebrows.
You can use hook size and safety eyes matching to your yarn.
2. Hook size: 3.5 mm.
3. Scissors.
4. Safety eyes size: 12 mm.
5. Safety nose: 12 mm.
6. Needle.
7. Fiber filling (stuffing)
8. Stitch marker.
Abbreviations:
MR- Magic ring
St/sts- Stitch/stitches
Ch- Chain
Sc- Single crochet
Rnd- Round
Inc- Increase
Dec- Decrease
Slst- Slip stitch
Let’s start crocheting the panda from the head first, friends, we will go step by step.
Head
Crochet with white color. Stuff as you go.
Rnd 1.6 sc in MR (6)
Rnd 2.6 inc (12)
Rnd 3. (1 sc, inc)* 6 (18)
Rnd 4. (2 sc, inc)* 6 (24)
Rnd 5. (3 sc, inc)* 6 (30)
Rnds 6-8.30 sc (3 Rnds)
Rnd 9. (4 sc, inc)* 6 (36)
Rnds 10-13. 36 sc (4 Rnds)
Insert the safety eyes between rounds 9-10, distance between 5 visible stitches.
Insert the safety nose between rounds 11-12.
Rnd 14. (4 sc, dec )* 6 (30)
Rnd 15. (3 sc, dec)* 6 (24)
Rnd 16. (2 sc, dec )* 6 (18)
Rnd 17. (1 sc, dec )* 6 (12)
Rnd 18. 6 dec (6)
Sew the hole closed.
Fasten off and weave in the ends.
Now we will shape the panda’s face.
Tighten and face sculpting
Follow the steps from the picture.
Tighten each end of the thread well and then tighten both ends at once.
Embroider eyelids and eyebrows.
Embroider the muzzle below the nose (see picture).
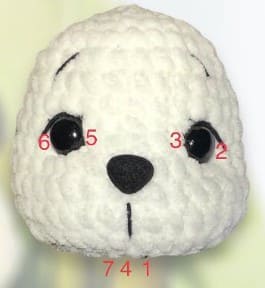
As seen in the example picture, after compressing and shaping the panda’s face, we can make its tail.
Tail
Crochet with black color.
Stuff as you go.
Rnd 1. 6 sc in MR
Rnd 2. 6 inc (12)
Rnd 3. 12 sc
Rnd 4. 6 dec
Fasten off and leave a tail for sewing.
Sew the tail on the back between rounds 8 and 9.
Ears (make two)
Crochet with black color. Do not stuff.
Rnd 1. 6 sc in MR
Rnd 2. 6 inc (12)
Rnd 3. 12 sc
Fold the ear and crochet 6 sc through both layers.
Fasten off and leave a tail for sewing.
Don’t sew the ears until after making hat to get correct fitting.
I sewed the ears between rounds 5 and 9.
Arms (make two)
Crochet with black color. Stuff as you go, until round 7.
Rnd 1. 6 sc in MR
Rnd 2. 6 inc (12)
Rnd 3. (1sc,inc)*6 (18)
Rnd 4. (1sc,dec)*6 (12)
Rnd 5. 3 sc, 3 dec, 3 sc (9)
Rnd 6. 3 sc, dec, 4 sc (8)
Rnd 7-11. 8 sc (5 rnds)
Fold the arm and crochet 4 sc through both layers.
Fasten off and weave in the ends.
Legs (make two)
Crochet with black color.
Stuff as you go until round 11.
Rnd 1. 6 sc in MR
Rnd 2. 6 inc (12)
Rnd 3. (1sc,inc)*6 (18)
Rnd 4. (2sc,inc)*6 (24)
Rnd 5-6. 24 sc (2 rnds)
Rnd 7. 6 sc, 6 dec, 6 sc (18)
Rnd 8. 5 sc, 4 dec, 5 sc (14)
Rnd 9. 5 sc, 2 dec, 5 sc (12)
Rnd 10-14. 12 sc (5 rnds)
Fold the leg and crochet 6 sc through both layers.
Fasten off and weave in the ends.
Body
Start with white color. Stuff as you go.
Rnd 1.6 sc in MR
Rnd 2. 6 inc (12)
Rnd 3. (1 sc, inc)* 6 (18)
Rnd 4. (2 sc, inc)* 6 (24)
Rnd 5. (3 sc, inc)* 6 (30)
Rnd 6. (4 sc, inc)* 6 (36)
Rnd 7. (5 sc, inc)* 6 (42)
In the next round connect the legs.
Rnd 8. 8 sc, 6 sc with the left leg, 14 sc, 6 sc with the right leg, 8 sc (42) Rnds 9-10. 42 sc (2 Rnds)
Rnd 11. (5 sc, dec )* 6 (36)
Rnd 12. 36 sc
Rnd 13.2 sc, dec, (4 sc, dec )* 5, 2 sc (30)
Rnd 14. 30 sc
Change the color to black.
Rnd 15. 30 sc
Rnd 16. (3 sc, dec )* 6 (24)
In the next round connect the arms.
Stitch marker must be placed in the center of the back. Add ot remove sc if necessary.
Rnd 17. 4 sc, 4 sc with the left arm, 8 sc, 4 sc with the right arm, 4 sc (24)
Rnd 18. (2 sc, dec )* 6 (18)
Rnd 19. (1 sc, dec )* 6 (12)
Fasten off and leave a long tail for sewing the body with the head.
We have completed the panda, now let’s start making its accessory, the Christmas hat.
Hat
Start with red color.
Rnd 1. 6 sc in MR
Rnd 2. (2sc,inc)*2 (8)
Rnd 3. 8 sc
Rnd 4. (3sc,inc)*2 (10)
Change the color to white.
Rnd 5. 10 sc
Rnd 6. (4sc,inc)*2 (12)
Change the color to red.
Rnd 7. 12 sc
Rnd 8. (5sc,inc)*2 (14)
Change the color to white.
Rnd 9. 14 sc
Rnd 10. (6sc,inc)*2 (16)
Change the color to red.
Rnd 11. 16 sc
Rnd 12. (7sc,inc)*2 (18)
Change the color to white.
Rnd 13. 18 sc
Rnd 14. (8sc,inc)*2 (20)
Change the color to red.
Rnd 15. 20 sc
Rnd 16. (9sc,inc)*2 (22)
Change the color to white.
Rnd 17. 22 sc
Rnd 18. (10sc,inc)*2 (24)C
Change the color to red.
Rnd 19. 24 sc
Rnd 20. (5sc,inc)*4 (28)
Change the color to white.
Rnd 21. 28 sc
Rnd 22. (6sc,inc)*4 (32)
Change the color to red.
Rnd 23. 32 sc
Rnd 24. (7sc,inc)*4 (36)
Change the color to white.
Rnd 25. 36 sc
In the next round make the holes for the ears.
Rnd 26. 8 sc, chain 6 (skip 6), 8 sc (between the ears), chain 6 (skip 6), 8 sc (36)
Change the color to red.
Rnd 27. (5sc,inc)*6 (42)
Rnd 28. (6sc,inc)*6 (48)
Rnd 29. 48 sc
Next round crochet with fluffy yarn.
Rnd 30. 48 inc
If you crochet with plush yarn instead of fluffy then make:
Ch, slst all around the hat.

Pom-pom for the hat
White color. Stuff as you go.
Rnd 1. 6 sc in MR
Rnd 2. 6 inc (12)
Rnd 3. (1sc,inc)*6 (18)
Rnd 4. (2sc,inc)*6 (24)
Rnd 5-6. 24 sc (2 rnds)
Rnd 7. (2sc,dec)*6 (18)
Rnd 8. (1sc,dec)*6 (12)
Rnd 9. 6 dec
Sew the hole closed.
Fasten off and leave a tail for sewing.
The pom-pom to the hat.
Sew the ball on round 1 of the hat.
Fasten off and weave in the ends.
Straps (make two)
Crochet with red color.
Attach the yarn on the side of the hat (round 29, right under the edge of the holes for the ears) and make chain 30, 1 sc in each loop and attach with slst to the hat (same loop).
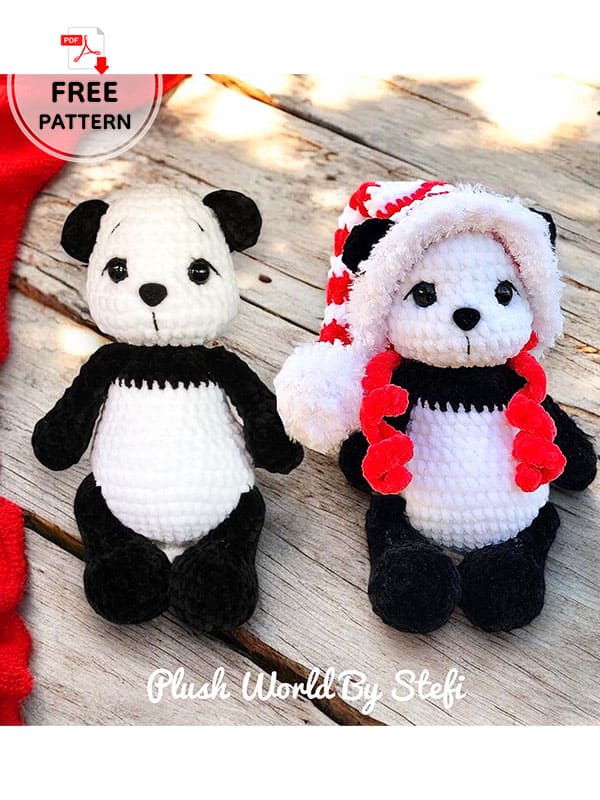
Cute panda is ready for Christmas!

Leave a Comment