Hello everyone who loves amigurumi,
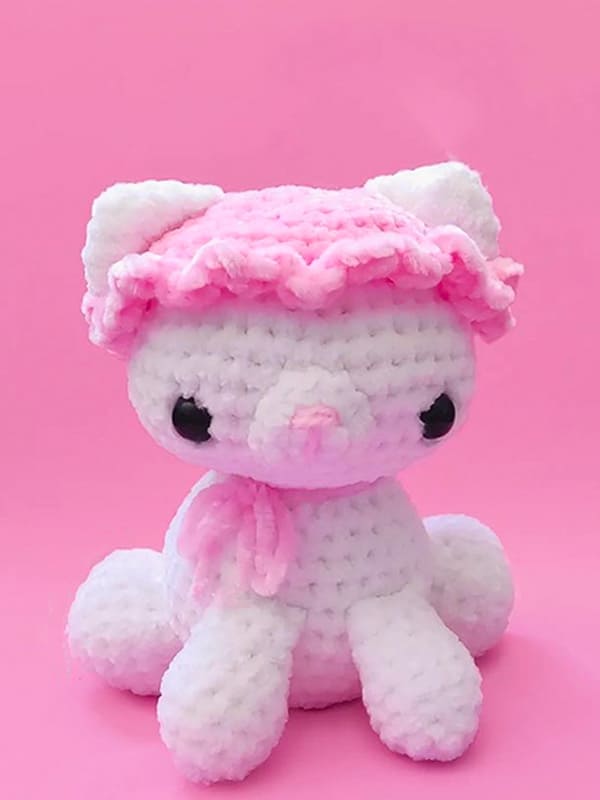
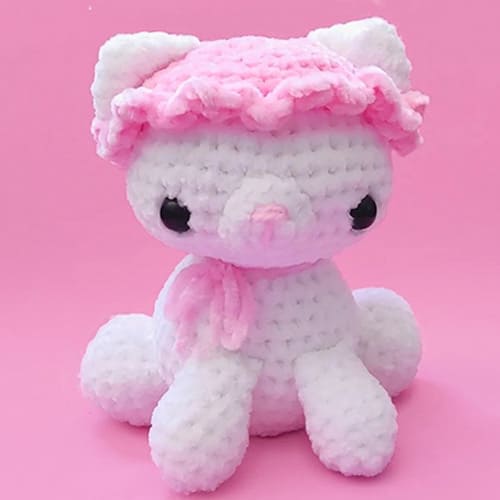
I shared a free crochet cat amigurumi patterns for you. The cute crochet cat amigurumi pattern is easy to crochet step by step. Crocheted using white yarn. It will be the children’s favorite amigurumi toy. You can give it as a gift to your loved ones. You can use the free amigurumi cat pattern for decor in your home.
You can crochet the cute crochet cat hat pattern amigurumi using different colors of yarn. We will crochet the cat’s hat separately. A yellow and blue hat would look great. Don’t forget to tie a bow tie around your neck after you’re done. Thank you to the creator of the free amigurumi patterns.
Crochet Cat Hat Toys Amigurumi Free Pattern PDF
Designer: cocoa_loops
Abbreviations
MR- magic ring
sc- single crochet
inc- increase
dec- decrease
hdc- half double crochet
FLO- front loop only
slst- slip stitch
Rnd- round
st- stitch
Materials
2 colours of chunky yarn
Crochet hook
Darning needle
polyfill stuffing
Safety eyes
Scissors
Head
Rnd 1. 6sc in a MR (6)
Rnd 2. inc x 6 (12)
Rnd 3. (1sc, inc) x 6 (18)
Rnd 4. (2sc, inc) x 6 (24)
Rnd 5. (3sc, inc) x 6 (30)
Rnd 6. (4sc, inc) x 6 (36)
Rnd 7. (5sc, inc) x 6 (42)
Rnd 8-13. sc around (42) 6 rounds
Add safety eyes between round 10 and 11, 9st apart
Start stuffing
Rnd 14. (5sc, dec) x 6 (36)
Rnd 15. sc all around (36)
Rnd 16. dec all around (18)
Fasten off, don’t leave a tail
Stuff well
Hat
Rnd 1. 6sc in a MR (6)
Rnd 2. inc x 6 (12)
Rnd 3. (1sc, inc) x 6 (18)
Rnd 4. (2sc, inc) x 6 (24)
Rnd 5. (3sc, inc) x 6 (30)
Rnd 6. (4sc, inc) x 6 (36)
Rnd 7. (5sc, inc) (42)
Rnd 8. (6sc, inc) (48)
Rnd 9-10. 48sc (48) 2 rounds
Rnd 11. FLO, (3 hdc, 1 slst) x 24 (96)
Fasten off, leave a long tail for sewing
Body
Rnd 1. 6sc in a MR (6)
Rnd 2. inc x 6 (12)
Rnd 3. (1sc, inc) x 6 (18)
Rnd 4. (2sc, inc) x 6 (24)
Rnd 5. (3sc, inc) x 6 (30)
Rnd 6. (4sc, inc) x 6 (36)
Rnd 7-10. 36sc (36) 4 rounds
Start stuffing
Rnd 11. (4sc, dec) x 6 (30)
Rnd 12. 30sc
Rnd 13. (3sc, dec) x 6 (24)
Rnd 14. 24sc
Rnd 15. (2sc, dec) x 6 (18)
Fasten off, leave a long tail for sewing
Stuff well
Muzzle
Rnd 1. 6sc in a MR (6)
Rnd 2. inc all around (12)
Fasten off and embroider a nose
Leave a long tail for sewing
Front Paws (x2)
Rnd 1. 6sc in a MR (6)
Rnd 2. inc x 6 (12)
Rnd 3-5. 12sc (12) 3 rounds
Start stuffing lightly
Rnd 6. (1sc, dec) x 4 (8)
Rnd 7-8. 8sc (8) 2 rounds
Fasten off, leave a long tail for sewing
Stuff lightly
Legs (x2)
Rnd 1. 6sc in a MR (6)
Rnd 2. inc x 6 (12)
Rnd 3. (1 st, inc) x 6 (18)
Rnd 4. (2 st, inc) x 6 (24)
Rnd 5. 24sc (24)
Start stuffing
Rnd 6. (2 st, dec) x 6 (18)
Rnd 7. (1 st, dec) x 6 (12)
Fasten off, leave a long tail for sewing
Stuff well
Ears (x2)
Rnd 1. 4sc in a MR (4)
Rnd 2. inc x 4 (8)
Rnd 3. (1sc, inc) x 4 (12)
Rnd 4. 12sc (12)
Fasten off, leave a long tail for sewing
Tail
Rnd 1. 6sc in a MR (6)
Rnd 2. 6sc
Rnd 3. (1sc, inc) x 3 (9)
Rnd 4-6. 9sc (9) 3 rounds
Rnd 7. (1sc, dec) x 3 (6)
Rnd 8-12. 6sc (6) 5 rounds
Fasten off, leave a long tail for sewing
Stuff lightly
Assembly
Sew the hat to the head through the BLO of the last st
Sew the ears to the hat, 2 st apart from the brim
Sew the muzzle between the eyes
Sew the head to the body
Sew the front paws between round 10-11 of the body, 2 st apart
Sew the legs between round 9-10 of the body, towards the back
Sew the tail between round 6-7 of the body
EDIT:
Legs
Rnd 3. (1st,inc)x6 (18)
Rnd 4-6. 18 sc
Rnd 7. (1st, dec)x6 (12)
You have completed the amigurumi pattern.


Leave a Comment