
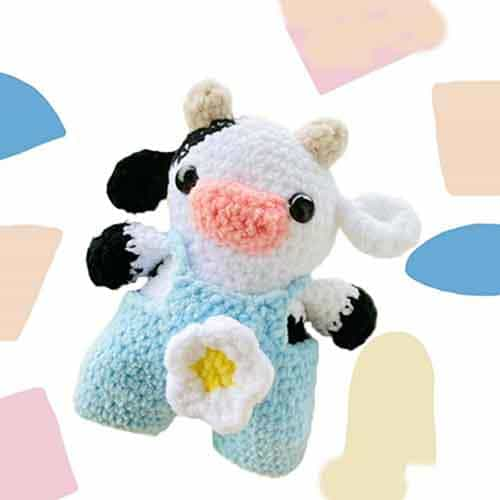
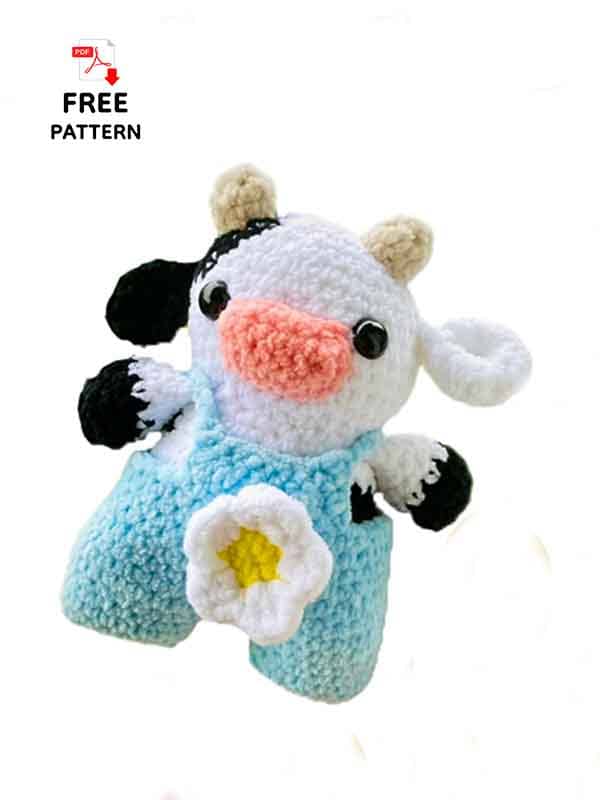
I am giving you today the amigurumi cow wearing overalls free pattern. Of course, I would like to thank the designer very much for this wonderful crochet cow pattern. This amigurumi cow comes with a daisy crocheted overalls. In the free pattern, you will learn in detail how to make an overalls to decorate your crochet cow. All parts of the amigurumi cow are made separately and then fixed together. Then you make an overalls to decorate your cow. It is also a nice idea to have the overalls separate from the cow. You can dress it up or display your amigurumi cow without overalls whenever you want.
Design by: mycrochetden
Amigurumi Cow Pattern
Materials and tools
Yarn- james C brett flutterby chunky in 1x white: B1, black: B30, light blue: B2, peachy pink: B43 and a small amount of beige: B28.
1x utopia crafts velvet lux yarn in sun yellow.
Hook size – 5 mm.
Scissors.
Stitch markers.
Yarn needle.
Safety eyes – size 12 mm. Please note that plushies with safety eyes should not be given to children under 3 yrs of age.
Abbreviations:
MR- Magic ring
Sc- Single crochet
Inc- Increase
Dec- Decrease
FLO- Front loop only
Slst- Slip stitch
FO- Fasten off
The finished product measures around 7.5 inches tall.
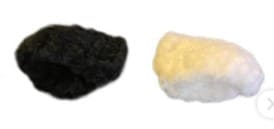
Ears X2
One in white: B1 and one in black:
B30.
R1. 6 sc in a MR (6)
R2. (inc)x6 (12)
R3-6. sc around (12)
Do not stuff. Fold and pinch the opening at the top closed. Do 3 sc across the top. We will crochet the ears on R8 of the head.
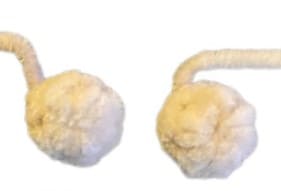
Horns X2
In beige: B28
R1. 6 sc in a MR (6)
R2-3. sc around (6)
Stuff lightly and sew on the top of the head between R12-15. Five stitches apart.
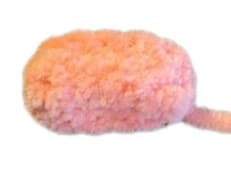
Muzzle
In peachy pink: B43
R1. Ch 6. In the second chain from the hook do 4 sc along. In the last chain do 3sc. This will help move us round to the underside of the chain. Now do 5 sc along the underside of the chain. (12)
R2. sc around (12)
Stuff and FO. Sew between the eyes on R3-7.
Tail
Starting in black: B30
R1. 3 sc in a MR (3)
R2. (inc)x3 (6)
R3-4. sc around (6)
Change to white: B1
R5-11. sc around (6)
Do not stuff. FO by doing 3sc across the top to close. We will crochet the tail on R6 of the body.
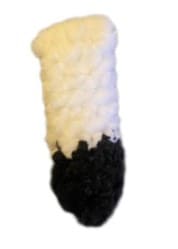
Arms X2
Starting in black: B30
R1. 6 sc in a MR (6)
R2. (inc)x6 (12)
R3-4. sc around (12)
Change to white: B1
R5-8. sc around (12)
Stuff and FO by doing 6 sc across the top to close. We will crochet the arms on R14 of the body.
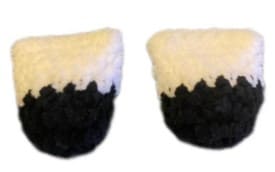
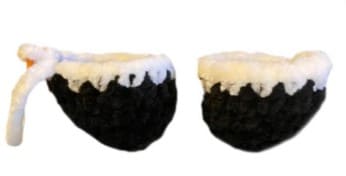
Legs X2
Starting in black: B30
R1. 6 sc in a MR (6)
R2. (inc)x6 (12)
R3-4. sc around (12)
Change to white: B1
R5. sc around (12)
On the first leg FO leaving a short tail to weave in.
When making the second leg, do not cut the yarn.
Instead, ch 3 and move onto the body section where we connect the legs together.
Body
Starting in white: B1
R1. After chaining 3 on the second leg, sc anywhere into the first leg. This counts as the first sc of the round. Then do 11 sc around the first leg and then 3sc into the chain we made. Then do 12 sc around the second leg and finally do 3 sc back into the chain to finish (30)
R2. (4sc,inc)x6 (36)
R3-5. sc around (36)
R6: On this round we will attach the tail and begin adding in some colour changes to create the patches on the cow. Start by doing 4SC, change to black and do 5SC, change back to white and do 7SC along, then 3SC through both the tail and the body (to attach the tail), and then 17SC along the rest of the body to finish (36)
R7: In white do 3SC along and then change to black and do 7SC. Then change back to white and do 26SC along the rest of the body. (36)
R8: In white do 3SC along and then change to black and do 6SC. Then change back to white and do 27SC along the rest of the body. (36)
R9: In white do 4SC along, then change to black and do 4SC along. Then change to white and do 14SC along and change back to black and do 5SC along. Finally change back to white again and do 9SC along to finish. (36)
R10: In white do 4SC along then change to black. DEC, 2SC (change to white) 2SC, DEC, 4SC, DEC, 4SC (change to black) DEC, 4SC, DEC (change to white) 4SC, DEC (30)
R11-12: In white 18SC (change to black) 7SC (change to white) 5SC (30)
R13: In white [3SC, DEC] x4, SC (change to black) 2SC, DEC (change to white) 3SC, DEC (24)
R14: On this round we will be attaching the arms. Do 5SC along and then do 6SC to attach the first arm to the body. Then do 6SC along the body and then 6SC to attach the second arm to the body. Do 1SC on the body to finish. (24)
Now we will be continuing on to make the head. Do not cut the yarn.
Head
Carrying on in White: B1
R1: FLO [3SC, INC] x6 (30)
R2: [4SC, INC] x6 (36)
R3-6: SC around (36)
Insert safety eyes between R6-7. Seven stitches apart.
R7: Do 28SC (change to black) and do 7SC, (change to white) 1SC (36) R8: On this round we will be attaching the ears to the head. In white do 11SC along the head. Then do 3SC to attach the white ear. Then do 13SC along the head. (Change to black) and do 3SC along the head and then 3SC to attach the black ear. Finally do 3SC along the rest of the head. On the last stitch change back to white. (36)
R9: 26SC, (change to black) 10SC (36)
R10: 1SC, (change to white) 24SC, (change to black) 11SC (36)
R11: 2SC (change to white) 2SC, DEC, [4SC, DEC] x3, 1SC, (change to black) 3SC, DEC, 4SC, DEC (30)
R12: 2SC, (change to white) 1SC, DEC, [3SC, DEC] x3, 1SC, (change to black) 2SC, DEC, 3SC, DEC (24)
R13: 2SC (change to white) DEC, [2SC, DEC] x3, 1SC, (change to black) 1SC, DEC, 2SC, DEC (18)
R14: 1SC, DEC (change to white) [1SC, DEC] x3, 1SC, (change to black) DEC, 1SC, DEC (12)
R15: DEC, (change to white) [DEC] x4, (change to black), DEC (6)
SLST and FO by using a yarn needle to thread the tail through the front loops of the remaining six stitches. Pull gently to close the hole.
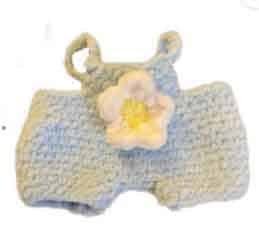
Dungarees
In Light Blue: B3
First we will make the trouser legs. CH18 and SC into the first chain to create a loop. This counts as the first SC of the round. Continue along the loop doing 17SC (1SC into each stitch of the chain) till the end. (18) R2: SC around (18)
FO the first trouser leg and put it to one side. When making the second trouser leg, do not cut the yarn, instead CH3. We will now connect both trouser legs together.
R3: After chaining 3, SC anywhere into the first trouser leg. This counts as the first SC of the round. Then do 17SC around the first trouser leg and 3SC into the chain. Then do 18SC around the second trouser leg and finally 3SC into the chain again to finish. (42)
R4: [6SC, INC] x6 (48)
R5-8: SC around (48)
R9: [6SC, DEC] x6 (42)
R10: [5SC, DEC] x6 (36)
R11: CH3, skip 3 stitches, then do 33SC along the rest of the dungarees. This creates a little gap for the tail to poke through. (36) R12: SC around (36)
SLST and FO leaving a short tail to weave in.
Now to make the bib…
R1: CH10 and do 9SC along the chain to the end. CH1 and turn. (9)
R2: Do 9SC along the chain. CH1 and turn. (9)
Now to attach the bib to the trousers. You can either sew the bib to the front or instead of cutting the yarn, single crochet the bib onto the front of the trousers.
To make the straps, grab another piece of Light Blue: B3 yarn, make a slipknot and SLST into the top left corner of the bib and CH15. Place the strap over the shoulder and SLST into the back (middle) of the dungaree trousers. Then CH15 again, going back over the other shoulder and SLST into the top right corner of the bib.
FO and weave in the tail to finish.
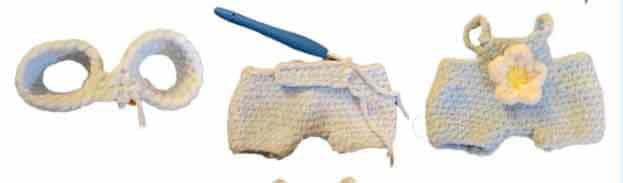
Daisy detail for dungarees
Starting in Utopia Crafts Velvet Lux yarn in Sun Yellow.
R1: 5SC in a MR (6)
R2: 1SC, (change to white) do 3DC into the same stitch, then SLST into the next stitch followed by 3DC into the same stitch. Do (SLST and 3DC) the rest of the way around. Once at the end of the round, do a SLST into the first petal.
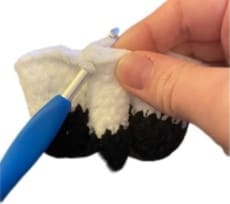
Cut the yarn and weave in the tail. Use the yellow yarn to sew through the middle of the daisy onto the dungarees, securing it into place.
Leave a Comment