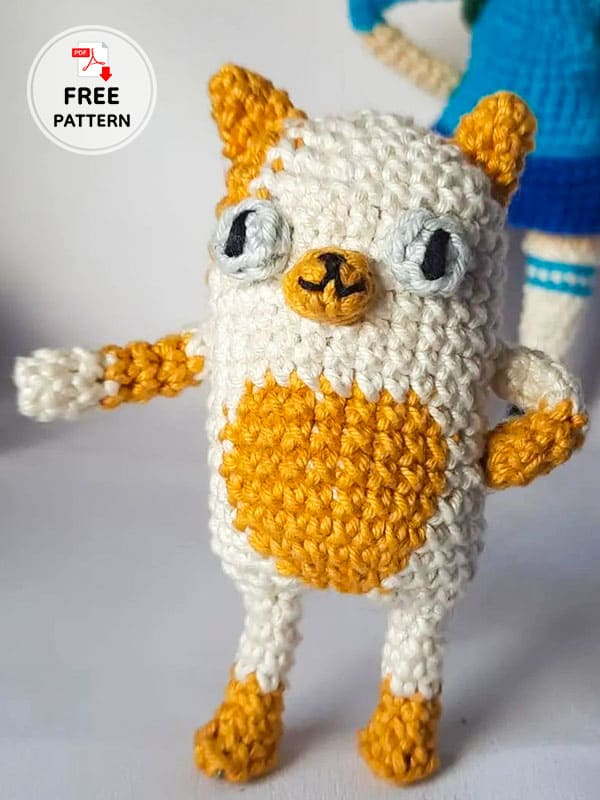
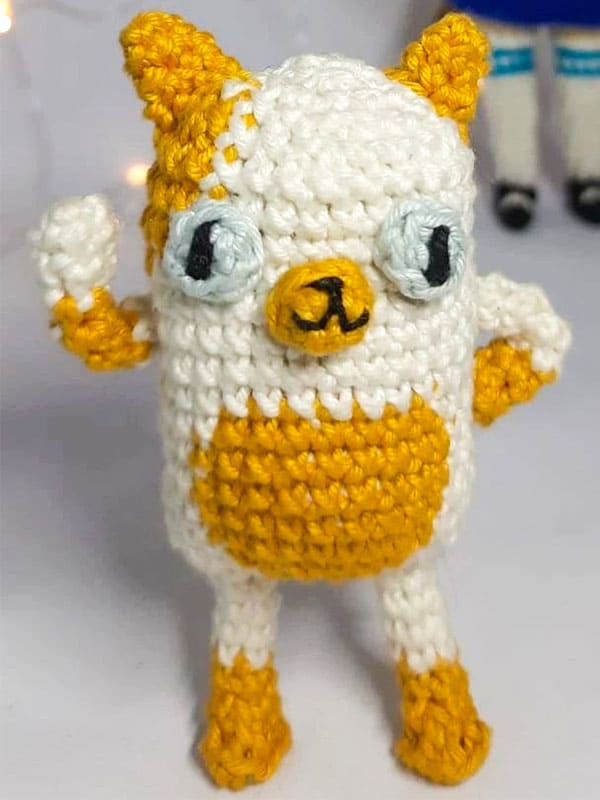
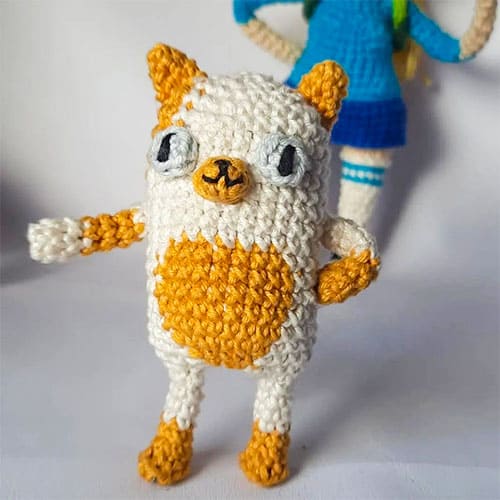
I think there is no child who does not like Adventure Time. Today, I am sharing the crochet cat cake character with you for free. Follow the step-by-step free crochet cat pattern instruction and complete this cute hero. Cake is the genre-bending version of Jake. Just like Jake, he can shape his body into any shape he wishes because he has flexible powers. Since he is a cat, he has the ability to see in the dark at night. You can create this cute cartoon character yourself at home. Complete your wonderful, fun and safe amigurumi toy for children right now. I will also add detailed section pictures for you so that you can easily follow step by step. Now I invite you to the crochet cat pattern.
Adventure Time Cake The Crochet Cat Amigurumi Free Pattern
Designer: crochewithcat
Abbreviations
st: stitch
MR: magic ring
sc: single crochet
inc: increase
inc-T: triple increase (3 sc in the same st)
dec: decrease
dec-T: triple decrease (decrease over 3 sts)
slst: slip stitch
BLO: back loop only
ch: chain
Rnd: round
Materials and tools
• Yarn colors: off-white, mustard, light blue, and black.
• Crochet hook: 2.0 mm
• Tapestry needle and scissors.
• Stitch marker.
• Polyester fiberfill for stuffing.
• 30 cm of 1.2 mm wire (optional).
• Glue, felt for eyes, and embroidery thread (optional).
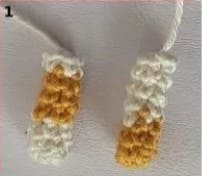
Arms X 2
1st arm: Start with the color mustard.
Rnd 1. 5 sc in magic ring (5)
Rnd 2-3. 5 sc (5) 2 rounds.
Change to off-white color.
Rnd 4-7. 5 sc (5) 4 rounds.
Cut the yarn and fasten off.
2nd arm: Start with the color off-white.
Rnd 1. 5 sc in MR (5)
Rnd 2-3. 5 sc (5) 2 rounds.
Change to mustard color.
Rnd 4-6. 5 sc (5) 3 rounds.
Change to off-white color.
Rnd 7. 5 sc (5)
Cut the yarn and fasten off.
Legs X 2
Mustard color.
Ch 4, starting from the second chain.
Rnd 1. 2 sc, 1 incT in the last st, working on the other side of the chain: 2 sc (7) (photo 2)
Rnd 2. BLO: 7 sc (7)
Rnd 3. 2sc, 1decT, 2 sc (5)
Rnd 4. 5 sc (5) (photo 3)
Change to off-white color.
Rnd 5-8. 5 sc (5) 4 rounds.
Cut the yarn and finish the 1st leg (photo 4).

Do not cut the yarn of the 2nd leg continue as follows:
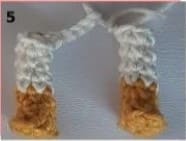
1 slip stitch, 4 chains, position the legs in the correct position and join with 1 slip stitch (photo 5).
Make rnd 9 by skipping the slst of the leg joinnings made previously.
Rnd 9. (1sc,1inc)x2 on the 1st leg, 4 sc in the chains, (1sc,1inc)x2 on the 2nd leg, 4 sc on the other side of the chains (20)
Add the rnd marker to the first sc made in rnd 9, at the back of the body.
Body
To create the body, we will change colors (carry the yarn) and for that, I’ll indicate the corresponding color name before each change.
Rnd 10. off-white (2sc,1inc)x2, 1sc, mustard 2 inc, off-white (2sc,1inc)x3, 2 sc (27)
Rnd 11. off-white 9 sc, mustard (1sc,1inc)x2, off-white 14 sc (29=
Rnd 12. off-white 9 sc, mustard (1sc,1inc)x3, off-white 14 sc (32)
Rnd 13. off-white 9 sc, mustard 9 sc, off-white, 11 sc, mustard 3 sc (32)
Rnd 14. off-white 9 sc, mustard 9 sc, off-white, 10 sc, mustard 4 sc (32)
Rnd 15. mustard 1 sc, off-white, 8 sc, mustard, 9 sc, off-white, 11 sc, mustard 3 sc (32)
Rnd 16. off-white, 9 sc, mustard, 9 sc, off-white, 14 sc (32)
Rnd 17. off-white, 10 sc, mustard, 7 sc, off-white, 15 sc (32)
Cut a 20 cm wire and bend the ends. Insert it into the legs (photo 8-9). Stuff the body.


Position the arms (photo 10) and attach them in Rnd 18.
Continue with the off-white color.
Rnd 18. 5 sc, make 1 slst between the sts of rnd 17 and the 1st arm, then make 4 sc on the 1st arm, 15 sc, join the 2nd arm with 1 slst and make 4 sc on the 2nd arm, 10 sc (38)
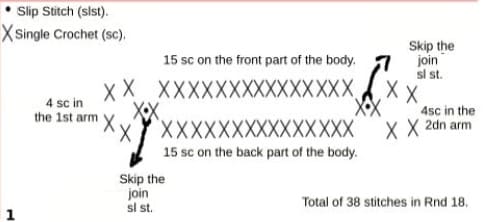
Make rnd 19 skipping the joining slip stitches from the arms, made previously in round 18.
Rnd 19. 5 sc, 2 dec in the 1st arm, 15 sc, 2 dec, in the 2nd arm, 10 sc (34)
Rnd 20. 5 sc, 1 dec, 15 sc, 1 dec, 10 sc (32)
Rnd 21. 5 sc, 1 dec, 14 sc, 1 dec, 9 sc (30)
Rnd 22. 19 sc, mustard, 3 sc, off-white 8 sc (30)
Rnd 23. 18 sc, mustard, 5 sc, off-white, 7 sc (30)
Rnd 24-25. 17 sc, mustard, 7 sc, off-white, 6 sc (30) 2 rounds
Rnd 26. (3sc,1dec)x3, mustard 2 sc, 1 sc, 1 dec, 3 sc, off-white, 1 dec, 3 sc, 1 dec (24)
Rnd 27. (2sc,1dec)x4, mustard,2 sc, off-white, 1 dec, 2 sc, 1dec (18)
Continue with off-white color. Stuff the head.
Rnd 28. (1sc,1dec)x6 (12)
Rnd 29. 6 dec (6)
Close with an inverted magic ring.
Cut the yarn and fasten off.

Continue with the off-white color.
Rnd 18-20. 32 sc (32) 3 rounds.
Rnd 21. 19 sc, mustard, 3sc, off-white, 8 sc (30)
Rnd 23. 18 sc, mustard, 5 sc, off-white, 7 sc (30)
Rnd 24-25. 17 sc, mustard, 7 sc, off-white, 6 sc (30) 2 rounds.
Rnd 26. (3sc,1dec)x3, mustard, 2 sc, 1 sc, 1dec, 3 sc, off-white, 1 dec (24)
Rnd 27. (2sc,1dec)x4, mustard, 2 sc, 1 dec, 2 sc, off-white, 1dec (18)
Continue with the off-white color. Stuff the head.
Rnd 28. (1sc,1dec)x6 (12)
Rnd 29. 6 dec (6)
Close with and inverted magic ring.
Cut the yarn and fasten off.

Sew the arms between rounds 19 and 20 of the body.
Insert wire.
Muzzle
Mustard color.
Make 3 chains, start from the second chain.
Rnd 1. 1 sc, 1 incT in the last st, working on the other side of the chain: 1 inc (6)
Rnd 2. 6 slst (6)
Cut, leaving a tail for sewing.
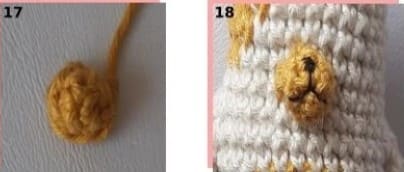
Sew or glue the muzzle between rounds 20 and 23 of the body, centered on the front.
Using the sewing thread, embroider the muzzle. (photo 18).
Ears X 2
Mustard color.
Rnd 1. 4 sc in a MR (4)
Rnd 2. 1 inc, 3 sc (5)
Rnd 3. 1 inc, 4 sc (6)
Cut the yarn, leaving a tail for sewing.
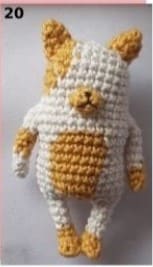
Sew or glue the between rnd 25-27, with 4 stitches of separation between each ear.
Eyes X 2
Light blue.
Rnd 1. 6 sc in magic ring (6)
Cut and fasten off, leaving a tail for sewing.
Sew or glue the eyes in the center of the head, between the muzzle. Embroider the pupils with sewing thread.
You can make the eyes with 2 circles of felt (photo 24).

Tail
Color mustard.
Rnd 1. 4 sc in magic ring (4)
Rnd 2. (1sc,1inc)x2 (6)
Rnd 3. 3sc, 1inc, 2 sc (7)
Rnd 4. 1sc, 1 inc, 5 sc (8)
Rnd 5. 8 sc (8)
Change to off-white color.
Rnd 6. 8 sc (8)
Rnd 7. 2 sc, 2 dec, 2 sc (6)
Rnd 8. 3 sc, 1 inc, 2 sc (7)
Rnd 9. 4 sc, 1 dec, 1 sc (6)
Rnd 10. 6 sc (6)
Cut the yarn leaving a tail for sewing.
Do not stuff the tail.
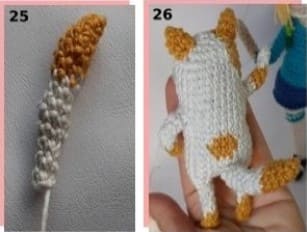
Sew or glue it to back, below the mark.
Insert wire if you prefer (photo 26).


Leave a Comment