

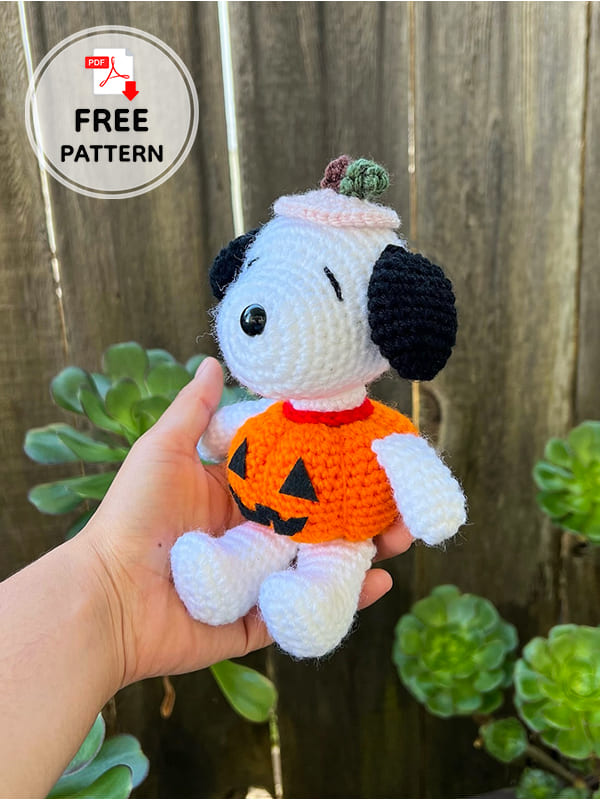
A special pumpkin body snoopy crochet pattern for Halloween is with you. I realized I haven’t shared the crochet pattern snoopy amigurumi before. Here is the free snoopy crochet pattern special for the weekend today. You can easily make this snoopy amigurumi toy with step by step detailed photos. I can say that it is the favorite cartoon character amigurumi toy of children. Follow this free snoopy crochet pattern below right now and complete the toy. Since you can make it in two different sizes, the measurements and material list are separate. I recommend you to take that into consideration. You can make a large snoopy or a small one using acrylic yarn. Or two!
Design by: cortescrochets
Snoopy crochet pattern
Materials
Yarn: black, red, white, orange, green, brown.
Hook:
Sewing needle
Stuffing
Safety eyes (for the nose)
Black felt
Hot glue (optional)
What I specifically use for the acrylic version (smaller snoopy):
• 12 mm safety eye (nose)
• 3.5 mm hook
• 4 medium acrylic yarn (red heart super saver)
What I specifically use for the chunky version (bigger snoopy):
• 16 mm safety eye (nose)
• 5.0 mm hook
• 6 chunky yarn (loops & threads, bernat blanket)
Abbreviations
mr- magic ring
sc- single crochet
dec- decrease
inc- increase
BLO- back loop only
st- stitch
FO- fasten off
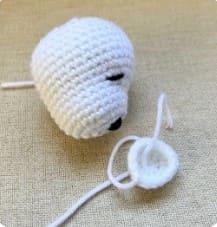
Head
With white:
1. mr 8 sc
2. inc x8 (16)
3. (1sc,inc)x8 (24)
4-6. 24 sc around *3 rows*
7. 9sc, (inc)x6, 9 sc (30)
8. 9sc, (1sc,inc)x6, 9 sc (36)
9-16. 36 sc around *7 rows*
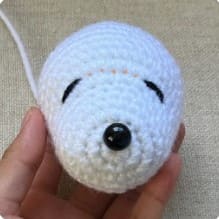
Insert safety eye aka nose.
Between nose 1&2 try to center it theres no even count so which ever stitch looks even works.
17. (1sc,dec)x12 (24)
Start stuffing.
18. (1sc,dec)x8 (16)
19. (2sc,dec)x4 (12)
Finish stuffing.
19. dec x6 (6)
FO, sew hole shut.
Embroider eyes between rows 7 & 8 5 stitches apart 2-3 stitches wide.
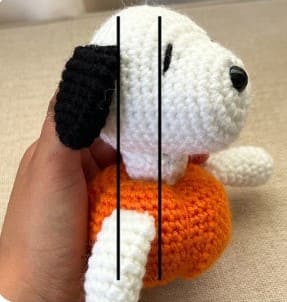
Neck
With white:
1. mr 8 sc
2. inc x8 (16)
3. 16 sc in BLO
4. 16 sc
FO.
Leave a tail to sew with.
Sew neck onto head between rows 9 & 15 stuff while sewing on (make sure its centered).
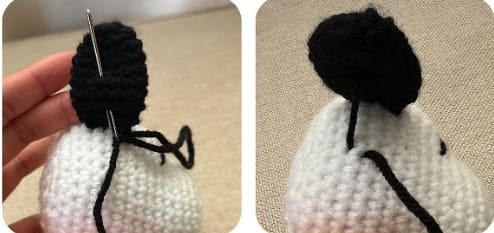
Ears
With black make 2:
1. mr 8 sc
2. (1sc,inc)x8 (12)
3-8. 12 sc *6 rows*
9. (1sc,dec)x8 (8)
Don’t stuff.
Fold in half, 4 sc through both sides, leave tail to sew with FO.
Sew ears above the nose between rows 11 & 15 (don’t hide ends yet).
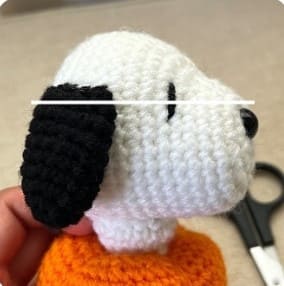
Then, insert yarn through the middle of the ear then through the head where the ear would naturally lay.
Pull the yarn and repeat the streps until the ear is held against the head.
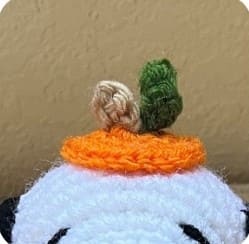
Hat
With orange:
1. mr 8 sc
2. inc x8 (16)
3. (1sc,inc)x8 (24)
FO.
Leave tail to sew with or not (you can glue hat on, which I did).

Pull ends of the stem through the middle of the hat (2 different stitches) tie a knot to secure.
Pull ends of the vine through the hat, right next to the stem, tie a knot to secure.
Stem (brown)
1. ch 3
2. 1 sc in ch next to hook
3. 1 sc in last st
FO.
Vine (green)
1. ch 5
2. inc in the ch next to hook
3. inc x3
FO.
Add hat once stem and vine are attached.
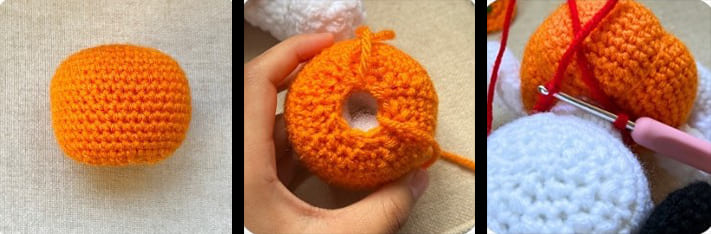
Body
With orange:
1. mr 8 sc
2. inc x8 (16)
3. (1sc,inc)x8 (24)
4. (2sc,inc)x8 (32)
5. (3sc,inc)x8 (40)
6-15. 40 sc around * 10 rows*
16. (3sc,dec)x8 (32)
17. (2sc,dec)x8 (24)
Begin stuffing.
When stuffing, leave the middle a little empty, so it’s easier to create the dents.
18. (1sc,dec)x8 (16)
19. dec x8
Finish stuffing.
Leave a tail to sew with fasten off.
Sew head onto pupmkin, right in the middle using the back loop of the neck.
Add collar (use red) ch 16
ss to first ch once you have wrapped around neck.
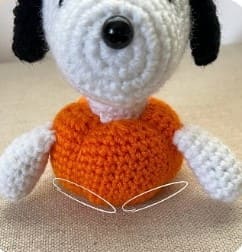
Arms (make 2)
With white.
1. mr 9 sc
2-8. 9 sc *7 rows*
Stuff.
Fold in half, 4 sc through both sides, leave tail to sew with fasten off.
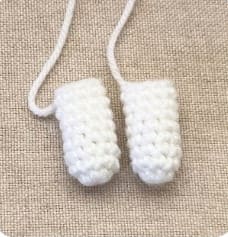
Sew arms onto pupmkin between rows 13 & 14 aligned with the space between the eye and ear.
Legs (make 2)
With white.
1. Ch 6
2. In 2nd ch from hook, inc, 3 sc, 3 sc in last ch, 4 sc (12)
3. In x 2, 3 sc, inc x3, 3 sc, inc (18)
4. 18 sc (18)
5. 8 sc, dec x3, 4 sc (15)
6. 6 sc, dec x3, 3 sc (12)
7-12. 12 sc (12)
Stuff.
Leave a tail to sew with fasten off.
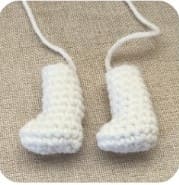
Sew legs between rows 3 & 4 (counting bottom up).
Should be centered.
Felt cutouts
Here are the cut outs that I used.
You can use this or make your own face.
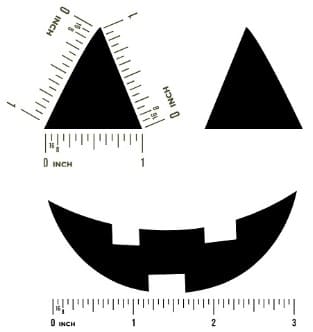
Measurements for smaller snoopy:
05 x 05 x 05 inches for eyes.
2 inches wide for mouth.
Measurements for bigger snoopy:
1 x 1 x 1 inches for eyes
3 inches wide for mouth.
Leave a Comment